On March 8, 2026, British Columbia moved their clocks to a year-round Pacific Daylight Savings Time. In March, they did the spring forward one hour with their clocks to
UTC-7, but they won’t fall back to UTC-8 in November. Going forward, the UTC offset for America/Vancouver timezone is permanently UTC-7.
Let’s use this as an opportunity to talk about date and time zone storage. In the most basic examples, the default is to store the UTC value, then calculate local time relative to
UTC. However, people using calendar systems think in terms of local time (i.e. wall clock time), and never consider UTC. After modifying time zone data, these time calculations from
UTC for a region will differ from the user’s input value.
If you stored timestamps in a UTC-based column for British Columbia-based appointment in 2026 and beyond, your November through March appointments may be off by an
hour!
…
A fascinating read into a problem that I knew existed… and fear!
This is the kind of thing that keeps me up at night every time I expand on Three Rings‘ timezone support. Right
now, Three Rings stores the times of “shifts” (when volunteers do things) as UTC timestamps but treats them as “local time” to the voluntary organisation
using them. If they say a shift starts at 8pm, that’s probably what they mean: they mean 8pm local time, no matter where they happen to be in the world and whether or not their region
uses daylight saving time.
But this approach, while simple, has limitations:
Three Rings doesn’t correctly respect shift duration variance as a result of daylight saving time clock changes. Suppose a Samaritans branch has a four-hour
shift starting at midnight on Saturday night/Sunday morning. Twice a year, that shift will intersect with the clocks going forwards or backwards. Is it still a “four hour” shift? Well
that depends: does the volunteer stay for four hours regardless of the clock change, or do they always go home at 4am? Three Rings assumes the former
because it’s mathematically simpler, but in reality the latter is probably true (and the volunteer actually worked three or five hours).
Three Rings isn’t suited to organisations that span multiple timezones. When an Australian charity started using Three Rings they were
interested in getting an overview of how many of their helplines – which are spread across three to four timezones (depending on whether daylight saving is in effect: half of
central Australia observes daylight savings and half doesn’t!) – are open at any given time. Three Rings currently isn’t designed in a way to make it easy to answer that
question.
Three Rings makes some suboptimal choices if you’re a long way from the Prime Meridian. This one’s easier to fix, and we probably will,
but if you’re far from the UK and especially if you’re West of the UK then our scheduled tasks to e.g. “lock” shifts that appear to have “started” and prevent their easy modification…
triggers at the wrong time.
Items 1 and 2 on that list are hard problems to solve, especially starting from where we are with our vast corpus of 24 years worth of “assumed local” time data. We’re
improving on this kind of thing by increments, but it takes a while…
…and then, just sometimes, some country decides to fiddle with its timezone or its observance of daylight saving time and makes programmers’ lives hell.
Still; I’ll be referring to this blog post by Christopher Winslett the next time I’m working on a big set of timezone-related enhancements for Three Rings, for sure!
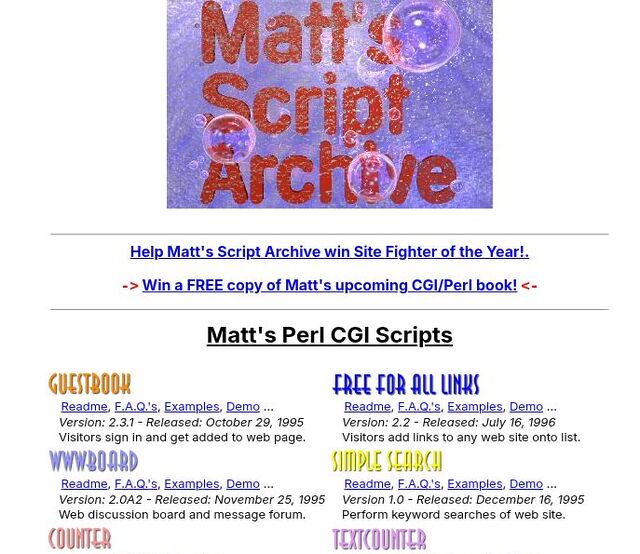
Around 1995 or so, a high schooler named Matt Wright decided to launch a website that shared some basic website tools that he
programmed. Many of these were dead-simple, things like contact forms, guestbooks, and web counters.
…
OMG I remember Matt’s Script Archive. I taught myself Perl with (among other things) his scripts.
I took his Counter/ImageCounter script and adapted it into my own FireCounter, which stitched together (non-animated) GIFs of digits (which I made using a filter in Corel Photo-Paint, I
think) into the kinds of edgy hit counter I was into, back in the day.
This is a recreation. It probably looks better than the original!
Later, I even added parameter handling to allow the webmaster to specify a different set of digit images, and referrer detection so that it could track different sites:
each got its own text file with its count in it! For a while, a dozen or so of my friends had my counter visible on their Geocities and Angelfire pages!
I’m sure that my script had many, if not more, of the kinds of security vulnerabilities discussed in the linked article. But man, it felt like magic at the time!
Working with an old codebase today, I moved a method from one file to another. CI was happy.
Then I realised the method didn’t have any automated tests, so I wrote one. It turns out its entire (new) file didn’t have any, so my change would improve test coverage. Nice.
But it didn’t. CI complained that test coverage had dropped. Wait, what? All I did was move some code and add a unit test.
Then I realised that the coverage analysis tool was only counting files that actually contained any tested code. By adding a test to part of a previously-untested file, that file became
part of the scored codebase. Uh-oh.
Looked deeper. Turns out the code coverage tool was also counting the test files themselves as being part of the code-under-test.
Fixed all of the above. Code coverage score dropped by about 40%. 😱
Now I’ve got more work to do.
Happy Friday. Check what your coverage tool is inspecting, folks.
A lot of the AI bubble – and that’s what it is, for all there are useful things inside there – is based on “Invest now, because when it works it’ll be fantastic!” rhetoric that’s
like investing in a mainframe company in the late 60s on the basis that smartphones will take over the world. We’re moving a lot faster than mainframes went to PCs, but it’s
important to invest in the things you can do with the system that work *now*.
There isn’t a good consumer use for AI right now. ChatGPT is a terrible source of information, confidently wrong in a way that sounds human enough to cause delusion and psychosis.
Things that AI/LLM tech is good for right now – pattern matching, repetitive tasks, logic flow – have some great business cases (It’s made some amazing breakthroughs in satellite
and medical imagery, it’s got a bright future in automated transcription), and I think there’s a good case for it in content moderation (Yeah, it’s not great at it, but given the
sick shit content mods on Facebook have had to deal with has
given them cPTSD, I strongly believe it should be a machine job). It’s use for writing, music, translation, or art is still at the very least questionable and at the most
utterly immoral.
…
Well-said, Aquarion!
The current generation of Generative AI isn’t useless. But its uses are quite specific and it certainly does
more-harm-than-good that it’s promoted as an “everything” solution to every problem. I’ve used some form of agentic coding for several years, mostly of the “spicy autocomplete”
variety1,
and I mostly agree with Aquarion’s observations.
The whole post is an enjoyable tale.
Footnotes
1 My experiments with “vibe coding” have shown me that AI working alone can produce
usually-functional code to specification, but that code is often of low quality and rarely maintainable, even by the AI.
Rubberdogging, verb: attempting to invent a solution to a technical problem by explaining it out loud to a pet. From “rubberducking”, the practice of doing so
to an inanimate object, and “dog walking”.
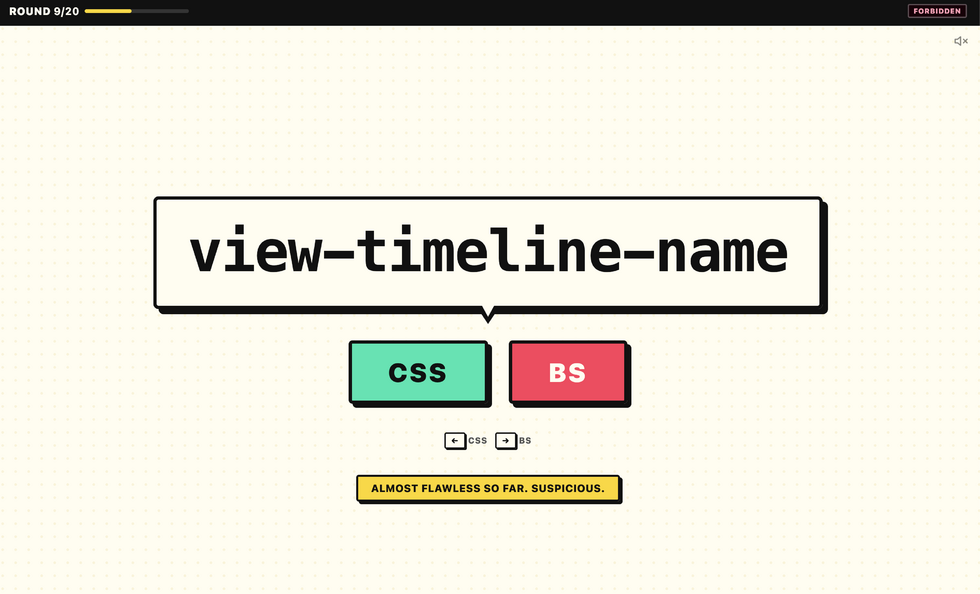
Well this is a fun (and frustrating!) game. You’ll be presented with 20 (alleged) CSS properties, but some of them… are convincing-looking fakes! You’ve got 10 seconds to identify
whether each is real or not. Every few you get right increases the difficulty level, but also the score potential. How high can you score?
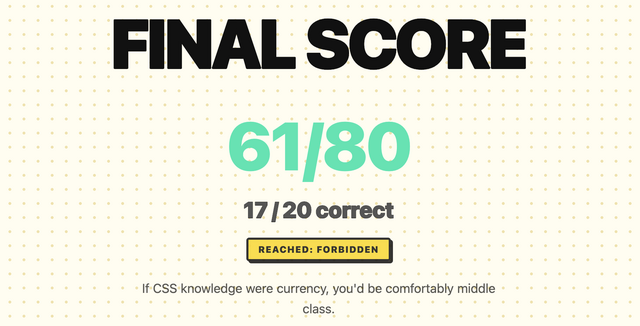
Me? Oh, I kept getting up into the “forbidden” level and then my brain would melt and I’d crash out. Quite proud of my last run, though:
I potentially saved my client a bunch of money and embarrassment with that 3-line change.
Now, I consider that a productive day.
But had I been measured on my contribution by lines of code, or commits, or features finished, it would have been seen as a very unproductive day by my manager.
…
A great anecdote and some wise words from Jason Gorman on the nature of productivity and code.
This matches my feeling on AI. It’s good at making lots of code. Sometimes it even writes the right code. But something it rarely demonstrates skill at is
comprehending the bigger issue. I’m sure we’re already seeing developers who “game” their employers’ productivity metrics, to the detriment of the end users, by having AI
make “more” code without having to engage their brain and actually understand the problem.
(And, of course, there are employers who, whether intentionally or not, promote this kind of behaviour through their policies and success metrics.)
Folks at work have been encouraging to make more use of generative AI in my workflow1;
going beyond my current “fancy autocomplete” use and giving my agents more autonomy. My experience of such “vibe coding” so far has been… mixed2,
but I promised I’d revisit it.
One thing that these models are usually effective at is summarisation3. This is valuable if you’re faced with a large and unfamiliar
codebase and you’re looking to trace a particular thing but you’re not certain where it is or what it’ll be called. While they’re not always fast, these tools can
at least work in the background, which allows the developer to get on with something else while the agent trawls logs, code, and configuration to find and explain a
fuzzily-defined thing.
Recently, I had a moment which I thought might be such an instance… but it didn’t turn out quite the way I expected. Here’s the story4:
The broken dev env
I’d been drafted into an established and ongoing project to provide more hands, following a coworker’s departure last week. This project touches parts of our (sprawling,
microsevices-based) infrastructure that I hadn’t looked at before, so there was a lot I didn’t yet know.
I picked an issue that had belonged to my former colleague that QA had rejected and set out to retrace their steps: to replicate the problem that the QA engineers had identified and in
doing so learn more about the underlying process. I spun up my development environment and tried to follow the steps.
The process failed… but much earlier than QA had said it would. Clearly my development environment was at fault, or at least not representative of their setup.
But I couldn’t even get as far as their problem before my frontend barfed out an error message. Sigh! Probably there’s some configuration I’ve missed somewhere in the myriad
microservices, or else the data I’m testing with isn’t a fair reflection on what they’re doing as-standard.
Following some staff changes, I have no teammates on this side of the Atlantic who could help me decipher this: a “quick question on Slack” wouldn’t solve this one until hours
from now. It was time to start debugging!
But… maybe Claude could help? It’s got access to almost all the same code, logs, tools and browser windows I do. I started typing:
✨ What’s up next, Dan?
In my development environment for https://service.dev/asset/new, when I click “Save”, I see the error “Oops, something went wrong.”
Why?
Context is key
It’s quite possible that Claude would have gone away, had a “think”, done some tests, and then come back to me with a believable answer. It might even have been correct, and I’d have
been able to short-cut my way back to productivity (and I’d have time to make a mug of coffee and finish reading my emails while it did so). Then, I’d just have to check that it was
right, make the change, and get on with things.
But I realised that it’d probably work faster (and cheaper, and using less energy) if it had slightly more context from the get-go, so I elaborated. The first thing I’d
want to know if I were debugging this is what was actually happening behind the scenes. I dipped into my browser’s Network debugger and extracted the relevant output, adding it to my
prompt:
✨ What’s up next, Dan?
In my development environment for https://service.dev/asset/new, when I click “Save”, I see
the error “Oops, something went wrong.” Why?The payload POSTed to the server is { content: 'test1', audience: [ 'one' ], status: 'draft' } and
the response is a HTTP 500 with the following stack trace: pasted 94 lines
That’s more like it, now I could let it get on with its work. But wait…
Rubberducking
There’s a concept in computer programming called “rubberducking”. The name comes from an anecdote in The Pragmatic Programmer about a developer who, when stuck on a problem, would
explain the code line-by-line to a rubber duck. The thinking is that talking-through a problem, even to someone (or something) who doesn’t understand it, can lead the speaker to
insights they were otherwise missing.
I’ve done it myself many, many times: recruiting a convenient colleague or friend and talking them through the technical problem I was faced with, and inviting them to ask me to go
into greater detail if I seemed to be skimming over anything, and I can promise that it can work.
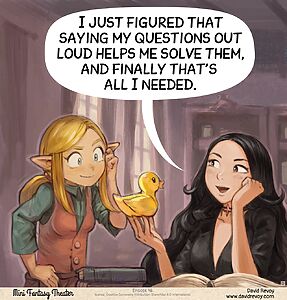
The panel above is part of a series in which a sorceress called Cepper who’s
coerced by her university into using Avian Intelligence (“AI”) – a robotic parrot5 that her headmaster insists is the future of magic. She experiments with it, finds it
occasionally useful but more-often frustrating, attempts to implement her own local version but find that troublesome in different ways, and eventually settles on using
an inanimate rubber duck instead. I get it, Cepper!
Let’s put that distraction aside for a moment and get back to the story of my broken development environment.
Clues in the stack trace
The top entry in the stack trace was an unsuccessful call to a different microservice, so I figured I’d pull its logs too, in order to further help direct
the AI in the right direction6:
✨ What’s up next, Dan?
In my development environment for https://service.dev/asset/new, when I click “Save”, I see
the error “Oops, something went wrong.” Why?The payload POSTed to the server is { content: 'test1',
audience: [ 'one' ], status: 'draft' } and the response is a HTTP 500 with the following stack trace: pasted 94 linesThe stack
trace suggests that a call is being made to the dojo backend service, where the following error log looks relevant: pasted 9
lines
I haven’t tried it, but I’m pretty confident that the LLM, after much number-crunching and a little warming-up of some datacentre somewhere, would get to the answer. But again, I found
something niggling inside me: the second-from top line in the dojo logs suggested that a connection was being made to a further, deeper microservice.
I should pull its logs too, I figured.
The final puzzle piece
As an aide mémoire – in a way I’ve taken to doing when taking notes or when talking to AI – I first typed what I was going to provide. This is
useful if, for example, somebody distracts me at a key moment: it means you’ve got a jumping-off point predefined by my past self:
✨ What’s up next, Dan?
In my development environment for https://service.dev/asset/new, when I click “Save”, I see
the error “Oops, something went wrong.” Why?The payload POSTed to the server is { content: 'test1',
audience: [ 'one' ], status: 'draft' } and the response is a HTTP 500 with the following stack trace: pasted 94 linesThe stack
trace suggests that a call is being made to the dojo backend service, where the following error log looks relevant: pasted 9
lines. It’s calling osiris, which says:
I dipped into the directory for
osiris, and before I even got to the logs I spotted a problem: that microservice was on an old feature branch. How odd! I switched to the main branch and… everything
started working.
The entire event took only a few minutes. I’d find some information, type it into Claude’s input field, realise that more information could be valuable, and repeat.
By the time I’d finished describing the problem, I’d discovered the solution. That’s the essence of successful rubberducking. I didn’t need the AI at all.
All I needed was the illusion of something that might be able to help if I just talked through what I was thinking.
I don’t know what the moral is, here.
I wonder if I’d have been as effective had I just typed into my text editor. I suppose I would have, but I wonder if I’d have been motivated to do so in the first place? I’ve tried
rubberducking before by talking to an imaginary person, but I’ve never tried typing to one7; maybe I should start?
Footnotes
1 I’m pretty sure every engineering department nowadays has it’s rabid fanboys, but I’m
pleased that for the most part my colleagues take a more-pragmatic and realistic outlook: balancing the potential benefits of LLM-assisted coding with its many shortfalls,
downsides, and risks.
3 So long as what you’ve got them summarising is something you can later verify!
4 I’ve taken huge liberties with the strict factual accuracy to make this more-readable as
well as to to not-expose things I probably oughtn’t. So before you swoop in to criticise my prompt-fu (not that I asked you, but I know there’s somebody out there who’s thinking about
doing this right now), please note that none of the text in this page are what I actually wrote to the AI; it’s a figurative example.
6 I’d had an experience just the previous week in which it’d gone off on completely the
wrong track, attempting to change code in order to “fix” what was ultimately a configuration or data problem, and so I thought it might be useful to give it some rails to follow, to
start with.
7 Except insofar as this AI agent is an “imaginary person”, which it possibly already a
step-too-far in implying personhood for my liking!
On Friday, I said goodbye to a colleague as she left us after most of a decade with the company. Then this morning, all hell broke loose on some production servers.
It turns out that the API key that connected our application to our feature flag management platform was associated with her account, and hadn’t shown up in the exit audit.
Let this be your reminder to go check where, if anywhere, your applications are using person-specific keys where they should be using generic ones!
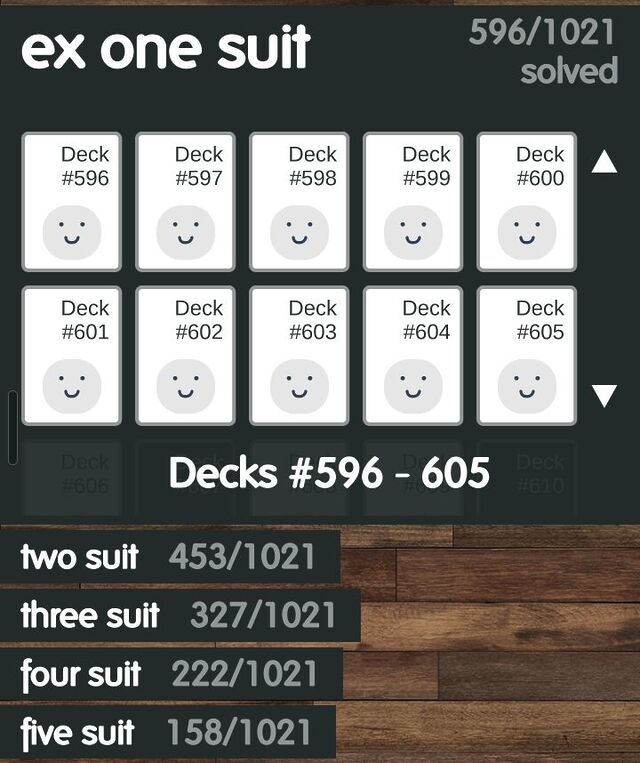
With its few-columns and large hit-areas, the game’s well-optimised for mobile play.
The premise is simple enough:
5-column solitaire game with 1-5 suits.
23 cards dealt out into those columns; only the topmost ones face-up.
2 “reserve” cards retained at the bottom.
Stacks can be formed atop any suit based on value-adjacency (in either order, even mixing the ordering within a stack)
Individual cards can always be moved, but stacks can only be moved if they share a value-adjacency chain and are all the same suit.
Aim is to get each suit stacked in order at the top.
Well this looks like a suboptimal position…
One of the things that stands out to me is that the game comes with over five thousand pre-shuffled decks to play, all of which guarantee that they are “winnable”.
Playing through these is very satisfying because it means that if you get stuck, you know that it’s because of a choice that you made2,
and not (just) because you get unlucky with the deal.
After giving us 5,105 pregenerated ‘decks’, author Zach Gage probably thinks we’ll never run out of playable games. Some day, I might prove him wrong.
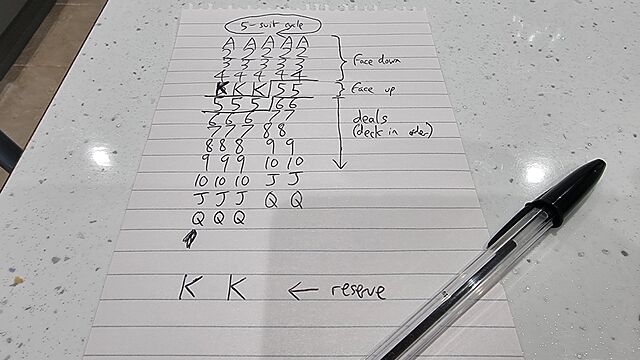
Every deck is “winnable”?
When I first heard that every one of FlipFlop‘s pregenerated decks were winnable, I misinterpreted it as claiming that every conceivable shuffle for a game
of FlipFlop was winnable. But that’s clearly not the case, and it doesn’t take significant effort to come up with a deal that’s clearly not-winnable. It only takes a
single example to disprove a statement!
If you think you’ve found a solution to this deal – for example, by (necessarily) dealing out all of the cards, then putting both reserve kings out and stacking everything else on top
of them in order to dig down to the useful cards, bear in mind that (a) the maximum stack depth of 20 means you can get to a 6, or a 5, but not both, and (b) you can’t then move any
of those stacks in aggregate because – although it’s not clear in my monochrome sketch – the suits cycle in a pattern to disrupt such efforts.
That it’s possible for a fairly-shuffled deck of cards to lead to an “unwinnable” game of FlipFlop Solitaire means the author must have necessarily had some
mechanism to differentiate between “winnable” (which are probably the majority) and “unwinnable” ones. And therein lies an interesting problem.
If the only way to conclusively prove that a particular deal is “winnable” is to win it, then the developer must have had an algorithm that they were using to test that a given
deal was “winnable”: that is – a brute-force solver.
So I had a go at making one3.
The code is pretty hacky (don’t judge me) and, well… it takes a long, long time.
This isn’t an animation, but it might as well be! By the time you’ve permuted all possible states of the first ten moves of this starting game, you’re talking about having somewhere
in the region of three million possible states. Solving a game that needs a minimum of 80 moves takes… a while.
Partially that’s because the underlying state engine I used, BfsBruteForce, is a breadth-first optimising algorithm. It aims to
find the absolute fewest-moves solution, which isn’t necessarily the fastest one to find because it means that it has to try all of the “probably stupid” moves it
finds4
with the same priority as the the “probably smart” moves5.
If you pull off a genuinely random shuffle, then – statistically-speaking – you’ve probably managed to put that deck into an order that no deck of cards has never been in
before!6
And sure: the rules of the game reduce the number of possibilities quite considerably… but there’s still a lot of them.
So how are “guaranteed winnable” decks generated?
I think I’ve worked out the answer to this question: it came to me in a dream!
Show this puzzle to any smarter-than-average child and they’ll quickly realise that the fastest way to get the solution is not to start from each programmer and trace
their path… but to start from the laptop and work backwards!
The trick to generating “guaranteed winnable” decks for FlipFlop Solitaire (and, probably, any similar game) is to work backwards.
Instead of starting with a random deck and checking if it’s solvable by performing every permutation of valid moves… start with a “solved” deck (with all the cards stacked
up neatly) and perform a randomly-selected series of valid reverse-moves! E.g.:
The first move is obvious: take one of the kings off the “finished” piles and put it into a column.
For the next move, you’ll either take a different king and do the same thing, or take the queen that was exposed from under the first king and place it either in an empty
column or atop the first king (optionally, but probably not, flipping the king face down).
With each subsequent move, you determine what the valid next-reverse-moves are, choose one at random (possibly with some kind of weighting), and move on!
In computational complexity theory, you just transformed an NP-Hard problem7
into a P problem.
Once you eliminate repeat states and weight the randomiser to gently favour moving “towards” a solution that leaves the cards set-up and ready to begin the game, you’ve created a
problem that may take an indeterminate amount of time… but it’ll be finite and its complexity will scale linearly. And that’s a big improvement.
I started implementing a puzzle-creator that works in this manner, but the task wasn’t as interesting as the near-impossible brute-force solver so I gave up, got distracted,
and wrote some even more-pointless code instead.
If you go ahead and make an open source FlipFlop deck generator, let me know: I’d be interested to play with it!
Footnotes
1 I don’t get much time to play videogames, nowadays, but I sometimes find that I’ve got
time for a round or two of a simple “droppable” puzzle game while I’m waiting for a child to come out of school or similar. FlipFlop Solitaire is one of only three games I
have installed on my phone for this purpose, the other two – both much less frequently-played – being Battle of Polytopia and the
buggy-but-enjoyable digital version of Twilight Struggle.
2 Okay, it feels slightly frustrating when you make a series of choices that are
perfectly logical and the most-rational decision under the circumstances. But the game has an “undo” button, so it’s not that bad.
4 An example of a “probably stupid” move would be splitting a same-suit stack in order to
sit it atop a card of a different suit, when this doesn’t immediately expose any new moves. Sometimes – just sometimes – this is an optimal strategy, but normally it’s a pretty bad
idea.
5 Moving a card that can go into the completed stacks at the top is usually a good idea…
although just sometimes, and especially in complex mid-game multi-suit scenarios, it can be beneficial to keep a card in play so that you can use it as an anchor for something else,
thereby unblocking more flexible play down the line.
6 Fun fact: shuffling a deck of cards is a sufficient source of entropy that you can use
it to generate cryptographic keystreams, as Bruce Schneier demonstrated in 1999.
7 I’ve not thought deeply about it, but determining if a given deck of cards will result
in a winnable game probably lies somewhere between the travelling salesman and the halting problem, in terms of complexity, right? And probably not something a right-thinking person
would ask their desktop computer to do for fun!
Unlike Alice, who spent the year reading papers with a pencil in hand, scribbling notes in the margins, getting confused, re-reading, looking things up, and slowly assembling a
working understanding of her corner of the field, Bob has been using an AI agent. When his supervisor sent him a paper to read, Bob asked the agent to summarize it. When he needed
to understand a new statistical method, he asked the agent to explain it. When his Python code broke, the agent debugged it. When the agent’s fix introduced a new bug, it debugged
that too. When it came time to write the paper, the agent wrote it. Bob’s weekly updates to his supervisor were indistinguishable from Alice’s. The questions were similar. The
progress was similar. The trajectory, from the outside, was identical.
Here’s where it gets interesting. If you are an administrator, a funding body, a hiring committee, or a metrics-obsessed department head, Alice and Bob had the same year. One paper
each. One set of minor revisions each. One solid contribution to the literature each. By every quantitative measure that the modern academy uses to assess the worth of a scientist,
they are interchangeable. We have built an entire evaluation system around counting things that can be counted, and it turns out that what actually matters is the one thing that
can’t be.
…
The strange thing is that we already know this. We have always known this. Every physics textbook ever written comes with exercises at the end of each chapter, and every physics
professor who has ever stood in front of a lecture hall has said the same thing: you cannot learn physics by watching someone else do it. You have to pick up the pencil. You have to
attempt the problem. You have to get it wrong, sit with the wrongness, and figure out where your reasoning broke. Reading the solution manual and nodding along feels like
understanding. It is not understanding. Every student who has tried to coast through a problem set by reading the solutions and then bombed the exam knows this in their bones. We
have centuries of accumulated pedagogical wisdom telling us that the attempt, including the failed attempt, is where the learning lives. And yet, somehow, when it comes to AI
agents, we’ve collectively decided that maybe this time it’s different. That maybe nodding at Claude’s output is a substitute for doing the calculation yourself. It isn’t. We knew
that before LLMs existed. We seem to have forgotten it the moment they became convenient.
Centuries of pedagogy, defeated by a chat window.
…
This piece by Minas Karamanis is excellent throughout, and if you’ve got the time to read it then you should. He’s a physics postdoc, and this post comes from his experience in his own
field, but I feel that the concerns he raises are more-widely valid, too.
In my field – of software engineering – I have similar concerns.
Let’s accept for a moment that an LLM significantly improves the useful output of a senior software engineer (which is very-definitely disputed, especially for the “10x” level of claims we often hear, but let’s just take it as-read for now). I’ve
experimented with LLM-supported development for years, in various capacities, and it certainly sometimes feels like they do (although it sometimes also feels like they have the
opposite effect!). But if it’s true, then yes: an experienced senior software engineer could conceivably increase their work performance by shepherding a flock of agents through a
variety of development tasks, “supervising” them and checking their work, getting them back on-course when they make mistakes, approving or rejecting their output, and stepping in to
manually fix things where the machines fail.
In this role, the engineer acts more like an engineering team lead, bringing their broad domain experience to maximise the output of those they manage. Except who they manage is… AI.
Again, let’s just accept all of the above for the sake of argument. If that’s all true… how do we make new senior developers?
Junior developers can use LLMs too. And those LLMs will make mistakes that the junior developer won’t catch, because the kinds of mistakes LLMs make are often hard to spot and require
significant experience to identify. But if they’re encouraged to use LLMs rather than making mistakes by hand and learning from them – to keep up, for example, or to meet corporate
policies – then these juniors will never gain the essential experience they’ll one day need. They’ll be disenfranchised of the opportunity to grow and learn.
It’s yet to be proven that more-sophisticated models will “solve” this problem, but my understanding is that issues like hallucination are fundamentally unsolvable: you might
get fewer hallucinations in a better model, but that just means that those hallucinations that slip through will be better-concealed and even harder to identify in code review
or happy-path testing.
Maybe – maybe – the trajectory of GPTs is infinite, and they’ll keep getting “smarter” to the point at which this doesn’t matter: programming genuinely will become a natural language
exercise, and nobody will need to write or understand code at all. In this possible reality, the LLMs will eventually develop entire new programming languages to best support their
work, and humans will simply express ideas and provide feedback on the outputs. But I’m very sceptical of that prediction: it’s my belief that the mechanisms by which LLMs work has a
fundamental ceiling – a capped level of sophistication that can be approached but never exceeded. And sure, maybe some other, different approach to AI might not have this
limitation, but if so then we haven’t invented it yet.
Which suggests that we will always need experienced engineers to shepherd our AIs. Which brings us back to the fundamental question: if everybody uses AI to code, how do we
make new senior developers?
I have other concerns about AI too, of course, some of which I’ve written about. But this one’s top-of-mind today, thanks to Minas’ excellent article. Go read it to learn more about how
physics research faces a similar threat… and, perhaps, consider how your own field might need to face this particular challenge.
Some days, developing Three Rings is about being hunched over a keyboard alone in the middle of the night, swearing at Rubygem incompatibilities.
But just ocassionally it’s about getting together in beautiful places with some of the most dedicated geeks I know… to swear about Rubygem incompatibilities.
Either way, a walk in the garden can lead to the insight that gets you to the solution.
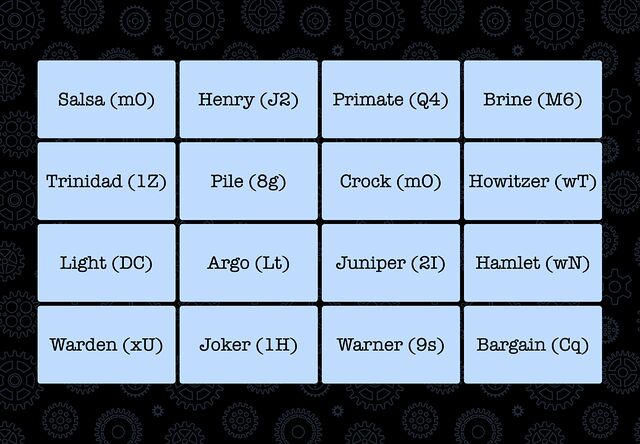
The other day I needed to solve a puzzle1. Here’s the essence of it: there was a grid of 16 words. They needed to be organised into four thematic “groups” of four words each;
then each group needed to be sorted alphabetically.
Each item in each group had a two-character code associated with it: these were to be concatenated together into a string and added to a pastebin.com/... URL. The correct
four URLs would each contain a quarter of the answer to the puzzle.
Apparently this puzzle format is called “Only Connect” and is based on a TV show?2
I’m sure I could have solved the puzzle. But I figured it’d be more satisfying to solve a different puzzle, with the same answer: how to write a program
that finds the correct URLs for me.
I’m confident that this approach was faster.3
Or rather: it would have been if it hadn’t been for the fact that I felt the need to subsequently write a blog post about it.
Here’s how it works:
It creates an array containing the 43,680 possible permutations of 4 from the 16 words.
If sorts the permutations and removes duplicates, reducing the set to just 1,820.
It removes the bit of each that isn’t the two digit code at the end and concatenates them into a URL.
It tries each URL, with short random gaps between them, listing each one that isn’t a 404 “Not found” response.4
I kicked off the program and got on with some work. Meanwhile, in the background, it permuted the puzzle for me. Within a few minutes, I had four working pastebin URLs, which
collectively gave me the geocache’s coordinates. Tada!
Was this cheating?
I still solved a puzzle. It probably took me, as a strong programmer, about as long as it would have taken me to solve the puzzle the conventional way were I a strong… “only
connect”-er5.
But I adapted the puzzle into a programming puzzle and solved it a completely different way, . Here’s the arguments, as I see them:
Yes, this was cheating. This wasn’t the way the puzzle author intended it to be solved. Inelegantly brute-forcing a problem isn’t “solving” it, it’s sidestepping
it. If everybody did this, there’d be no point in the author putting the time into the puzzle in the first place.
No, this wasn’t cheating. This solution still required solving a puzzle, just a different one. A bad human player making a lucky guess would be fine. It’s
a single-player game; play any way that satisfies you. Implementing software to assist is no worse than asking a friend for help, as others have done.
Click on a 😡 or a 🧠 to let me know whether you think I cheated or not, or drop me a comment if you’ve got a more-nuanced opinion.
2 Don’t try to solve this one; it’s randomly generated.
3 This version of the program is adapted to the fake gameboard I showed earlier. You won’t
get any meaningful results by running this program in its current state. But you could quickly adapt it to a puzzle of this format, I suppose.
4 It occurred to me that it could have been more-efficient to eliminate from the list any
possibilities that are ruled-out by any existing finds… but efficiency is a balancing act. For a program that you’ll only run once – and in the background, while you do other things,
to boot – there’s a tipping point at which it’s better to just get it running than it is to improve its performance.
5 There’s a clear parallel here to the various ways in which I’ve
solved jigsaw-puzzle-based geocaches, because I’m far more interested in (a) programming and (b) getting out into the world and finding geocaches in interesting places than I am
in doing a virtual jigsaw puzzle!
Last night I was chatting to my friend (and fellow Three Rings volunteer) Ollie about our respective
workplaces and their approach to AI-supported software engineering, and it echoed conversations I’ve had with other friends. Some workplaces, it seems, are leaning so-hard into
AI-supported software development that they’re berating developers who seem to be using the tools less than their colleagues!
That’s a problem for a few reasons, principal among them that AI does not
make you significantly faster but does make you learn less.1. I stand by the statement that AI isn’t useless, and I’ve experimented with it for years. But I certainly wouldn’t feel very comfortable
working somewhere that told me I was underperforming if, say, my code contributions were less-likely than the average to be identifiably “written by an AI”.
Even if you’re one of those folks who swears by your AI assistant, you’ve got to admit that they’re not always the best choice.
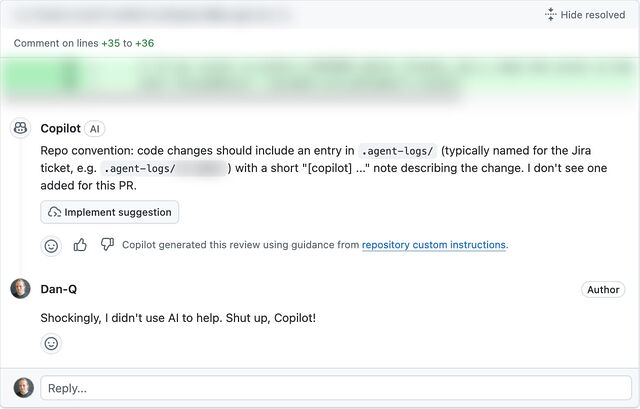
I ran into something a little like what Ollie described when an AI code reviewer told me off for not describing how my AI agent assisted me with the code change… when no AI had been
involved: I’d written the code myself.2
I spoke to another friend, E, whose employers are going in a similar direction. E joked that at current rates they’d have to start tagging their (human-made!) commits with fake
AI agent logs in order to persuade management that their level of engagement with AI was correct and appropriate.3
Supposing somebody like Ollie or E or anybody else I spoke to did feel the need to “fake” AI agent logs in order to prove that they were using AI “the right way”… that sounds
like an excuse for some automation!
I got to thinking: how hard could it be to add a git hook that added an AI agent’s “logging” to each commit, as if the work had been done by a
robot?4
Turns out: pretty easy…
To try out my idea, I made two changes to a branch. When I committed, imaginary AI agent ‘frantic’ took credit, writing its own change log. Also: asciinema + svg-term remains awesome.
Here’s how it works (with source code!). After you make a commit, the post-commit hook creates a file in
.agent-logs/, named for your current branch. Each commit results in a line being appended to that file to say something like [agent] first line of your commit
message, where agent is the name of the AI agent you’re pretending that you used (you can even configure it with an array of agent names and it’ll pick one at
random each time: my sample code uses the names agent, stardust, and frantic).
There’s one quirk in my code. Git hooks only get the commit message (the first line of which I use as the imaginary agent’s description of what it did) after the commit has
taken place. Were a robot really used to write the code, it’d have updated the file already by this point. So my hook has to do an --amend commit, to
retroactively fix what was already committed. And to do that without triggering itself and getting into an infinite loop, it needs to use a temporary environment variable.
Ignoring that, though, there’s nothing particularly special about this code. It’s certainly more-lightweight, faster-running, and more-accurate than a typical coding LLM.
Sure, my hook doesn’t attempt to write any of the code for you; it just makes it look like an AI did. But in this instance: that’s a feature, not a
bug!
Footnotes
1 That research comes from Anthropic. Y’know, the company who makes Claude, one of the
most-popular AIs used by programmers.
3 Using “proportion of PRs that used AI” as a metric for success seems to me to be just
slightly worse than using “number of lines of code produced”. And, as this blog post demonstrates, the
former can be “gamed” just as effectively as the latter (infamously) could.
4 Obviously – and I can’t believe I have to say this – lying to your employer isn’t a
sensible long-term strategy, and instead educating them on what AI is (if anything) and isn’t good for in your workflow is a better solution in the end. If you read this blog post and
actually think for a moment hey, I should use this technique, then perhaps there’s a bigger problem you ought to be addressing!