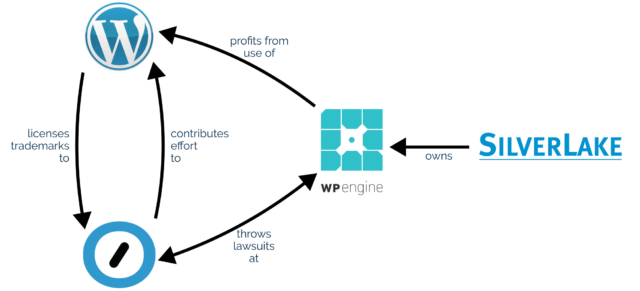
If you’re active in the WordPress space you’re probably aware that there’s a lot of drama going on right now between (a) WordPress hosting company WP Engine, (b) WordPress
hosting company (among quiteafewotherthings) Automattic1,
and (c) the WordPress Foundation.
If you’re not aware then, well: do a search across the tech news media to see the latest: any summary I could give you would be out-of-date by the time you read it anyway!
I tried to draw a better diagram with more of the relevant connections, but it quickly turned into spaghetti.
In particular, I think a lot of the conversation that he kicked off conflates three different aspects of WP Engine’s misbehaviour. That muddies the waters when it comes to
having a reasoned conversation about the issue3.
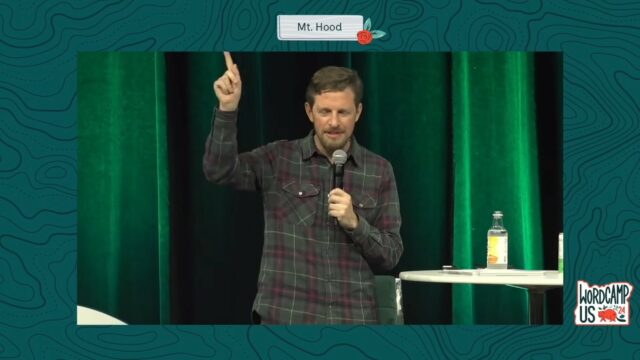
I’ve heard Matt speak a number of times, including in person… and I think he did a pretty bad job of expressing the problems with WP Engine during his Q&A at WCUS. In his defence,
it sounds like he may have been still trying to negotiate a better way forward until the very second he walked on stage that day.
I don’t think WP Engine is a particularly good company, and I personally wouldn’t use them for WordPress hosting. That’s not a new opinion for me: I wouldn’t have used them last year or
the year before, or the year before that either. And I broadly agree with what I think Matt tried to say, although not necessarily with the way he said it or the platform he
chose to say it upon.
Misdeeds
As I see it, WP Engine’s potential misdeeds fall into three distinct categories: moral, ethical4,
and legal.
Morally: don’t take without giving back
Matt observes that since WP Engine’s acquisition by huge tech-company-investor Silver Lake, WP Engine have made enormous profits from selling WordPress hosting as a service (and nothing else) while
making minimal to no contributions back to the open source platform that they depend upon.
If true, and it appears to be, this would violate the principle of reciprocity. If you benefit from somebody else’s
effort (and you’re able to) you’re morally-obliged to at least offer to give back in a manner commensurate to your relative level of resources.
The principle of reciprocity is a moral staple. This is evidenced by the fact that children (and some nonhuman animals) seem to be able to work it out for themselves
from first principles using nothing more than empathy. Companies, however aren’t usually so-capable. Photo courtesy Cotton.
Abuse of this principle is… sadly not-uncommon in business. Or in tech. Or in the world in general. A lightweight example might be the many millions of profitable companies that host
atop the Apache HTTP Server without donating a penny to the Apache Foundation. A heavier (and legally-backed) example might be Trump Social’s
implementation being based on a modified version of Mastodon’s code:
Mastodon’s license requires that their changes are shared publicly… but they don’t do until they’re sent threatening letters reminding them of their obligations.
I feel like it’s fair game to call out companies that act amorally, and encourage people to boycott them, so long as you do so without “punching down”.
Ethically: don’t exploit open source’s liberties as weaknesses
WP Engine also stand accused of altering the open source code that they host in ways that maximise their profit, to the detriment of both their customers and the original authors of
that code5.
It’s well established, for example, that WP Engine disable the “revisions” feature of WordPress6.
Personally, I don’t feel like this is as big a deal as Matt makes out that it is (I certainly wouldn’t go as far as saying “WP
Engine is not WordPress”): it’s pretty commonplace for large hosting companies to tweak the open source software that they host to better fit their architecture and business model.
But I agree that it does make WordPress as-provided by WP Engine significantly less good than would be expected from virtually any other host (most of which, by the way, provide much
better value-for-money at any price point).
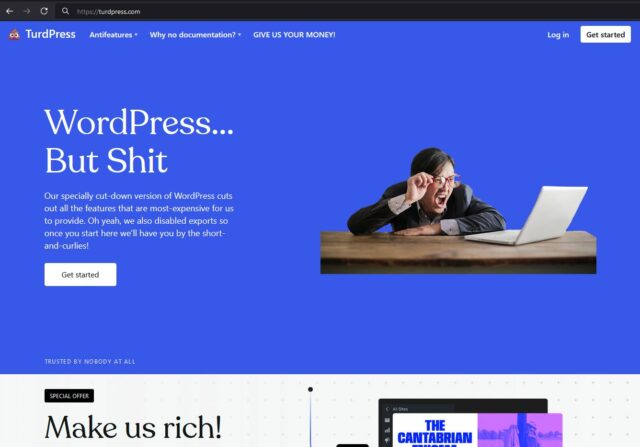
There’s nothing to stop me from registering TurdPress.com and providing a premium WordPress web hosting solution with all the best features disabled: I could even disable
exports so that my customers wouldn’t even be able to easily leave my service for greener pastures! There’s nothing stop me… but that wouldn’t make it
right7.
It also looks like WP Engine may have made more-nefarious changes, e.g. modifying the referral links in open source code (the thing that earns money for the original authors of
that code) so that WP Engine can collect the revenue themselves when they deploy that code to their customers’ sites. That to me feels like it’s clearly into the zone ethical bad
practice. Within the open source community, it’s not okay to take somebody’s code, which they were kind enough to release under a liberal license, strip out the bits that provide
their income, and redistribute it, even just as a network service8.
Again, I think this is fair game to call out, even if it’s not something that anybody has a right to enforce legally. On which note…
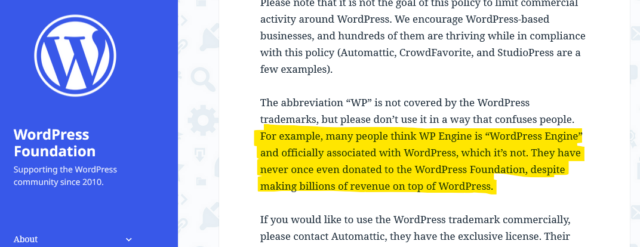
Obviously, this is the part of the story you’re going to see the most news media about, because there’s reasonable odds it’ll end up in front of a judge at some point. There’s a good
chance that such a case might revolve around WP Engine’s willingness (and encouragement?) to allow their business to be called “WordPress Engine” and to capitalise on any confusion that
causes.
I’m not going to weigh in on the specifics of the legal case: I Am Not A Lawyer and all that. Naturally I agree with the underlying principle that one should not be allowed to profit
off another’s intellectual property, but I’ll leave discussion on whether or not that’s what WP Engine are doing as a conversation for folks with more legal-smarts than I. I’ve
certainly known people be confused by WP Engine’s name and branding, though, and think that they must be some kind of “officially-licensed” WordPress host: it happens.
If you’re following all of this drama as it unfolds… just remember to check your sources. There’s a lot of FUD floating around on the Internet right now9.
In summary…
With a reminder that I’m sharing my own opinion here and not that of my employer, here’s my thoughts on the recent WP Engine drama:
WP Engine certainly act in ways that are unethical and immoral and antithetical to the spirit of open source, and those are just a subset of the reasons that I wouldn’t use them as
a WordPress host.
Matt Mullenweg calling them out at WordCamp US doesn’t get his point across as well as I think he hoped it might, and probably won’t win him any popularity contests.
I’m not qualified to weigh in on whether or not WP Engine have violated the WordPress Foundation’s trademarks, but I suspect that they’ve benefitted from widespread confusion about
their status.
Footnotes
1 I suppose I ought to point out that Automattic is my employer, in case you didn’t know,
and point out that my opinions don’t necessarily represent theirs, etc. I’ve been involved with WordPress as an open source project for about four times as long as I’ve had any
connection to Automattic, though, and don’t always agree with them, so I’d hope that it’s a given that I’m speaking my own mind!
2 Though like Manu, I don’t
think that means that Matt should take the corresponding blog post down: I’m a digital preservationist, as might be evidenced by the unrepresentative-of-me and frankly embarrassing
things in the 25-year archives of this blog!
3 Fortunately the documents that the lawyers for both sides have been writing are much
clearer and more-specific, but that’s what you pay lawyers for, right?
4 There’s a huge amount of debate about the difference between morality and ethics, but
I’m using the definition that means that morality is based on what a social animal might be expected to decide for themselves is right, think e.g. the Golden Rule etc., whereas ethics is the code of conduct expected within a particular community. Take stealing, for example,
which covers the spectrum: that you shouldn’t deprive somebody else of something they need, is a moral issue; that we as a society deem such behaviour worthy of exclusion is an
ethical one; meanwhile the action of incarcerating burglars is part of our legal framework.
5 Not that nobody’s immune to making ethical mistakes. Not me, not you, not anybody else.
I remember when, back in 2005, Matt fucked up by injecting ads into WordPress (which at that point didn’t have a reliable source of
funding). But he did the right thing by backpedalling, undoing the harm, and apologising publicly and profusely.
6 WP Engine claim that they disable revisions for performance reasons, but that’s clearly
bullshit: it’s pretty obvious to me that this is about making hosting cheaper. Enabling revisions doesn’t have a performance impact on a properly-configured multisite hosting system,
and I know this from personal experience of running such things. But it does have a significant impact on how much space you need to allocate to your users, which has cost
implications at scale.
7 As an aside: if a court does rule that WP Engine is infringing upon
WordPress trademarks and they want a new company name to give their service a fresh start, they’re welcome to TurdPress.
8 I’d argue that it is okay to do so for personal-use though: the difference for
me comes when you’re making a profit off of it. It’s interesting to find these edge-cases in my own thinking!
9 A typical Reddit thread is about 25% lies-and-bullshit; but you can double that for a
typical thread talking about this topic!
I used to pay for VaultPress. Nowadays I get it for free as one of the many awesome perks of my job. But I’d probably still pay for it
because it’s a lifesaver.
Like my occasional video content, this isn’t designed to replace any of my blogging: it’s just a different medium for those that might prefer it.
For some stories, I guess that audio might be a better way to find out what I’ve been thinking about. Just like how the vlog version of my post about
my favourite video game Easter Egg might be preferable because video as a medium is better suited to demonstrating a computer game, perhaps
audio’s the right medium for some of the things I write about, too?
But as much as not, it’s just a continuation of my efforts to explore different media over which a WordPress blog can be delivered2.
Also, y’know, my ongoing effort to do what I’m bad at in the hope that I might get better at a wider diversity of skills.
How?
Let’s start by understanding what a “podcast” actually is. It is, in essence, just an RSS feed (something you might have heard me talk about before…) with audio enclosures – basically, “attachments” – on each item. The idea was spearheaded by Dave Winer back in 2001 as a
way of subscribing to rich media like audio or videos in such a way that slow Internet connections could pre-download content so you didn’t have to wait for it to buffer.3
Podcasts are pretty simple, even after you’ve bent over backwards to add all of the metadata that Apple Podcasts (formerly iTunes) expects to see. I looked at a couple of
WordPress plugins that claimed to be able to do the work for me, but eventually decided it was simple enough to just add some custom metadata fields that could then be included in my
feeds and tweak my theme code a little.
Here’s what I had to do to add podcasting capability to my theme:
The tag
I use a post tag, dancast, to represent posts with accompanying podcast content4.
This way, I can add all the podcast-specific metadata only if the user requests the feed of that tag, and leave my regular feeds untampered . This means that you don’t
get the podcast enclosures in the regular subscription; that might not be what everybody would want, but it suits me to serve podcasts only to people who explicitly ask for
them.
Okay, onto the code (which I’ve open-sourced over here). I’ve use a series of standard WordPress hooks to
add the functionality I need. The important bits are:
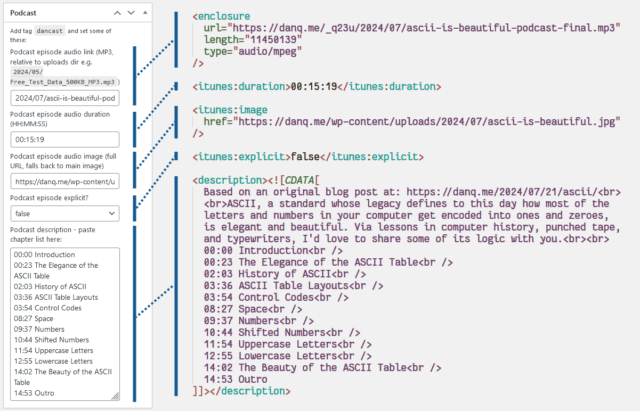
rss2_item – to add the <enclosure>, <itunes:duration>, <itunes:image>, and
<itunes:explicit> elements to the feed, when requesting a feed with my nominated tag. Only <enclosure> is strictly required, but appeasing Apple
Podcasts is worthwhile too. These are lifted directly from the post metadata.
the_excerpt_rss – I have another piece of post metadata in which I can add a description of the podcast (in practice, a list of chapter times); this hook
swaps out the existing excerpt for my custom one in podcast feeds.
rss_enclosure – some podcast syndication platforms and players can’t cope with RSS feeds in which an item has multiple enclosures, so as a
safety precaution I strip out any enclosures that WordPress has already added (e.g. the featured image).
the_content_feed – my RSS feed usually contains the full text of every post, because I don’t like feeds that try to force you to go to the
original web page5
and I don’t want to impose that on others. But for the podcast feed, the text content of the post is somewhat redundant so I drop it.
rss2_ns – of critical importance of course is adding the relevant namespaces to your XML declaration. I use the itunes namespace, which provides the widest compatibility for specifying metadata, but I also use the
newer podcast namespace, which has growing compatibility and provides some modern features, most of which I don’t
use except specifying a license. There’s no harm in supporting both.
rss2_head – here’s where I put in the metadata for the podcast as a whole: license, category, type, and so on. Some of these fields are
effectively essential for best support.
You’re welcome, of course, to lift any of all of the code for your own purposes. WordPress makes a perfectly reasonable platform for podcasting-alongside-blogging, in my experience.
What?
Finally, there’s the question of what to podcast about.
My intention is to use podcasting as an alternative medium to my traditional blog posts. But not every blog post is suitable for conversion into a podcast! Ones that rely on images
(like my post about dithering) aren’t a great choice. Ones that have lots of code that you might like to copy-and-paste are especially unsuitable.
You’re listening to Radio Dan. 100% Dan, 100% of the time.(Also I suppose you might be able to hear my dog snoring in the background…)
Also: sometimes I just can’t be bothered. It’s already some level of effort to write a blog post; it’s like an extra 25% effort on top of that to record, edit, and upload a podcast
version of it.
That’s not nothing, so I’ve tended to reserve podcasts for blog posts that I think have a sort-of eccentric “general interest” vibe to them. When I learn something new and feel the need
to write a thousand words about it… that’s the kind of content that makes it into a podcast episode.
Which is why I’ve been calling the endeavour “a podcast nobody asked for, about things only Dan Q cares about”. I’m capable of getting nerdsniped
easily and can quickly find my way down a rabbit hole of learning. My podcast is, I guess, just a way of sharing my passion for trivial deep dives with the rest of the world.
My episodes are probably shorter than most podcasts: my longest so far is around fifteen minutes, but my shortest is only two and a half minutes and most are about seven. They’re meant
to be a bite-size alternative to reading a post for people who prefer to put things in their ears than into their eyes.
Anyway: if you’re not listening already, you can subscribe from here or in your favourite podcasting app. Or you can just follow my blog as normal
and look for a streamable copy of podcasts at the top of selected posts (like this one!).
2 As well as Web-based non-textual content like audio (podcasts) and video (vlogs), my blog is wholly or partially available over a variety of more-exotic protocols: did you find me yet on Gemini (gemini://danq.me/), Spartan (spartan://danq.me/), Gopher (gopher://danq.me/), and even Finger
(finger://danq.me/, or run e.g. finger blog@danq.me from your command line)? Most of these are powered by my very own tool CapsulePress, and I’m itching to try a few more… how about a WordPress blog that’s accessible over FTP, NNTP, or DNS? I’m not even kidding when I say
I’ve got ideas for these…
3 Nowadays, we have specialised media decoder co-processors which reduce the size of media
files. But more-importantly, today’s high-speed always-on Internet connections mean that you probably rarely need to make a conscious choice between streaming or downloading.
4 I actually intended to change the tag to podcast when I went-live,
but then I forgot, and now I can’t be bothered to change it. It’s only for my convenience, after all!
Why must a blog comment be text? Why could it not be… a drawing?1
Red and black might be more traditional ladybird colours, but sometimes all you’ve got is blue.
I started hacking about and playing with a few ideas and now, on selected posts including this one, you can draw me a comment instead of typing one.
Just don’t tell the soup company what I’ve been working on, okay?
I opened the feature, experimentally (in a post available only to RSS subscribers2) the
other week, but now you get a go! Also, I’ve open-sourced the whole thing, in case you want to pick it apart.
What are you waiting for: scroll down, and draw me a comment!
Footnotes
1 I totally know the reasons that a blog comment shouldn’t be a drawing; I’m not
completely oblivious. Firstly, it’s less-expressive: words are versatile and you can do a lot with them. Secondly, it’s higher-bandwidth: images take up more space, take longer to
transmit, and that effect compounds when – like me – you’re tracking animation data too. But the single biggest reason, and I can’t stress this enough, is… the
penises. If you invite people to draw pictures on your blog, you’re gonna see a lot of penises. Short penises, long penises, fat penises, thin penises. Penises of every shape
and size. Some erect and some flacid. Some intact and some circumcised. Some with hairy balls and some shaved. Many of them urinating or ejaculating. Maybe even a few with smiley
faces. And short of some kind of image-categorisation AI thing, you can’t realistically run an anti-spam tool to detect hand-drawn penises.
2 I’ve copied a few of my favourites of their drawings below. Don’t forget to subscribe if you want early access to any weird shit I make.
Terence Eden, who’s apparently inspiring several posts this week, recently shared a way to attach a hook to WordPress’s
get_the_post_thumbnail() function in order to remove the extraneous “closing mark” from the (self-closing in HTML) <img> element.
By default, WordPress outputs e.g. <img src="..." />, where <img src="..."> would suffice.
It’s an inconsequential difference for most purposes, but apparently it bugs him, so he fixed it… although he went on to observe that he hadn’t managed to successfully tackle
all the instances in which WordPress was outputting redundant closing marks.
This is a problem that I’ve already solved here on my blog. My solution’s slightly hacky… but it works!
There are many things you could say about the HTML produced to make the page you’re reading now. But “it needs fewer />s” isn’t among them.
My Solution: Runing HTMLTidy over WordPress
Tidy is an excellent tool for tiding up HTML! I used to use its predecessor back in
the day for all kind of things, but it languished for a few years and struggled with support for modern HTML features. But
in 2015 it made a comeback and it’s gone from strength to strength ever since.
I run it on virtually all pages produced by DanQ.me (go on, click “View Source” and see for yourself!), to:
Standardise the style of the HTML code and make it easier for humans to read1.
Bring old-style emphasis tags like <i>, in my older posts, into a more-modern interpretation, like <em>.
Hoist any inline <style> blocks to the <head>, and detect any repeated inline style="..."s to convert to classes.
Repair any invalid HTML (browsers do this for you, of course, but doing it server-side makes parsing easier for the
browser, which might matter on more-lightweight hardware).
WordPress isn’t really designed to have Tidy bolted onto it, so anything it likely to be a bit of a hack, but here’s my approach:
Install libtidy-dev and build the PHP bindings to it.
Note that if you don’t do this the code might appear to work, but it won’t actually tidy anything2.
Add a new output buffer to my theme’s header.php3, with a callback function: ob_start('tidy_entire_page').
Without an corresponding ob_flush or similar, this buffer will close and the function will be called when PHP
finishes generating the page.
Define the function tidy_entire_page($buffer) Have it instantiate Tidy ($tidy = new tidy) and use $tidy->parseString (with your buffer and Tidy preferences) to tidy the code, then
return $tidy.
Ensure that you’re caching the results!
You don’t want to run this every page load for anonymous users! WP Super Cache on “Expert” mode (with the
requisite webserver configuration) might help.
1 I miss the days when most websites were handwritten and View Source typically looked
nice. It was great to learn from, too, especially in an age before we had DOM debuggers. Today: I can’t justify
dropping my use of a CMS, but I can make my code readable.
2 For a few of its extensions, some PHP developer made the interesting choice to fail silently if the required extension is missing. For example: if you don’t have the
zip extension enabled you can still usePHPto make ZIP files, but they won’t be
compressed. This can cause a great deal of confusion for developers! A similar issue exists with tidy: if it isn’t installed, you can still call all of the
methods on it… they just don’t do anything. I can see why this decision might have been made – to make the language as portable as possible in production – but I’d
prefer if this were an optional feature, e.g. you had to set try_to_make_do_if_you_are_missing_an_extension=yes in your php.ini to enable it, or if
it at least logged that it had done so.
3 My approach probably isn’t suitable for FSE (“block”) themes, sorry.
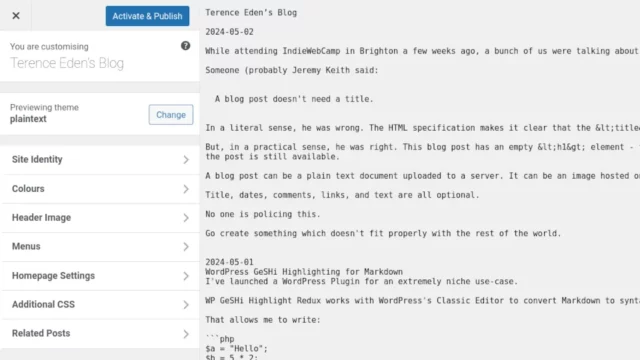
I clearly nerdsniped Terence at least a little when I asked whether a blog necessarily had to be HTML, because he went on to implement a WordPress theme that delivers content entirely in plain text.
I guess I’ve always been more of a sprinter/hurdles blogger than a marathon runner.
Might I meet that challenge? Maybe. But it turns out it’s easier than I thought because Kev revised the rules to require only 100 posts in a calendar year (or any other 365-day
period, but I’m not going to start thinking about the maths of that).
That’s not only much more-achievable… I’ve probably already achieved it! Let’s knock out some SQL to check how many posts I
made each year:
SELECTYEAR(wp_posts.post_date_gmt) yyyy,
COUNT(wp_posts.ID) total
FROM
wp_posts
WHERE
wp_posts.post_status='publish'AND wp_posts.post_type='post'GROUPBY yyyy
ORDERBY yyyy
My code’s actually a little more-complicated than this, because of some plot, but this covers the essentials.
A big question in some years is what counts as a post. Kev’s definition is quite liberal and includes basically-everything, but I wonder if mine shouldn’t perhaps be stricter.
For example:
Should I count checkins, even though they’re not always born as blog posts but often start as logs on geocaching websites?
(My gut says yes!)
Do reposts and bookmarks contribute, a significant minority of which are presented without any further
interpretation by me? (My gut says no!)
Does a vlog version of a blog post count separately, or is it a continuation of the same content? (My gut says the volume is too
low to matter!)
Can a retroactive achievement (i.e. from before the challenge was announced) count? Kev writes “there is no specific start date”, but it seems a little counter to
the idea of it specifically being a challenge to claim it when you weren’t attempting the challenge at the time.
Some posts are lost from 1998/1999. If they were recovered I might have made 100 posts in 1999, but probably not in 1998 as I only started blogging on 27 September 1998.
A heartfelt post about saying goodbye to Aberystwyth as I moved to Oxford on 16 June was my 100th of the year. Pedants might argue that
this year shouldn't count, but so long as you're willing to count checkins (and you should) then it would... and my qualifying post would have come only a couple of days
later, with a post about the Headington Shark, which I had just moved-in near to.
I'm not convined this low-blogging year should count: a clear majority of the posts were geocaching logs, and they weren't always even that verbose (consider this candidate for 100th post of 2013, from 1 October).
Another geocache log heavy, conventional blogpost light year that I'm not convinced should count, even if the obvious candidate for 100th post would be 18 May's cool article about
geocaching like Batman!
I maintain that checkins should count, even when they're PESOS'd from geocaching sites, so long as they don't make up a majority of the qualifying posts in a year. In
which case this year should qualify, with the 100th post being my visit to this well-hidden London pub
while on my way to a conference.
My blogging ramped up again this year, and on 24 August I shared a motivational poster with a funny twist, plus a pun at the intersection
between my sexuality and my preferred mode of transport.
Total count of all the posts.
Doesn't add up? Not all posts feature in one of the years above!
* Pedants might claim this year was not a success for the reasons described above. Make your own mind up.
In any case, I’d argue that I clearly achieved the revised version of the challenge on certainly six, probably fourteen, arguably (depending on how you count posts) as
many as nineteen different years since I started blogging in 1998. My least-controversial claims would be:
Given all these unanswered questions, I’m not going to just go ahead and raise a PR against the Hall of Fame! Instead, I’ll leave it to
Kev to decide whether I’m (a) eligible to claim a 14-time award, (b) merely eligible for a 4-time award for the years following the challenge starting, or (c) ineligible to claim
success until I intentionally post 100 times in a year (in, at current rates, another two months…). Over to you, Kev…
Update: Kev’s agreed that I can claim the most-recent four of them, so I raised a PR.
You can click an image and see a full-window popup dialog box containing a larger version of the image.
The larger version of the image isn’t loaded until it’s needed.
You can close the larger version with a close button. You can also use your browser’s back button.
You can click again to download the larger version/use your browser to zoom in further.
You can share/bookmark etc. the URL of a zoomed-in image and the recipient will see the same image (and return to the
image, in the right blog post, if they press the close button).
No HTTP round trip is required when opening/closing a lightbox: it’s functionally-instantaneous.2
No JavaScript is used at all.
Visitors can click on images to see a larger version, with a “close” button. No JavaScript needed.
Here’s how it works –
The Markup
<figureid="img3336"aria-describedby="caption-img3336"><ahref="#lightbox-img3336"role="button"><imgsrc="small-image.jpg"alt="Alt text is important."width="640"height="480"></a><figcaptionid="caption-img3336">
Here's the caption.
</figcaption></figure>
... (rest of blog post) ...
<dialogid="lightbox-img3336"class="lightbox"><ahref="large-image.jpg"><imgsrc="large-image.jpg"loading="lazy"alt="Alt text is important."></a><aclass="close"href="#img3336"title="Close image"role="button">×</a></dialog>
The HTML is pretty simple (and I automatically generate it, of course).
For each lightboxed image in a post, a <dialog> for that image is appended to the post. That dialog contains a larger copy of the image (set to
loading="lazy" so the browser have to download it until it’s needed), and a “close” button.
The image in the post contains an anchor link to the dialog; the close button in the dialog links back to the image in the post.3 I wrap the lightbox image itself in a link to the full version of the
image, which makes it easier for users to zoom in further using their browser’s own tools, if they like.
Even without CSS, this works (albeit with “scrolling” up and down to the larger image). But the clever bit’s yet to
come:
The Style
body:has(dialog:target) {
/* Prevent page scrolling when lightbox open (for browsers that support :has()) */position:fixed;
}
a[href^='#lightbox-'] {
/* Show 'zoom in' cursor over lightboxed images. */cursor: zoom-in;
}
.lightbox {
/* Lightboxes are hidden by-default, but occupy the full screen and top z-index layer when shown. */all:unset;
display:none;
position:fixed;
top:0;
left:0;
width:100%;
height:100%;
z-index:2;
background:#333;
}
.lightbox:target {
/* If the target of the URL points to the lightbox, it becomes visible. */display: flex;
}
.lightboximg {
/* Images fill the lightbox. */object-fit:contain;
height:100%;
width:100%;
}
/* ... extra CSS for styling the close button etc. ... */
Here’s where the magic happens.
Lightboxes are hidden by default (display: none), but configured to fill the window when shown.
They’re shown by the selector .lightbox:target, which is triggered by the id of the <dialog> being referenced by the anchor part of
the URL in your address bar!
Summary
It’s neither the most-elegant nor cleanest solution to the problem, but for me it hits a sweet spot between developer experience and user experience. I’m always disappointed when
somebody’s “lightbox” requires some heavyweight third-party JavaScript (often loaded from a CDN), because that seems to be the
epitome of the “take what the Web gives you for free, throw it away, and reimplement it badly in JavaScript” antipattern.
There’s things I’ve considered adding to my lightbox. Progressively-enhanced JavaScript that adds extra value and/or uses the Popover API where available, perhaps? View Transitions to animate the image “blowing up” to the larger size, while the full-size image loads in the
background? Optimistic preloading when hovering over the image4? “Previous/next” image links when lightboxing a gallery? There’s lots of potential to expand it
without breaking the core concept here.
I’d also like to take a deeper dive into the accessibility implications of this approach: I think it’s pretty good, but accessibility is a big topic and there’s always more to
learn.
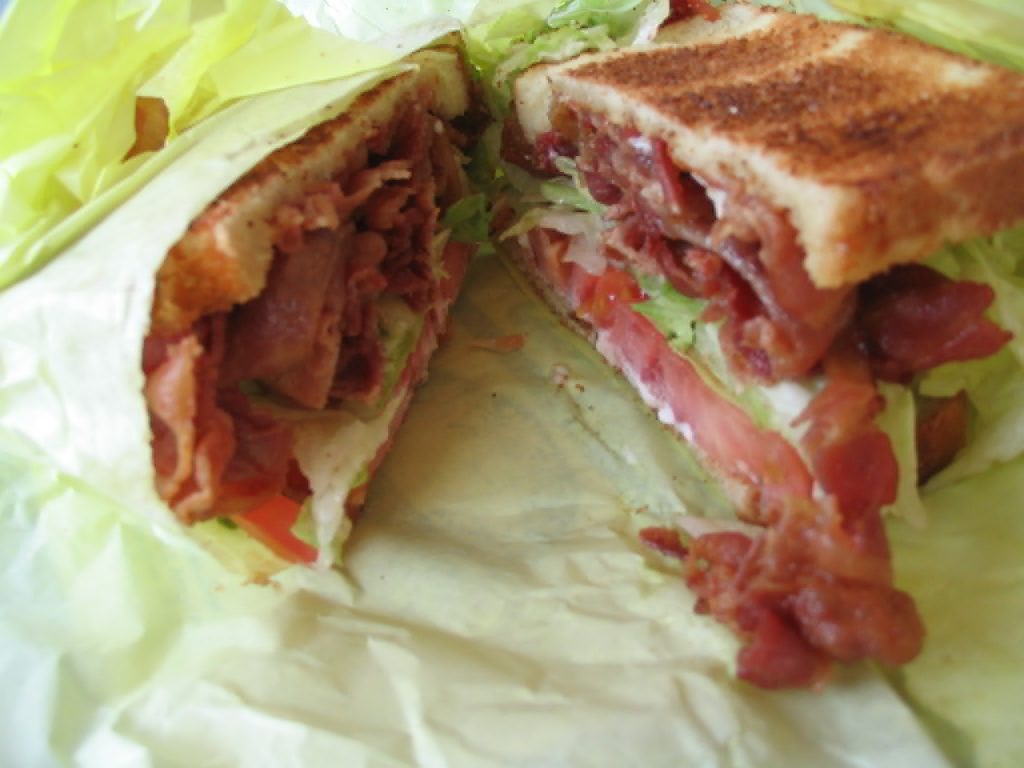
In the meantime, why not try out my lightbox by clicking on this picture of my dog (photographed here staring longingly at the bacon sandwich picture above, perhaps).
I hope the idea’s of use to somebody else looking to achieve this kind of thing, too.
Footnotes
1 Where JavaScript is absolutely necessary, I (a) host it on the same domain, for
performance and privacy-respecting reasons, and (b) try to provide a functional alternative that doesn’t require JavaScript, ideally seamlessly.
2 In practice, the lightbox images get lazy-loaded, so there can be a short round
trip to fetch the image the first time. But after that, it’s instantaneous.
3 The pair – post image and lightbox image – work basically the same way as footnotes,
like this one.
4 I already do this with links in general using the excellent instant.page.
The Internet is full of guides on easily making your WordPress installation run fast. If you’re looking to speed up your WordPress site, you should go read those, not this.
Those guides often boil down to the same old tips:
uninstall unnecessary plugins,
optimise caching (both on the server and, via your headers, on clients/proxies),
resize your images properly and/or ensure WordPress is doing this for you,
This article is for people who aren’t afraid to go tinkering in their WordPress codebase to squeeze a little extra (real world!) performance.
It’s for people whose neverending quest for perfection is already well beyond the point of diminishing returns.
But mostly, it’s for people who want to gawp at me, the freak who actually did this stuff just to make his personal blog a tiny bit nippier without spending an extra penny on
hosting.
You shouldn’t use Lighthouse as your only measure of your site’s performance. But it’s still reassuring when you get to see those fireworks!
Don’t start with the hard way. Exhaust all the easy solutions – or at least, make a conscious effort which easy solutions to enact or reject – first. Only if you really
want to get into the weeds should you actually try doing the things I propose here. They’re not for most sites, and they’re not the for faint of heart.
Performance is a tradeoff. Every performance improvement costs you something else: time, money, DX, UX, etc. What you choose to trade for performance gains depends on your priority of constituencies, which may differ from mine.4
This is not a recipe book. This won’t tell you what code to change or what commands to run. The right answers for your content will be different than the right answers
for mine. Also: you shouldn’t change what you don’t understand! But I hope these tips will help you think about what questions you need to ask to make your site blazing fast.
Okay, let’s get started…
1. Backstab the plugins you can’t live without
If there are plugins you can’t remove because you depend upon their functionality, and those plugins inject content (especially JavaScript) on the front-end… backstab them to
undermine that functionality.
For example, if you want Jetpack‘s backup and downtime monitoring features, but you don’t want it injecting random <linkrel='stylesheet' id='...-jetpack-css' href='...' media='all' />‘s (an
extra stylesheet to download and parse) into your pages: find the add_filter hook it uses and remove_filter it in your theme5.
Alternatively, entirely remove the wp_head() and manually reimplement the functionality you actually need. Insert your own joke about “Headless WordPress” here.
Better yet, remove wp_head() from your theme entirely6.
Now, instead of blocking the hooks you don’t want polluting your <head>, you’re specifically allowing only those you want. You’ll want to take care to get
some semi-essential ones like <link rel="canonical" href="...">7.
Now most of your plugins are broken, but in exchange, your theme has reclaimed complete control over what gets sent to the user. You can select what content you actually
want delivered, and deliver no more than that. It’s harder work for you, but your site becomes so much lighter.
Your site is faster now. It doesn’t work, but it’s quick about it!
2. Throw away 100% of your render-blocking JavaScript (and as much as you can of the rest)
The single biggest bottleneck to the user viewing a modern WordPress website is the JavaScript that needs to be downloaded, compiled, and executed before the page can be rendered. Most
of that’s plugins, but even on a nearly-vanilla installation you might find a copy of jQuery (eww!) and some other files.
In step 1 you threw it all away, which is great… but I’m betting you were depending on some of that to make your site work? Let’s put it back, carefully and selectively, while
minimising the impact on load time.
That means scripts should be loaded (a) low-down, and/or (b) marked defer (or, better yet, async), so they don’t block page rendering.
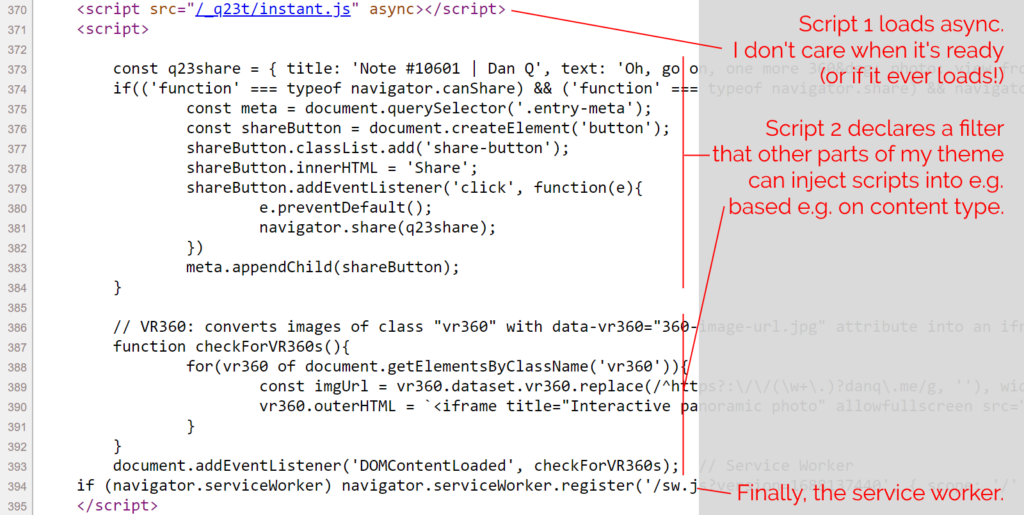
If you haven’t already, you might like to View Source on this page. Count my <script> tags. You’ll probably find just two of them: one external file marked
async, and a second block right at the bottom.
The only third-party script routinely loaded on danq.me is Instant.Page, which specifically exists to improve perceived performance. It preloads
links when you hover over or start-to-touch them.
The inline <script> in my footer.php wraps a single line of PHP: which looks a little like
this: <?php echo implode("\n\n", apply_filters( 'danq_footer_js', [] ) ); ?>. For each item in an initially-empty array, it appends to the script tag. When I render
anything that requires JavaScript, e.g. for 360° photography, I can just add to that
(keyed, to prevent duplicates when viewing an archive page) array. Thus, the relevant script gets added exclusively to the pages where it’s needed, not to the entire site.
The only inline script added to every page loads my service worker, which itself aims to optimise caching as well as providing limited “offline” functionality.
While you’re tweaking your JavaScript anyway, you might like to check that any suitable addEventListeners are set to passive mode. Especially
if you’re doing anything with touch or mousewheel events, you can often increase the perceived performance of these interactions by not letting your custom code block the default
browser behaviour.
I promise you; most of your blog’s front-end JavaScript is either (a) garbage nobody wants, (b) polyfills for platforms nobody uses, or (c) huge libraries you’ve imported so you can
use just one or two functions form them. Trash them.
3. Don’t use a CDN
Wait, what? That’s the opposite of what everybody else recommends. To understand why, you have to think about why people recommend a CDN in the first place. Their reasons are usually threefold:
Proximity
Claim: A CDN delivers content geographically-closer to the user.
Retort: Often true. But in step 4 we’re going to make sure that everything critical comes within the first TCP
sliding window anyway, so there’s little benefit, and there’s a cost to that extra DNS lookup and fresh handshake. Edge
caching your own contentmay have value, but for most sites it’ll have a much smaller impact than almost everything else on this list.
Precaching
Claim: A CDN improves the chance resources are precached in the user’s browser.
Retort: Possibly true, especially with fonts (although see step 6) but less than you’d think with JS libraries because
there are so many different versions/hosts of each. Yours may well be the only site in the user’s circuit that uses a particular one!
Power Claim: A CDN has more resources than you and so can better-withstand spikes of traffic.
Retort: Maybe, but they also introduce an additional single-point-of-failure. CDNs aren’t magically immune
to downtime nor content-blocking, and if you depend on one you’ve just doubled the number of potential failure points that can make your site instantly useless. Furthermore:
in exchange for those resources you’re trading away your users’ privacy and security: if a CDN gets hacked, every site that
uses it gets hacked too.
Consider edge-caching your own content only if you think you need it, but ditch jsDeliver, cdnjs, Google Hosted Libraries etc.
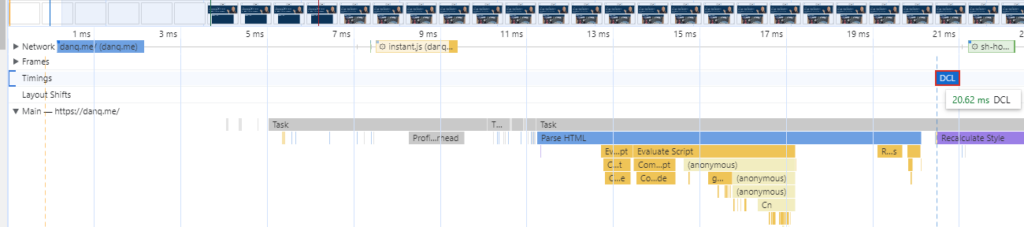
Despite having no edge cache and being hosted in a different country to me, I can open a completely fresh browser and reach DOMContentLoaded on the my homepage in ~20ms. You should learn how to read a
waterfall performance chart just so you can enjoy how “flat” mine is.
Hell: if you can, ditch all JavaScript served from third-parties and slap a Content-Security-Policy: script-src 'self' header on your domain to dramatically reduce
the entire attack surface of your site!8
4. Reduce your HTML and CSS size to <12kb compressed
There’s a magic number you need to know: 12kb. Because of some
complicated but fascinating maths (and depending on how your hosting is configured), it can be significantly faster to initially load a web resource of up to 12kb
than it is to load one of, say, 15kb. Also, for the same reason, loading a web resource of much less than 12kb might not be significantly faster than loading
one only a little less than 12kb.
Inlining as much essential content as possible (CSS, SVGs,
JavaScript etc.) to bring you back up to close-to that magic number again!
$ curl --compressed -so /dev/null -w "%{size_download}\n" https://danq.me/


              10416
Note that this is the compressed, over-the-wire size. Last I checked, my homepage weighed-in at about 10.4kb compressed, which includes the entirety of its HTML and CSS, most of its JS, and a
couple of its SVG images.
Again, this probably flies in the face of everything you were taught about performance. I’m sure you were told that you should <link> to your stylesheets so that they
can be cached across page loads. But it turns out that if you can make your HTML and CSS small enough, the opposite is true and you should inline the stylesheet again: caching styles becomes almost irrelevant if you get all the content in
a single round-trip anyway!
For extra credit, consider optimising your homepage’s CSS so it’s even smaller by excluding directives that only apply to
non-homepage pages, and vice-versa. Assuming you’re using a preprocessor, this shouldn’t be too hard: at simplest, you can have a homepage.css and main.css,
each derived from a set of source files some of which they share (reset/normalisation, typography, colours, whatever) and the rest which is specific only to that part of the site.
Most web pages should fit entirely onto a floppy disk. This one doesn’t, mostly because of all the Simpsons clips, but most should.
Can’t manage to get your HTML and CSS down below the magic
number? Then at least ensure that your HTML alone weighs in at <12kb compressed and you’ll still get some of the
benefits. If you’ve got the headroom, you can selectively include a <style> block containing only the most-crucial CSS, with a particular focus on any that results in layout shifts (e.g. anything that specifies the height: of otherwise dynamically-sized
block elements, or that declares an element position: absolute or position: fixed). These kinds of changes are relatively computationally-expensive because
they cause content to re-flow, so provide hints as soon as possible so that the browser can accommodate for them.
5. Make the first load awesome
We don’t really talk about content being “above the fold” like we used to, because the modern Web has such a diverse array of screen sizes and resolutions that doing so doesn’t make
much sense.
But if loading your full page is still going to take multiple HTTP requests (scripts, images, fonts, whatever),
you should still try to deliver the maximum possible value in the first round-trip. That means:
Making sure all your textual content loads immediately! Unless you’re delivering a huge amount of text, there’s absolutely no excuse for lazy-loading text: it’s
usually tiny, compresses well, and it’s fast to parse. It’s also the most-important content of most pages. Get it delivered to the browser so it can be rendered rightaway.
Reserving space for blocks by sizing images appropriately, e.g. using <img width="..." height="..." ...> or having them load as a background with
background-size: cover or contain in a block sized with CSS delivered in the initial payload. This
reduces layout shift, which mitigates the need for computationally-expensive content reflows.
If possible (see point 4), move vector images that support basic site functionality, like logos, inline. This might also apply to icons, if they’re “as important” as text content.
Marking everything up with standard semantic HTML. There’s a trend for component-driven design to go much too
far, resulting in JavaScript components being used in place of standard elements like links, buttons, and images, resulting in highly-fragile websites: when those scripts fail (or are
very slow to load), the page becomes unusable.
If you want to be sure you’re prioritising your content first and foremost, try disabling all CSS, JavaScript, and external
resources (or just access your site in a browser that ignores those things, like Lynx), and check that it’s still usable. As a bonus, this
helps you check for several accessibility issues.
6. Reduce your dependence on downloaded fonts
Fonts are lovely and can be an important part of your brand identity, but they can also add a lot of weight to your web pages.
If you’re ready and able to drop your webfonts and appreciate the beauty and flexibility of a system font stack (I get it: I’m not there quite
yet!), you can at least make smarter use of your fonts:
Every modern browser supports WOFF2, so you can ditch those chunky old formats you’re clinging onto.
If you’re only using the Latin alphabet, minify your fonts further by dropping the characters you don’t need: tools like Google Webfonts
Helper can help with this, as well as making it easier to selfhost fonts from the most-popular library (is a smart idea for the reasons described under point 3, above!). There are
tools available to further minify fonts if e.g. you only need the capital letters for your title font or something.
Browsers are pretty clever and will work-around it if you make a mistake. Didn’t include an emoji or some obscure mathematical symbol, and then accidentally used them in a
post? Browsers will switch to a system font that can fill in the gap, for you.
Make the most-liberal use of the font-display: CSS directive that you can tolerate!
Don’t use font-display: block, which is functionally the default in most browsers, unless you absolutely have to.
font-display: fallback is good if you’re too cowardly/think your font is too important for you to try font-display: optional.
font-display: optional is an excellent choice for body text: if the browser thinks it’s worthwhile to download the font (it might choose not to if the operating
system indicates that it’s using a metered or low-bandwidth connection, for example), it’ll try to download it, but it won’t let doing so slow things down too much and it’ll
fall-back to whatever backup (system) font you specify.
font-display: swap is also worth considering: this will render any text immediately, even if the right font hasn’t downloaded yet, with no blocking time
whatsoever, and then swap it for the right font when it appears. It’s probably better for headings, because large paragraphs of text can be a little disorienting if they change
font while a user is looking at them!
If writing is for nerds, then typography must be doubly-so. But you’ve read this far, so I’m confident that you qualify…
7. Cache pre-compressed static files
It’s possible that by this point you’re saying “if I had to do this much work, I might as well just use a static site generator”. Well good news: that’s what you’re about to
do!
Obviously you should make sure all your regular caching improvements (appropriate HTTP headers for caching, a
service worker that further improves on that logic based on your content’s update schedule, etc.) first. Again: everything in this guide presupposes that you’ve already done the things
that normal people do.
By aggressively caching pre-compressed copies of all your pages, you’re effectively getting the best of both worlds: a website that, for anonymous visitors, is served directly from
.html.gz files on a hard disk or even straight from RAM in memcached10,
but which still maintains all the necessary server-side interactivity to allow it to be used as a conventional Web-based CMS
(including accepting comments if that’s your jam).
WP Super Cache can do the heavy lifting for you for a filesystem-based solution so long as you put it into “Expert” mode and
amending your webserver configuration. I’m using Nginx, so I needed a try_files directive like this:
I’m sure your favourite performance testing tool has already complained at you about your failure to use the best formats possible when serving images to your users. But how can you fix
it?
There are some great plugins for improving your images automatically and/or in bulk – I use EWWW Image Optimizer – but
to really make the most of them you’ll want to reconfigure your webserver to detect clients that Accept:
image/webp and attempt to dynamically serve them .webp variants, for example. Or if you’re ready to give up on legacy formats and replace all your .pngs
with .webps, that’s probably fine too!
The image you see at https://danq.me/_q23u/2023/11/dynamic.png is probably an image/webp. But if your browser doesn’t support WebP, you’ll get an
image/png instead!
Assuming you’ve got curl and Imagemagick‘s identify, you can see this in action:
curl -s https://danq.me/_q23u/2023/11/dynamic.png -H "Accept: image/webp" | identify -
(Will give you a WebP image)
curl -s https://danq.me/_q23u/2023/11/dynamic.png -H "Accept: image/png" | identify -
(Will give you a PNG image, even though the URL is the same)
9. Simplify, simplify, simplify
The single biggest impact you can have upon the performance of your WordPress pages is to make them less complex.
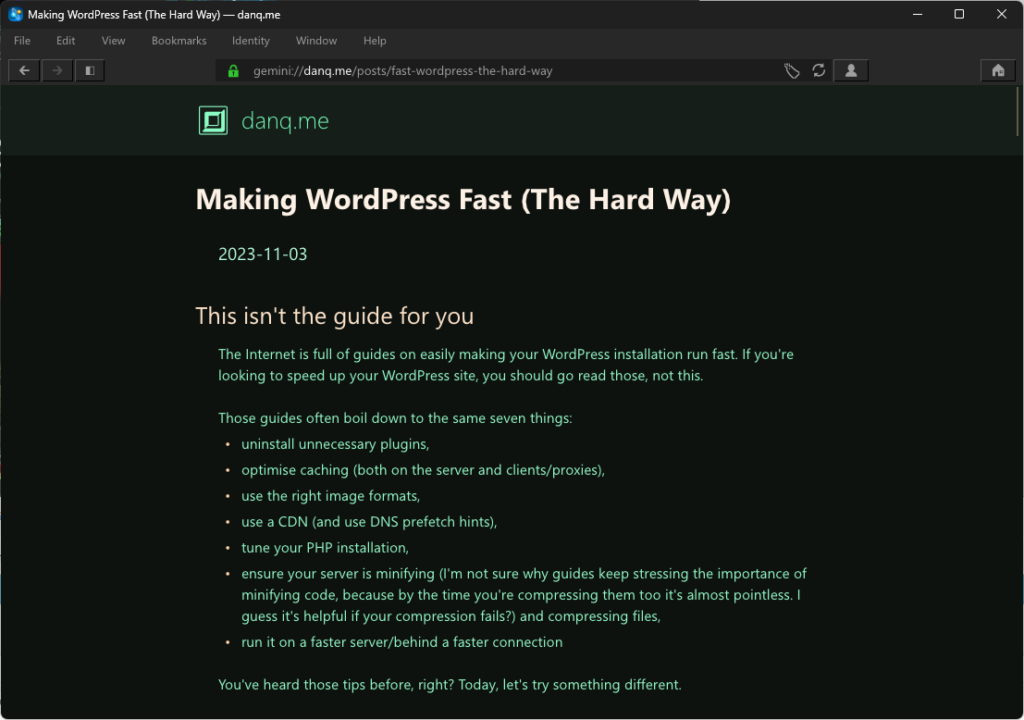
You don’t have to go as light as Gemtext – like this page on Gemini does – to see
benefits.
Writing my templates and posts so that they’re compatible with CapsulePress helps keep my code necessarily-simple. You don’t have to
do that, though, but you should be asking yourself:
Does my DOM need to cascade so deeply? Could I achieve the same with less?
Am I pre-emptively creating content, e.g. adding a hidden <dialog> directly to the markup in the anticipation that it might be triggered later using
JavaScript, rather than having that JavaScript run document.createElement the element after the page becomes readable?
Have I created unnecessarily-long chains of CSS selectors11
when what I really want is a simple class name, or perhaps even a semantic element name?
10. Add a Service Worker
A service worker isn’t magic. In particular, it can’t help you with those new visitors hitting your site for the first time12.
A service worker lets you do smart things on behalf of the user’s network connection, so that by the time they ask for a resource, you already fetched it for them.
But a suitable service worker can do a few things that can help with performance. In particular, you might consider:
Precaching assets that you anticipate they’re likely to need (e.g. if you use different stylesheets for the homepage and other pages, you can preload both so no matter
where a user lands they’ve already got the CSS they’ll need for the entire site).
Preloading popular pages like the homepage and recent articles, allowing them to load quickly.
Caching a fallback pages – and other resources as-they’re-accessed – to support a full experience for users even if they (or your site!) disconnect from the Internet (or even
embedding “save for offline” functionality!).
Chapters 7 and 8 of Going Offline by Jeremy Keith are
especially good for explaining how this can be achieved, and it’s all much easier than everything else I just described.
Anything else?
Did I miss anything? If you’ve got a tip about ramping up WordPress performance that isn’t one of the “typical seven” – probably because it’s too hard to be worthwhile for most people –
I’d love to hear it!
Footnotes
1 You’ll sometimes see guides that suggest that using a CDN is to be recommended specifically because it splits your assets among multiple domains/subdomains, which mitigates browsers’ limitation on the
number of files they can download simultaneously. This is terrible advice, because such limitations essentially don’t exist any more, but DNS lookups and TLS handshakes still have a bandwidth and computational cost. There are good
things about CDNs, sometimes, but this has not been one of them for some time now.
2 I’m not sure why guides keep stressing the importance of minifying code,
because by the time you’re compressing them too it’s almost pointless. I guess it’s helpful if your compression fails?
3 “Use a faster server” is a “just throw money/the environment at it” solution. I’d like
to think we can do better.
4 For my personal blog, I choose to prioritise user experience, privacy, accessibility,
resilience, and standards compliance above almost everything else.
5 If you prefer to keep your backstab code separate, you can put it in a custom plugin,
but you might find that you have to name it something late in the alphabet – I’ve previously used names like zzz-danq-anti-plugin-hacks – to ensure that they load
after the plugins whose functionality you intend to unhook: broadly-speaking, WordPress loads plugins in alphabetical order.
6 I’ve assumed you’re using a classic, not block, theme. If you’re using a block theme,
you get a whole different set of performance challenges to think about. Don’t get me wrong: I love block themes and think they’re a great way to put more people in control of their
site’s design! But if you’re at the point where you’re comfortable digging this deep into your site’s PHP code,
you probably don’t need that feature anyway, right?
7 WordPress is really good at serving functionally-duplicate content, so search
engines appreciate it if you declare a proper canonical URL.
8 Before you choose to block all third-party JavaScript, you might have to
whitelist Google Analytics if you’re the kind of person who doesn’t mind selling their visitor data to the world’s biggest harvester of personal information in exchange for some
pretty graphs. I’m not that kind of person.
10 I’ve experimented with mounting a ramdisk and storing the WP Super Cache directory
there, but it didn’t make a huge difference, probably because my files are so small that the parse/render time on the browser side dominates the total cascade, and they’re already
being served from an SSD. I imagine in my case memcached would provide similarly-small benefits.
11 I really love the power of CSS preprocessors like Sass, but they do make it deceptively easy to create many more – and longer – selectors
than you intended in your final compiled stylesheet.
12 Tools like Lighthouse usually simulate first-time visitors, which can be a little
unfair to sites with great performance for established visitors. But everybody is a first-time visitor at least once (and probably more times, as caches expire or are
cleared), so they’re still a metric you should consider.
Now I’ve added support for Spartan3 too and, seeing as the implementations shared functionality, I’ve
combined all three – Gemini, Spartan, and Gopher – into a single package: CapsulePress.
CapsulePress is a Gemini/Spartan/Gopher to WordPress bridge. It lets you use WordPress as a CMS for any or all of
those three non-Web protocols in addition to the Web.
For example, that means that this post is available on all of:
It’s also possible to write posts that selectively appear via different media: if I want to put something exclusively on my gemlog, I can, by assigning metadata that
tells WordPress to suppress a post but still expose it to CapsulePress. Neat!
Using Gemini and friends in the 2020s make me feel like the dream of the Internet of the nineties and early-naughties is still alive. But with fewer banner ads.
I’ve open-sourced the whole thing under a super-permissive license, so if you want your own WordPress blog to “feed” your Gemlog… now you can. With a few caveats:
It’s hard to use. While not as hacky as the disparate piles of code it replaced, it’s still not the cleanest. To modify it you’ll need a basic comprehension of all
three protocols, plus Ruby, SQL, and sysadmin skills.
It’s super opinionated. It’s very much geared towards my use case. It’s improved by the use of templates. but it’s still probably only suitable for this
site for the time being, until you make changes.
It’s very-much unfinished. I’ve got a growing to-do list, which should
be a good clue that it’s Not Finished. Maybe it never will but. But there’ll be changes yet to come.
Whether or not your WordPress blog makes the jump to Geminispace4, I hope you’ll came take a look at mine at one of the URLs linked above,
and then continue to explore.
If you’re nostalgic for the interpersonal Internet – or just the idea of it, if you’re too young to remember it… you’ll find it there. (That Internet never actually went away,
but it’s harder to find on today’s big Web than it is on lighter protocols.)
It turns out that by default, WordPress replaces emoji in its feeds (and when sending email) with images of those emoji, using the Tweemoji set, and with the alt-text set to the original emoji. These images are hosted at https://s.w.org/images/core/emoji/…-based
URLs.
I can see why this functionality was added: what if the feed reader didn’t support Unicode or didn’t have a font capable of showing the appropriate emoji?
But I can also see reasons why it might not be desirable to everybody. For example:
Downloading an image will always be slower than rendering an emoji.
The code to include an image is always more-verbose than simply including an emoji.
As seen above: a feed reader which imposes a minimum size on embedded images might well render one “wrong”.
It’s marginally more-verbose for screen reader users to say “Image: heart emoji” than just “heart emoji”, I imagine.
Serving an third-party image when a feed item is viewed has potential privacy implications that I try hard to avoid.
Replacing emoji with images is probably unnecessary for modern feed readers anyway.
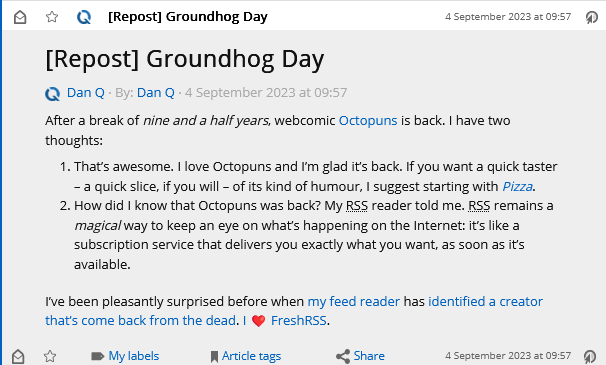
That’s all there is to it. Now, my feed reader shows my system’s emoji instead of a huge image:
I’m always grateful to discover that a piece of WordPress functionality, whether core or in an extension, makes proper use of hooks so that its functionality can be changed, extended,
or disabled. One of the single best things about the WordPress open-source ecosystem is that you almost never have to edit somebody else’s code (and remember to re-edit it
every time you install an update).
I’ve made a handful of tweaks to my RSS feed which I feel improves upon
WordPress’s default implementation, at least in my use-case.1 In case any of these improvements help
you, too, here’s a list of them:
Post Kinds in Titles
Since 2020, I’ve decorated post titles by prefixing them with the “kind” of post they are (courtesy of the Post Kinds
plugin). I’ve already written about how I do it, if you’re
interested.
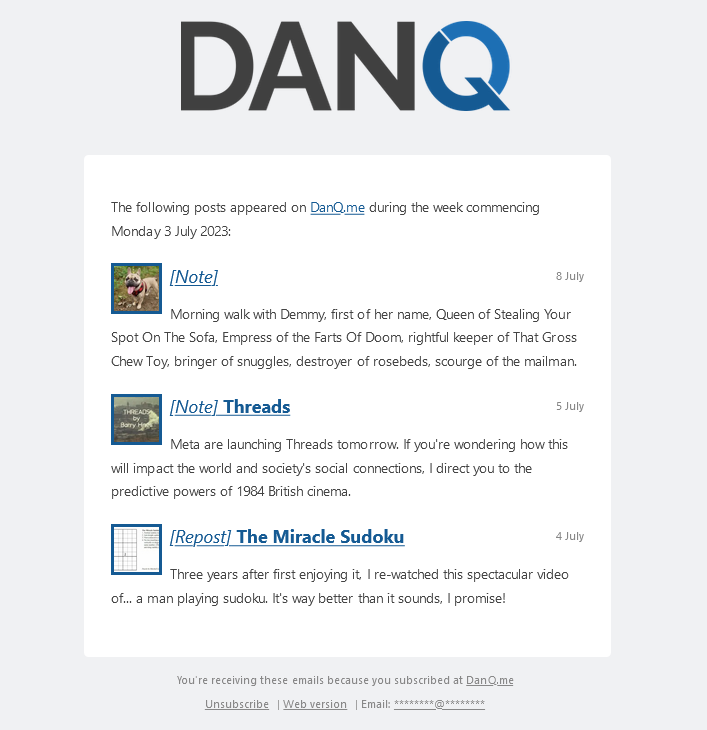
Identifying post kinds is particularly useful for people who subscribe by
email (the emails are generated off the RSS feed either daily or weekly: subscriber’s choice), who might want to see
articles and videos but not care about for example checkins and reposts.
RSS Only posts
A minority of my posts are – initially, at least – publicised only via my RSS feed (and places that are directly fed
by it, like email subscribers). I use a tag to identify posts to be hidden in this way. I’ve
written about my implementation before, but I’ve since made a couple of additional improvements:
Suppressing the tag from tag clouds, to make it harder to accidentally discover these posts by tag-surfing,
Tweaking the title of such posts when they appear in feeds (using the same technique as above), so that readers know when they’re seeing “exclusive” content, and
Setting a X-Robots-Tag: noindex, nofollow HTTP header when viewing such tag or a post, to discourage
search engines (code for this not shown below because it’s so very specific to my theme that it’s probably no use to anybody else!).
// 1. Suppress the "rss club" tag from tag clouds/the full tag listfunctionrss_club_suppress_tags_from_display( string $tag_list, string $before, string $sep, string $after, int $post_id ): string {
foreach(['rss-club'] as$tag_to_suppress){
$regex=sprintf( '/<li>[^<]*?<a [^>]*?href="[^"]*?\/%s\/"[^>]*?>.*?<\/a>[^<]*?<\/li>/', $tag_to_suppress );
$tag_list=preg_replace( $regex, '', $tag_list );
}
return$tag_list;
}
add_filter( 'the_tags', 'rss_club_suppress_tags_from_display', 10, 5 );
// 2. In feeds, tweak title if it's an RSS exclusivefunctionrss_club_add_rss_only_to_rss_post_title( $title ){
$post_tag_slugs=array_map(function($tag){ return$tag->slug; }, wp_get_post_tags( get_the_ID() ));
if ( !in_array( 'rss-club', $post_tag_slugs ) ) return$title; // if we don't have an rss-club tag, drop out herereturn trim( "{$title} [RSS Exclusive!]" );
return$title;
}
add_filter( 'the_title_rss', 'rss_club_add_rss_only_to_rss_post_title', 6 );
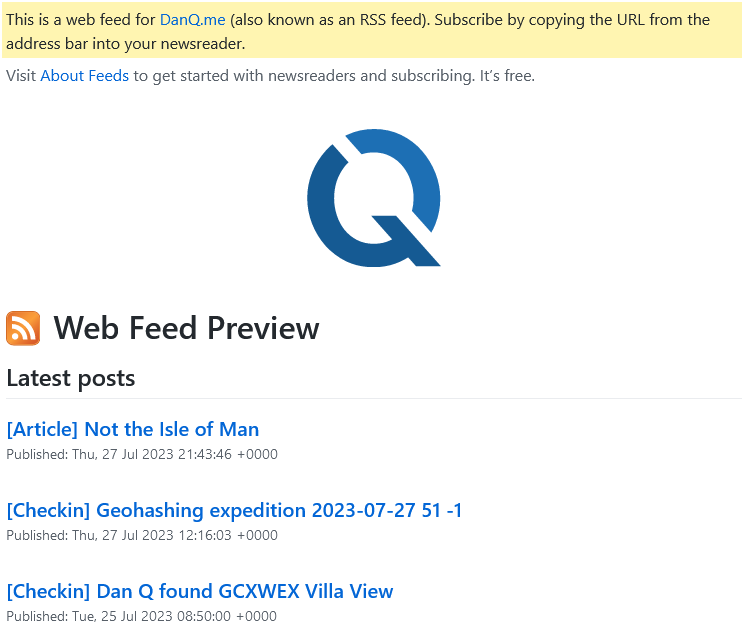
Adding a stylesheet
Adding a stylesheet to your feeds can make them much friendlier to beginner users (which helps drive adoption) without making them much less-convenient for people who know how
to use feeds already. Darek Kay and Terence Eden both wrote great articles about this just
earlier this year, but I think my implementation goes a step further.
In addition to adding some “Q” branding, I made tweaks to make it work seamlessly with both my RSS and Atom feeds by using
two<xsl:for-each> blocks and exploiting the fact that the two standards don’t overlap in their root namespaces. Here’s my full XSLT; you need to
override your feed template as Terence describes to use it, but mine can be applied to both RSS and Atom.2
I’ve still got more I’d like to do with this, for example to take advantage of the thumbnail images I attach to posts. On which note…
Thumbnail images
When I first started offering email subscription options I used Mailchimp’s RSS-to-email service, which was… okay,
but not great, and I didn’t like the privacy implications that came along with it. Mailchimp support adding thumbnails to your email template from your feed, but WordPress themes don’t
by-default provide the appropriate metadata to allow them to do that. So I installed Jordy Meow‘s RSS Featured Image plugin which did it for me.
<item><title>[Checkin] Geohashing expedition 2023-07-27 51 -1</title><link>https://danq.me/2023/07/27/geohashing-expedition-2023-07-27-51-1/</link>
...
<media:contenturl="https://bcdn.danq.me/_q23u/2023/07/20230727_141710-1024x576.jpg"medium="image"/><media:description>Dan, wearing a grey Three Rings hoodie, carrying French Bulldog Demmy, standing on a path with trees in the background.</media:description></item>
Media attachments for RSS feeds are perhaps most-popular for podcasts, but they’re also great for post thumbnail images.
During my little redesign earlier this year I decided to go two steps further: (1) ditching the
plugin and implementing the functionality directly into my theme (it’s really not very much code!), and (2) adding not only a <media:content medium="image" url="..."
/> element but also a <media:description> providing the default alt-text for that image. I don’t know if any feed readers (correctly) handle this
accessibility-improving feature, but my stylesheet above will, some day!
So there we have it: a little digital gardening, and four improvements to WordPress’s default feeds.
RSS may not be as hip as it once was, but little improvements can help new users find their way into this (enlightened?) way
to consume the Web.
If you’re using RSS to follow my blog, great! If it’s not for you, perhaps pick your favourite alternative way to get updates, from options including email, Telegram, the Fediverse (e.g. Mastodon), and more…
1 The changes apply to the Atom
feed too, for anybody of such an inclination. Just assume that if I say RSS I’m including Atom, okay?
2 The experience of writing this transformation/stylesheet also gave me yet another opportunity to remember how much I hate
working with XSLTs. This time around, in addition to the normal namespace issues and headscratching
syntax, I had to deal with the fact that I initially tried to use a feature from XSLT version 2.0 (a
22-year-old version) only to discover that all major web browsers still only support version 1.0 (specified last millenium)!
There’s a perception that a blog is a long-lived, ongoing thing. That it lives with and alongside its author.1
But that doesn’t have to be true, and I think a lot of people could benefit from “short-term” blogging. Consider:
Photoblogging your holiday, rather than posting snaps to social media
You gain the ability to add context, crosslinking, and have permanent addresses (rather than losing eveything to the depths of a feed). You can crosspost/syndicate to your favourite
socials if that’s your poison..
Photoblog your holiday and I might follow it, and I’ll do so at my convenience. Put your snaps on Facebook and I almost certainly won’t bother. Photo courtesy ArtHouse Studio.
Blogging your studies, rather than keeping your notes to yourself
Writing what you learn helps you remember it; writing what you learn in a public space helps others learn too and makes it easy to search for your discoveries later.2
Recording your roleplaying, rather than just summarising each session to your fellow players
My D&D group does this at levellers.blog! That site won’t continue to be updated forever – the party will someday retire or, more-likely, come to a
glorious but horrific end – but it’ll always live on as a reminder of what we achieved.
One of my favourite examples of such a blog was 52 Reflect3 (now integrated into its successor The Improbable Blog). For 52 consecutive weeks my partner‘s brother Robin
blogged about adventures that took him out of his home in London and it was amazing. The project’s finished, but a blog was absolutely the right medium for it because now it’s got a
“forever home” on the Web (imagine if he’d posted instead to Twitter, only for that platform to turn into a flaming turd).
I don’t often shill for my employer, but I genuinely believe that the free tier on WordPress.com is an excellent
way to give a forever home to your short-term blog4.
Did you know that you can type new.blog (or blog.new; both work!) into your browser to start one?
What are you going to write about?
Footnotes
1This blog is, of course, an example of a long-term blog. It’s been going in
some form or another for over half my life, and I don’t see that changing. But it’s not the only kind of blog.
2 Personally, I really love the serendipity of asking a web search engine for the solution
to a problem and finding a result that turns out to be something that I myself wrote, long ago!
4 One of my favourite features of WordPress.com is the fact that it’s built atop the
world’s most-popular blogging software and you can export all your data at any time, so there’s absolutely no lock-in: if you want to migrate to a competitor or even host your own
blog, it’s really easy to do so!
My second day of the main conference part of WordCamp Europe 2023 was hampered slightly by a late start on my part.
I can’t say for certain why I woke up mildly hungover and with sore knees, but I make an educated guess that it might be related to the Pride party I found myself at last night.
Still, I managed to get to all the things I’d earmarked for my attention, including:
I’m sure I can’t be the only person who’s been asked “why can’t the (or ‘shouldn’t the’) WordPress post editor let multiple people edit post at the same time”. Often, people
will compare it to e.g. Google Docs.
I can’t begin to speculate how often people must ask this supposedly-trivial question of Dawid Urbański, possibly the world’s expert on this
very question.
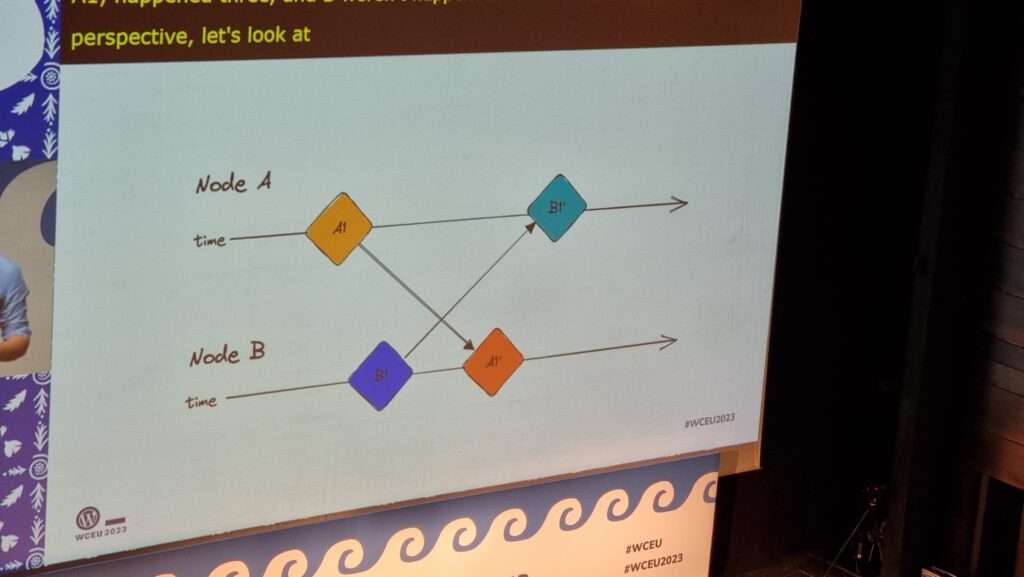
Dawid summarised the challenging issues in any effort to implement this much-desired feature. Some of them are examples of those unsolved problems that keep rearing their heads in
computer science, like the two generals’ problem, but even the solvable problems are difficult: How does one
handle asynchronous (non-idempotent) commutative operations? How is the order of disparate actions determined? Which node is the source of truth? If a server is used, where is that
server (with a nod to quite how awful the experience of implementing a Websockets server in PHP can be…)? And so on…
Slides showing simplified timelines of parties communicating with one another in ambigous ways
I really appreciated Dawid’s reference to the various bits of academic literature that’s appeared over the last four decades (!) about how these problems might be solved. It’s a strong
reminder that these things we take for granted in live-updating multi-user web applications are not trivial and every question you can answer raises more questions.
There’s some great early proof-of-concepts, so we’re “getting there”, and it’s an exciting time. Personally, I love the idea of the benefits this could provide for offline editing
(perhaps just because I’m still a huge fan of a well-made PWA!).
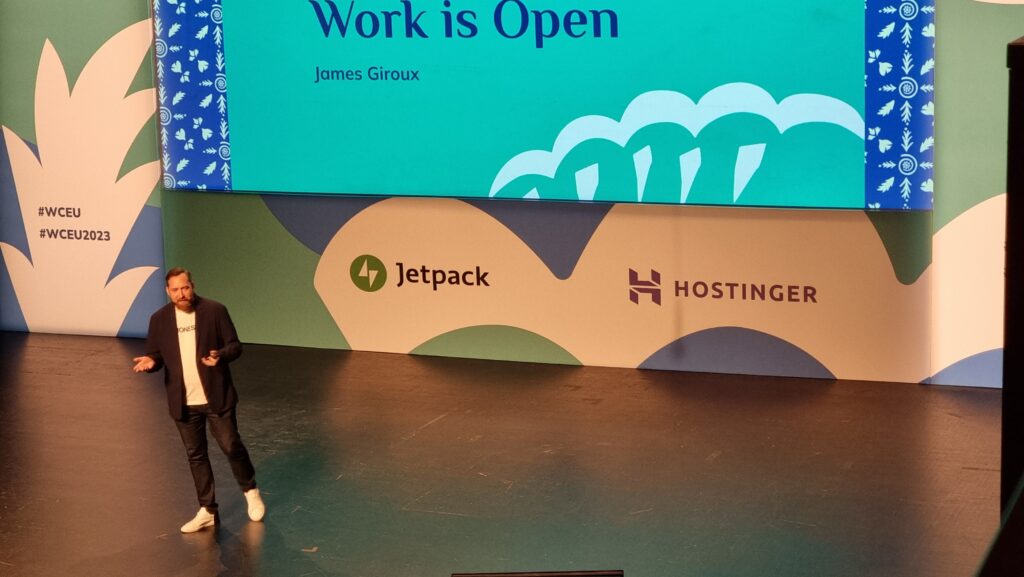
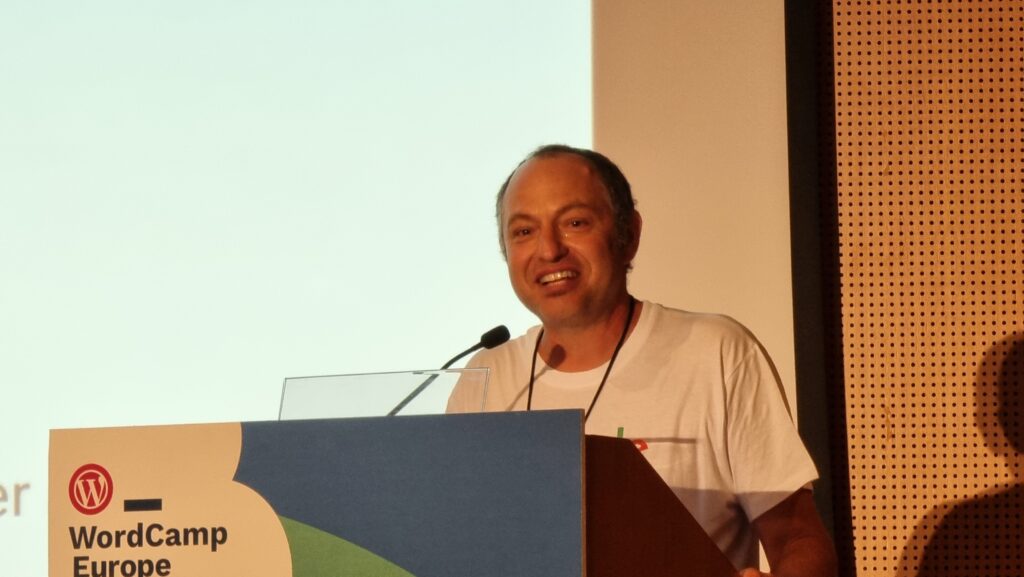
James Giroux’s goal: that we all become more curious about and more invested in our team’s experiences, from a humanistic standpoint. His experience of companies with organic growth of
software companies is very, very familiar: you make a thing and give it away, then you need more people, then you’ve somehow got a company and it’s all because you just had an idea
once. Sounds like Three Rings!
Financial success is not team success, as Twitter shows, with their current unsustainable and unhappy developer culture, James reminds us.
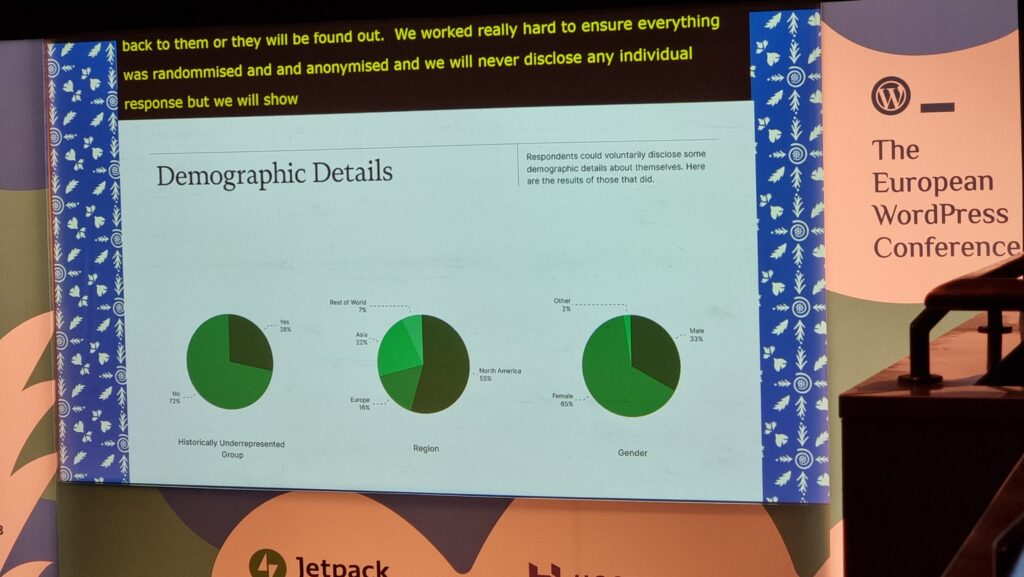
James was particularly keen to share with us the results of his Team Experience Index research, and I agree that some of the result are
especially exciting, in particularly the willingness of underrepresented groups, especially women, to enagage with the survey: this provides hugely valuable data about the health of
teams working in the WordPress space.
The statistician in me immediately wanted to know how the non-response rate to these (optional) questions varied relative to one another (if they’re very different, putting these pie
charts alongside one another could be disingenuous!), but I’m tentatively excited by the diversity represented anyway.
“We have this project that we work with and contribute to, that we love,” says James, in an attempt to explain the highly-positive feedback that his survey respondents gave when asked
questions about the authenticity of their purpose and satisfaction in their role.
Again, my inner statistician wants to chirp up about the lack of a control group. The data from the survey may well help companies working within the WordPress ecosystem to
identify things we’re doing well and opportunities for growth, but it’d also be cool to compare these metrics to those in companies outside of the WordPress world!
So, what do we do with these findings? How do WordPress-ey companies improve? James recommends that we:
Get better are showing what recognition, celebration, and career growth looks like,
Improve support and training for team leaders to provide them with the tools to succeed and inspire, and
Bridge the gap between leadership and team members with transparent, open dialogue.
Good tips, there.
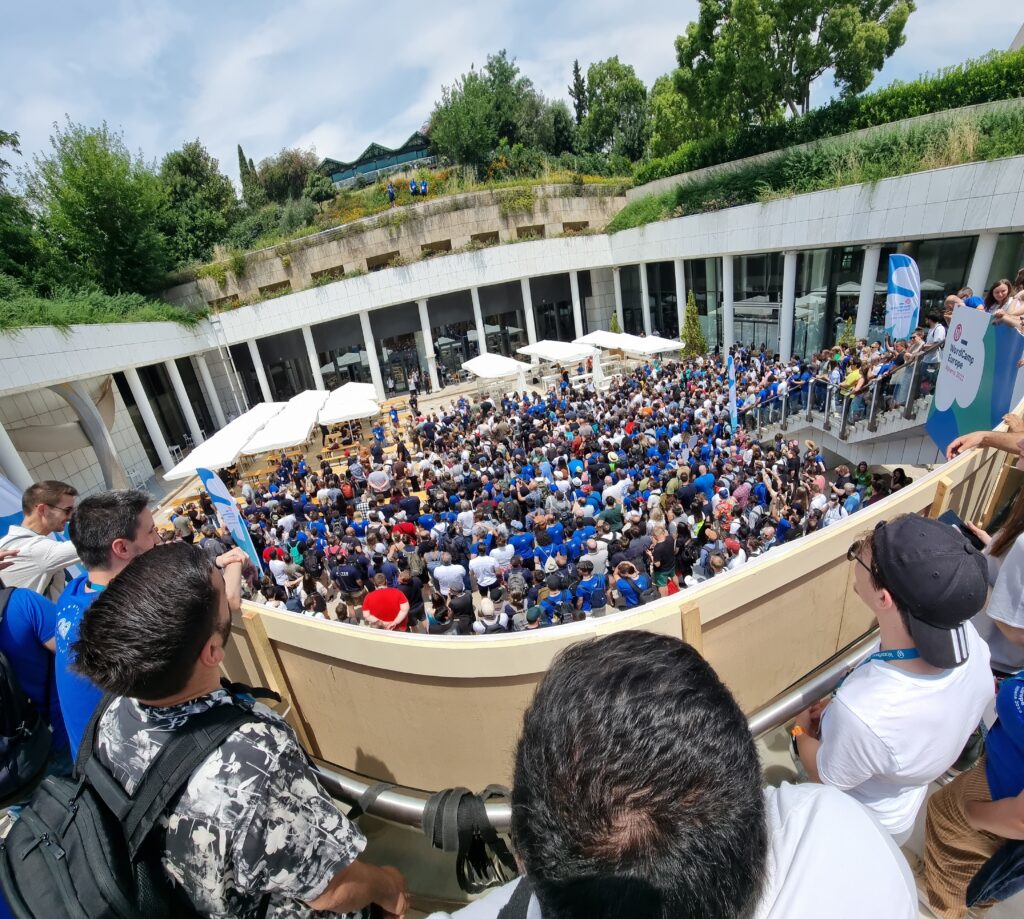
The Big Photo
A WordCamp tradition is to try to squeeze every willing participant into a photo. Clearly with the size that these events are, nowadays, this requires some wrangling (and, in this case,
the photographers standing atop the roof of a nearby building to get everybody into frame).
Like herding cats, trying to get several hundred people to line up where you want them for a photograph is an exercise in patience.
I’ll have to keep an eye out for the final picture and see if I can find myself in it.
I always find that learning about bleeding edge CSS techniques makes me feel excited and optimistic, perhaps because
CSS lends itself so well towards a progressive enhancement approach to development: often, you can start using a new technique
today and it’ll only benefit, say, people using a beta version of a particular browser (and perhaps only if they opt-in to the applicable feature flag). But if you’ve designed
your site right then the lack of this feature won’t impact anybody else, and eventually the feature will (hopefully) trickle-down into almost everybody’s Web experience.
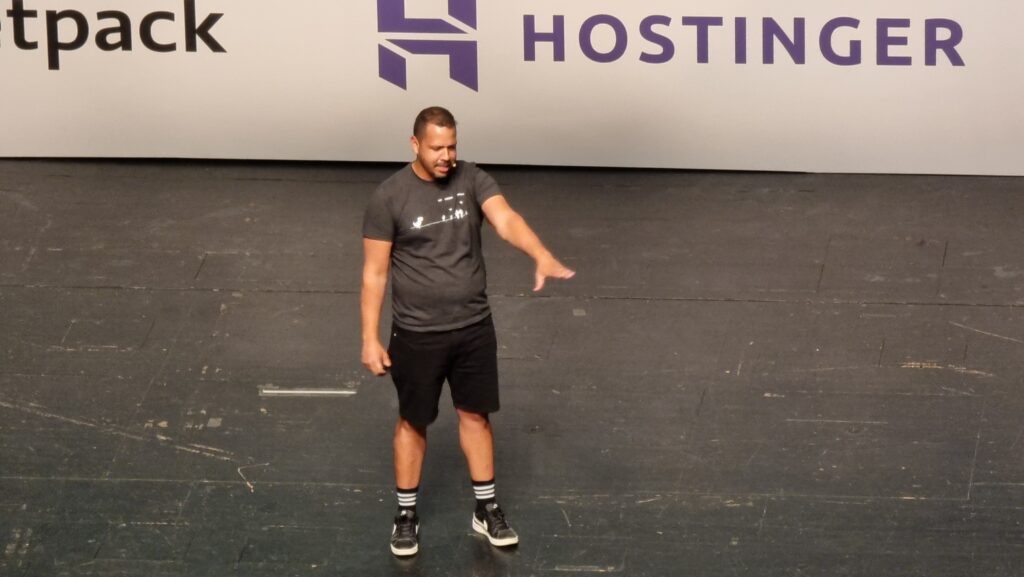
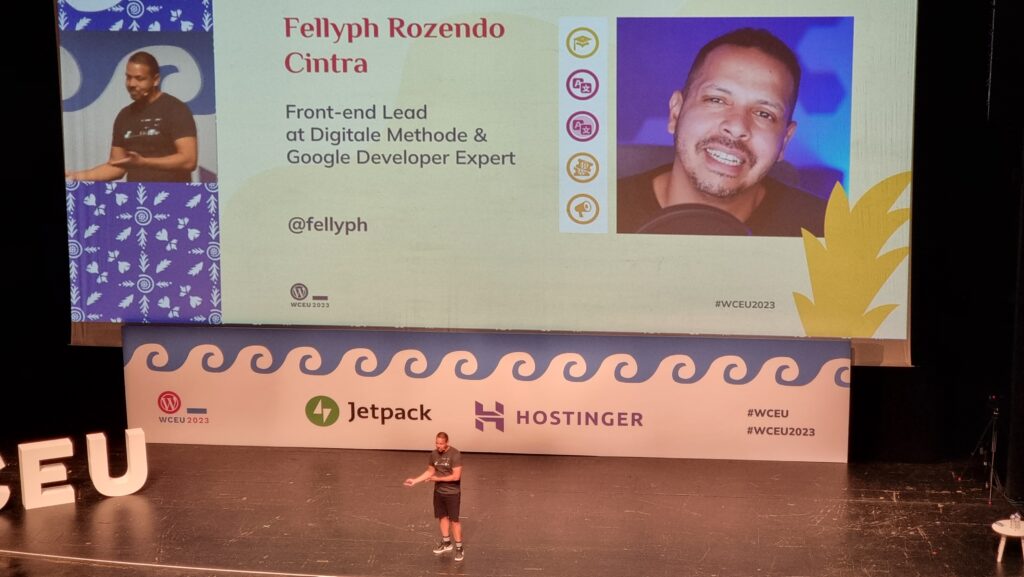
Anyway, that’s what Fellyph Cintra says too, but he adds that possibly we’ve still not grown out of thinking that browsers take a long
time between versions. 5 years passed between the release of Internet Explorer 6 and Internet Explorer 7, for example! But nowadays most browsers are evergreen with releases each
month! (Assuming we quietly ignore that Apple don’t sent new versions of Safari to old verisons of MacOS, continuing to exacerbate a problem that we used to see with Internet Explorer
on Windows, ahem.)
Fellyph told us about how he introduced <dialog> to his team and they responded with skepticism that they’d be able to use it within the next 5 years. But in fact
it’s already stable in every major browser.
An important new development may come from Baseline, a project to establish a metric of what you can reliably use on the Web today. So a
bit like Can I Use, I guess, but taken from the opposite direction: starting from the browsers and listing the features, rather than the other way
around.
Anyway, Fellyph went on to share some exciting new ideas that we should be using, like:
object-fit and object-position, which can make the contents of any container “act like” a background
aspect-ratio, which I’m already using and I love, but I enjoyed how Fellyph suggested combining the two to crop images to a fluid container on the client side
scroll-behavior: smooth, which I’ve used before; it’s pretty good
clamp, which I use… but I’m still not sure I fully grok it: I always have to load some documentation with examples when I use it
@container queries, which can apply e.g. (max-width: ...) rules to things other than the viewport, which I’ve not found a need for yet but I can see the
value of it
@layers, which grant an additional level of importance in the cascade: for example, you might load a framework into a layer (with @import url(...)
layer(framework)) which is defined as a lower-priority than your override layer, meaning you won’t have to start slapping !important all over the shop
@media (400px <= width <= 600px)-style media queries, which are much easier to understand than min-width: if you’re used to thinking in a
more-procedural programming language (I assume they work in container queries too!)
…
It’s also worth remembering:
@supports, which is badass and I love and use it already (it was especially useful as display: grid began to roll out and I wanted to start using it but
needed to use a fallback method for browsers that didn’t support it yet
:has(), which I’ve long thought is game-changing: styling something based on what it contains is magical; not really suitable for mainstream use yet without
Firefox support, though (it’s still behind a feature flag)! Fellyph sold me on the benefit of :not(:has(...)), though!
Nesting, which again doesn’t have Firefox support yet but provides SCSS-like nesting in CSS, which is awesome
Scroll-driven animations, which can e.g. do parallax effects without JavaScript (right now it’s Canary only, mind…), using e.g. animation-timeline: and
animation-range: to specify that it’s the scroll position within the document that provides the timeline for the animation
And keeping an eye on upcoming things like text-balanced (which I’m already excited by), popover, selectmenu, view transitions (which I’ve been
experimenting with because they’re cool), and scoped style.
For my second workshop, I joined Google’s Adam Silverstein to watch him dissect a few participants’ websites performance using Core Web
Vitals as a metric. I think I already know the basics of Core Web Vitals, but when it comes to improving my score (especially on work-related sites with
unpleasant reliance on heavyweight frameworks like React, in my experience).
In an early joke, Adam pointed out that you can reduce JavaScript thread blocking by removing JavaScript from your site. A lot of people laughed, but frankly I think it’s a great
idea.
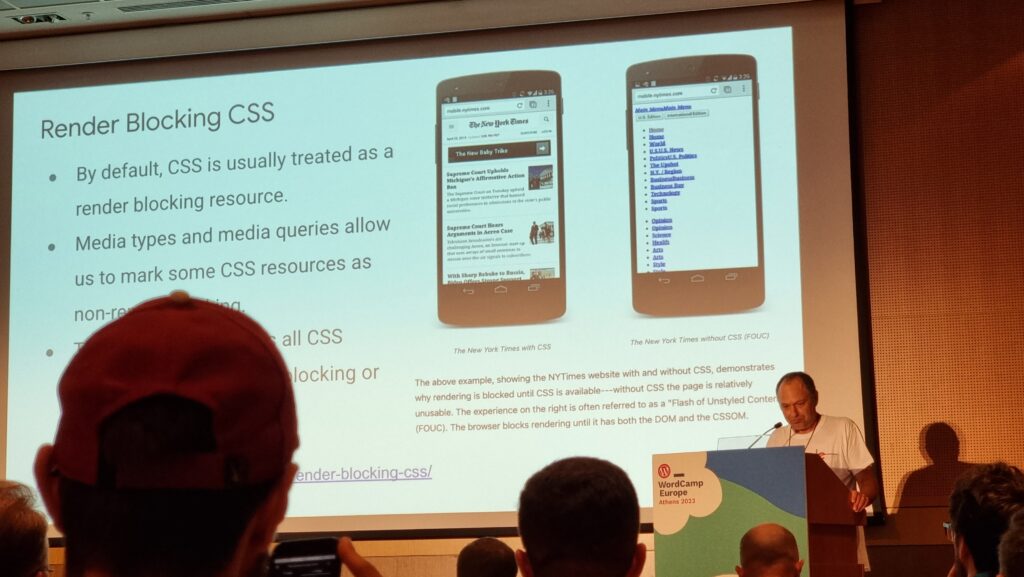
We talked a lot about render blocking (thanks to JS and CSS in the
<head>), thread blocking (by scripts, especially those reacting to user input), TTFB (relating to actual network
and server performance, or at least server-side processing), TBT (the time between FCP and TTI), and the upcoming change to measure INP rather than FID. That’s a lot of acronyms.
The short of it is that there are three pillars to Core Web Vitals: loading (how long until the page renders), interactivity (how long until the page
responds to user interaction), and stability (how long it takes for the page to cease layout shifts as a result of post-load scripts and stylesheets). I was pleased
that Adam acknowledged the major limitation of lab testing resulting from developers often using superior hardware and Internet connections to typical users, and how if you’re
serious about performance metrics you’ll want to collect RUM data.
The fastest way to improve rendering performance is to put fewer obstacles in the way of rendering.
I came away with a few personalised tips, but they’re not much use for your site: I paid attention to the things that’ll be helpful for the sites I look after. But
I’ll be taking note of his test pages so I can play with some of the tools he demonstrated later on.
I couldn’t liveblog this because I spent too much of the session applauding. A few highlights from memory:
Phase 2 (of 4) of Gutenberg is basically complete, which is cool. Some back-and-forth about the importance of phase 4 (bringing better multilingual support to WordPress) and how it
feels like it’s a long way away.
In the same vein as his 2016 statement that WordPress developers should “learn JavaScript deeply”, Matt leant somewhat into the idea that from today they
should “watch AI carefully”; I’m not 100% convinced, but it’s not been stopping me from getting involved with a diversity of AI experiments (including some WordPress-related ones)
anyway.
Musings about our community being a major part of why WordPress succeeded (and continues to thrive) unlike some other open source projects of its era. I agree that’s a
factor, but I suspect that being in the right place at the right time was also important. Perhaps more on that another time.
Announcement of the next WordCamp Europe location.