The week before last I had the opportunity to deliver a “flash talk” of up to 4 minutes duration at a work meetup
in Vienna, Austria. I opted to present a summary of what I’ve learned while adding support for Finger and Gopher protocols to the WordPress installation that powers DanQ.me (I
also hinted at the fact that I already added Gemini and
Spring ’83 support, and I’m looking at other protocols). If you’d like to see how it went, you can watch my flash talk here or on YouTube.
If you love the idea of working from wherever-you-are but ocassionally meeting your colleagues in person for fabulous in-person events with (now optional) flash talks like this, you
might like to look at Automattic’s recruitment pages…
The presentation is a shortened, Automattic-centric version of a talk I’ll be delivering tomorrow at Oxford Geek Nights #53; so if
you’d like to see it in-person and talk protocols with me over a beer, you should come along! There’ll probably be blog posts to follow with a more-detailed look at the how-and-why of
using WordPress as a CMS not only for the Web but for a variety of zany, clever, retro, and retro-inspired protocols down the
line, so perhaps consider the video above a “teaser”, I guess?
It all started when I saw no-ht.ml, Terence Eden‘s hilarious response to Salma
Alam-Naylor‘s excellent HTML is all you need to make a website. The latter is an
argument against both the silly amount of JavaScript with which websites routinely burden their users, but also even against depending on CSS. As a fan of CSS Naked Day and a firm
believer in using JS only for progressive enhancement, I’m obviously in favour.
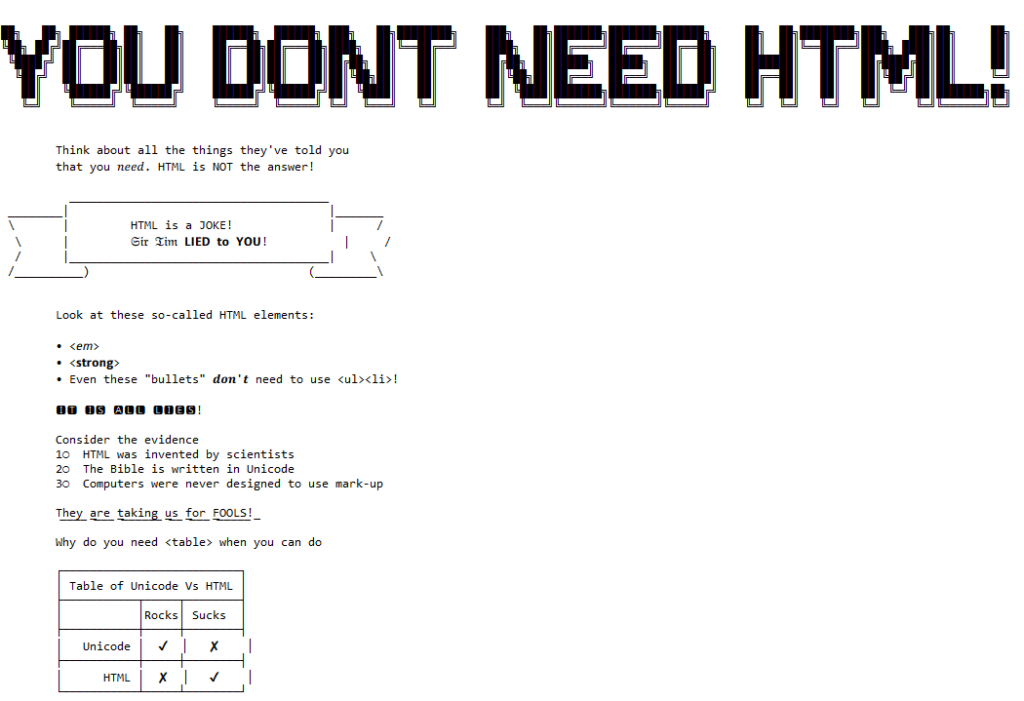
Obviously no-ht.ml is to be taken as tongue-in-cheek, but as you’re about to see: it caught my interest and got me thinking: how could I go even further.
Terence’s site works by delivering a document with a
claimed MIME type of text/html, but which contains only the (invalid) “HTML” code
<!doctype UNICODE><meta charset="UTF-8"><plaintext> (to work around browsers’ wish to treat the page as HTML). This is followed by a block of UTF-8 plain text making use of spacing
and emoji to illustrate and decorate the content. It’s frankly very silly, and I love it.1
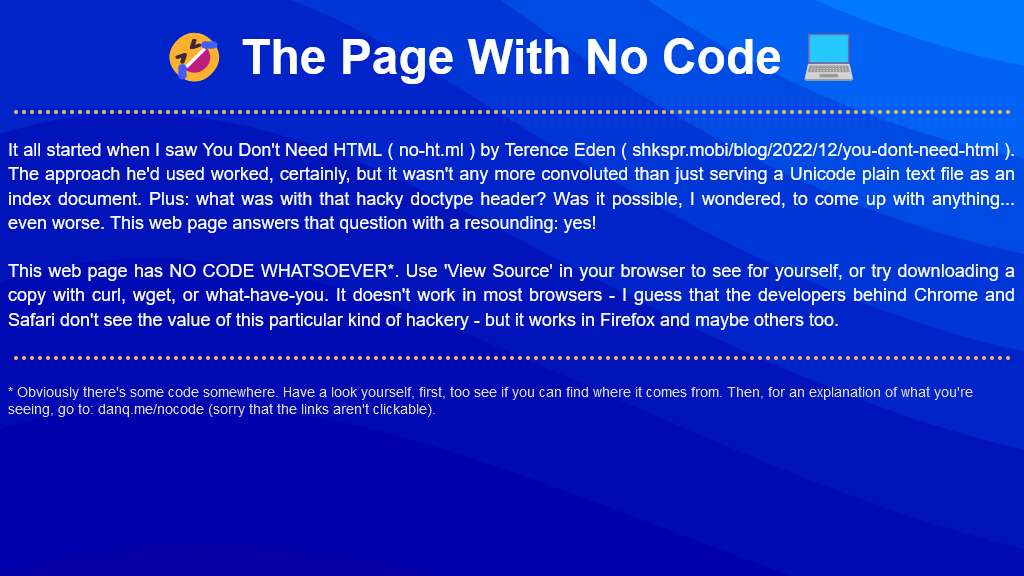
I think it’s possible to go one step further, though, and create a web page with no code whatsoever. That is, one that you can read as if it were a regular web page, but where
using View Source or e.g. downloading the page with curl will show you… nothing.
I present: The Page With No Code! (It’ll probably only work if you’re using Firefox, for reasons that will become apparent later.)
I’d encourage you to visit The Page With No Code, use View Source to confirm for yourself that it truly has no code, and see if you can work out for yourself how it manages
this feat… before coming back here for an explanation. Again: probably Firefox-only.
Once you’ve had a look for yourself and had a chance to form an opinion, here’s an explanation of the black magic that makes this atrocity possible:
The page is blank. It’s delivered with Content-Type: text/html. Your browser interprets a completely-blank page as faulty and corrects it to a functionally-blank
minimal HTML page: <html><head></head><body></body></html>.
<body> and <html> elements can be styled with CSS; this includes the ability to add
content:::before and ::after each
element. If only we could load a stylesheet then content injection is possible.
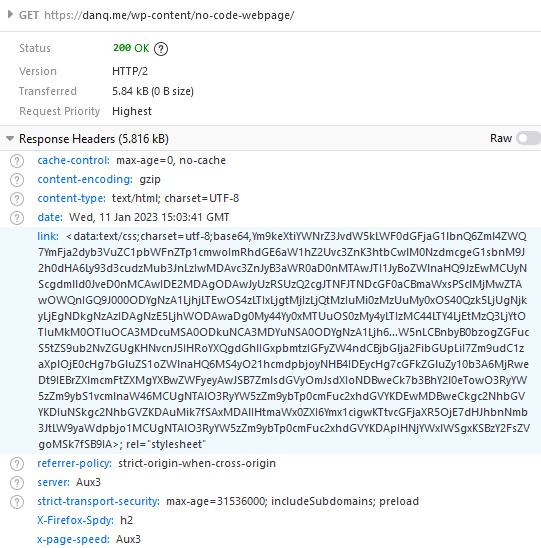
We use the fourth way to inject
CSS – a Link: HTTP header – to deliver a CSS payload (this, unfortunately, only works in Firefox). To further obfuscate what’s happening and remove the need for a round-trip, this is encoded
as a data: URI.
The stylesheet – and all the page content – is right there in the Link: header if you just care to decode it! Observe that while 5.84kB of
data are transferred, the browser rightly states that the page is zero bytes in size.
My server-side implementation of this broke in 2023 after I upgraded Nginx; my new version doesn’t support the super-long Link: header needed
to make this hack work, so I’ve updated the page to use the Link: to reference the CSS file rather than embed it via a data URI. It’s not as cool, but it at least means you can
still see the page. Thanks to Thomas Bradshaw for pointing out the problem.
Footnotes
1 My first reaction was “why not just deliver something with Content-Type:
text/plain; charset=utf-8 and dispense with the invalid code, but perhaps that’s just me overthinking the non-existent problem.
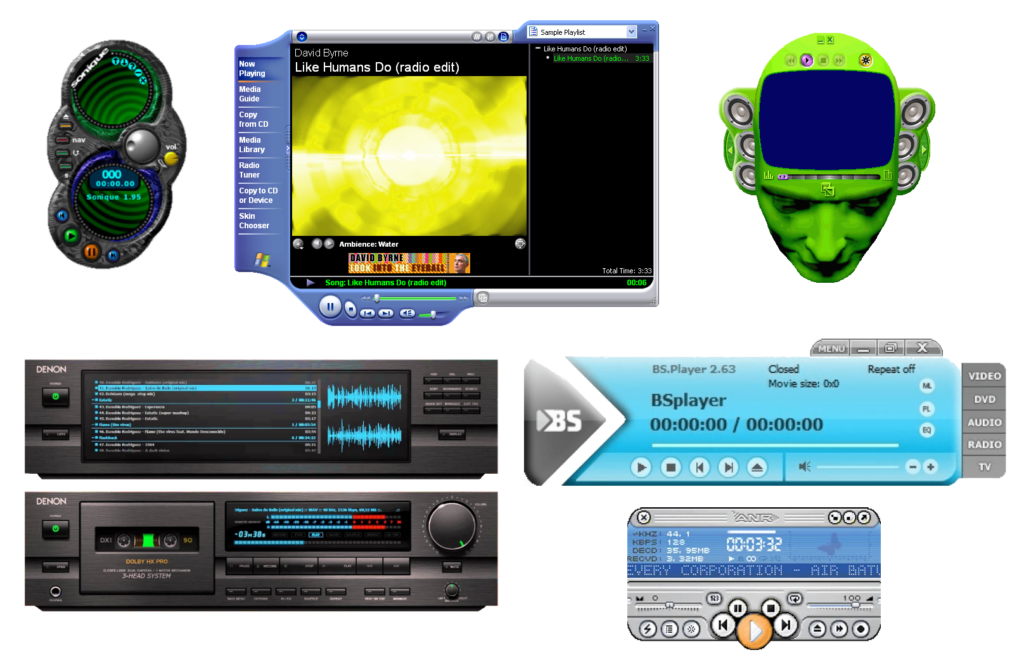
You don’t really see it any more, but: if you downloaded some media player software a couple of decades ago, it’d probably appear in a weird-shaped window, and I’ve never understood
why.
Mostly, these designs are… pretty ugly. And for what? It’s also worth noting that this kind of design can be found in all kinds of applications, in media players that it
was almost ubiquitous.
You might think that they’re an overenthusiastic kind of skeuomorphic design: people trying
to make these players look like their physical analogues. But hardware players were still pretty boxy-looking at this point, either because of the limitations of their data
storage1. By the time flash memory-based
portable MP3 players became commonplace their design was copying software players, not the other way around.
So my best guess is that these players were trying to stand out as highly-visible. Like: they were things you’d want to occupy a disproportionate amount of desktop space. Maybe
other people were listening to music differently than me… but for me, back when screen real estate was at such a premium2,
a music player’s job was to be small, unintrusive, and out-of-the-way.
I used to run Winamp in its very-smallest minified size, tucked up at the top of the screen, using
the default skin or one that made it even less-obtrusive.
It’s a mystery to me why anybody would (or still
does) make media player software or skins for them that eat so much screen space, frequently looking ugly while they do so, only to look like a hypothetical hardware device that
wouldn’t actually become commonplace until years after this kind of player design premiered!
Maybe other people listened to music on their computer differently from me: putting it front and centre, not using their computer for other tasks at the same time. And maybe for these
people the choice of player and skin was an important personalisation feature; a fashion statement or a way to show off their personal identity. But me? I didn’t get it then, and I
don’t get it now. I’m glad that this particular trend seems to have died and windows are, for the most part, rounded rectangles once more… even for music player software!
Footnotes
1 A walkman, minidisc player, or hard drive-based digital music device is always going to
look somewhat square because of what’s inside.
2 I “only” had 1600 × 1200 (UXGA) pixels on the very biggest monitor I owned before I went widescreen, and I spent a lot of time on monitors at lower resolutions e.g.
1024 × 768 (XGA); on such screens, wasting space on a music player when you’re mostly going to be listening “in the
background” while you do something else seemed frivolous.
This is a reply to a post published elsewhere. Its content might be duplicated as a traditional comment at the original source.
In his blog post “The ethics of syndicating comments using WebMentions”, Terence Eden said:
…
I want to see what people are writing in public about my posts. I also want to direct people to the conversations which are happening elsewhere on the web. But people – quite
rightly – might not want their content permanently stored by my site.
So I think I have a few options.
Do nothing. My site; my rules. If you don’t want me to grab your hot takes, don’t post them in public. (Feels a bit rude, TBQH.)
Be reactive. If someone asks me to remove their content, do so. (But, of course, how will they know I’ve made a copy?)
Stop syndicating comments. (I don’t wanna!)
Replace the verbatim comments with a link saying “Fred mentioned this article on Twitter” . (A bit of a disruptive experience for readers.)
Use oEmbed to capture the user’s comment and dynamically load it from the 3rd party site. That would update automatically if the user changes their name or deleted the
comment. (A massive faff to set up.)
…
Terence describes a problem that I’ve wrestled with myself. If somebody comments directly on my blog using the form at the bottom of a post, that’s a pretty strong indicator of
them giving their consent for their comment to be published at the bottom of that post (at my discretion). If somebody publicly replies somewhere my post is syndicated, that’s
less-obvious, but still pretty clear. If somebody merely mentions my post publicly, writing their own post and linking to mine… that’s a real fuzzy area.
I take a minimal approach; only capturing their full content if it’s short and otherwise trying to extract a snippet that contains the bit that mentioned my content, and I think that
works great. But Terence points out an important follow-up: what if the commenter deletes that content?
My approach so far has always been a reactive one – the second in Terence’s list – and I think it’s a morally-acceptable stance for a personal blogger. But I’m not sure it scales. I
find myself asking: what if a news outlet did this, taking my self-published feedback to their story and publishing it on their site, even if I later amended, retracted, or deleted it
on my own? If somebody’s making money out of my content, that feels different: I’ve always been clear that what I write on my blog is permissively-licensed, but that permissiveness is based on the prohibition of
commercial use of my content.
Perhaps down the line this can be solved technologically: something machine-readable akin to the <link rel="license" ...> tag could state an author’s preference for
how their content is syndicated by third parties they’ve mentioned, answering questions like:
Can you quote me, or just link to me? Who do these rules apply to? (Should we be attaching metadata to individual links?)
Should you inform me that you’ve done so, and if so: how (WebMention, etc.)?
If you (or your site) observe that my content has disappeared or changed for an extended time, should that be taken as revokation of consent to syndicate it?
Right now, the relevant technologies are not well-established enough to even begin this kind of work, but if a modern interconected federated web of personal websites takes off, it’s
the kind of question we might one day have to answer.
For now my gut feeling is that option #2 (reactive moderation of syndicated comments) is ethically-sufficient for personal websites. But I’ll be watching the feedback Terence (who
probably gets many more readers than I) receives in case my gut doesn’t represent the majority!
Nowadays if you’re on a railway station and hear an announcement, it’s usually a computer stitching together samples1. But back in the day, there used to be a human
with a Tannoy microphone sitting in the back office, telling you about the platform alternations and
destinations.
I had a friend who did it as a summer job, once. For years afterwards, he had a party trick that I always quite enjoyed: you’d say the name of a terminus station on a direct line from
Preston, e.g. Edinburgh Waverley, and he’d respond in his announcer-voice: “calling at Lancaster, Oxenholme the Lake District, Penrith, Carlisle, Lockerbie, Haymarket, and Edinburgh
Waverley”, listing all of the stops on that route. It was a quirky, beautiful, and unusual talent. Amazingly, when he came to re-apply for his job the next summer he didn’t get it,
which I always thought was a shame because he clearly deserved it: he could do the job blindfold!
There was a strange transitional period during which we had machines to do these announcements, but they weren’t that bright. Years later I found myself on Haymarket station waiting for
the next train after mine had been cancelled, when a robot voice came on to announce a platform alteration: the train to Glasgow would now be departing from platform 2, rather than
platform 1. A crowd of people stood up and shuffled their way over the footbridge to the opposite side of the tracks. A minute or so later, a human announcer apologised for the
inconvenience but explained that the train would be leaving from platform 1, and to disregard the previous announcement. Between then and the train’s arrival the computer tried twice
more to send everybody to the wrong platform, leading to a back-and-forth argument between the machine and the human somewhat reminiscient of the white zone/red zone scene from Airplane! It was funny perhaps only
because I wasn’t among the people whose train was in superposition.
Clearly even by then we’d reached the point where the machine was well-established and it was easier to openly argue with it than to dig out the manual and work out how to turn it off.
Nowadays it’s probably even moreso, but hopefully they’re less error-prone.
When people talk about how technological unemployment, they focus on the big changes, like how a tipping point with self-driving vehicles might one day revolutionise the haulage
industry… along with the social upheaval that comes along with forcing a career change on millions of drivers.
But in the real world, automation and technological change comes in salami slices. Horses and carts were seen alongside the automobile for decades. And you still find stations with
human announcers. Even the most radically-disruptive developments don’t revolutionise the world overnight. Change is inevitable, but with preparation, we can be ready for it.
103: Early Hints (“I’m not sure this can last forever.”)
300: Multiple Choices (“There are so many ways I can do better than you.”)
303: See Other (“You should date other people.”)
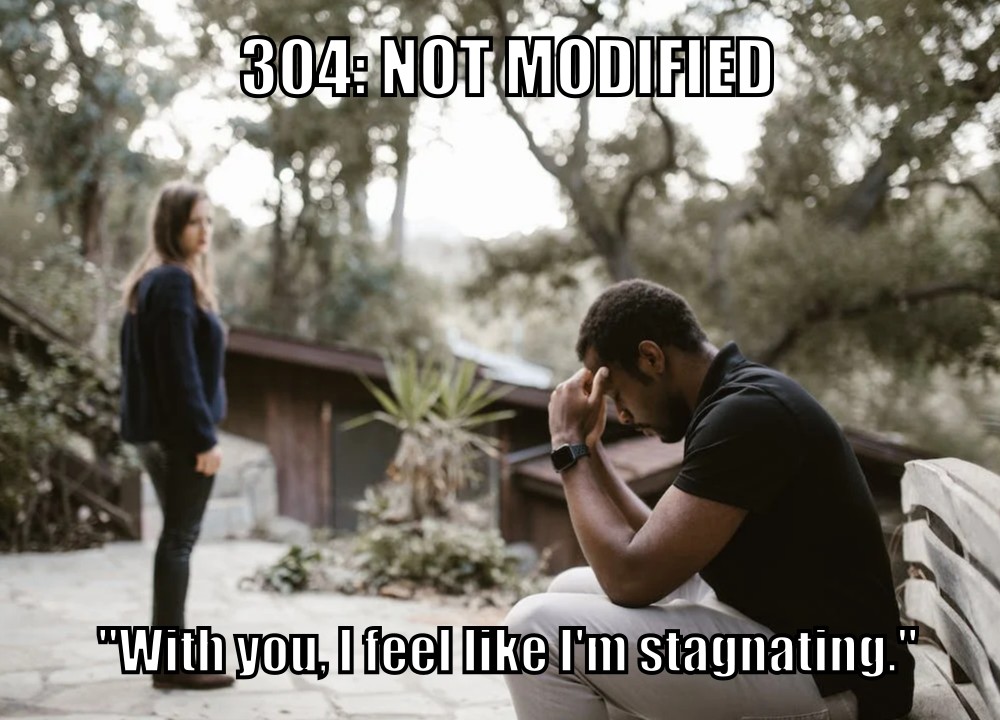
304: Not Modified (“With you, I feel like I’m stagnating.”)
402: Payment Required (“I am a prostitute.”)
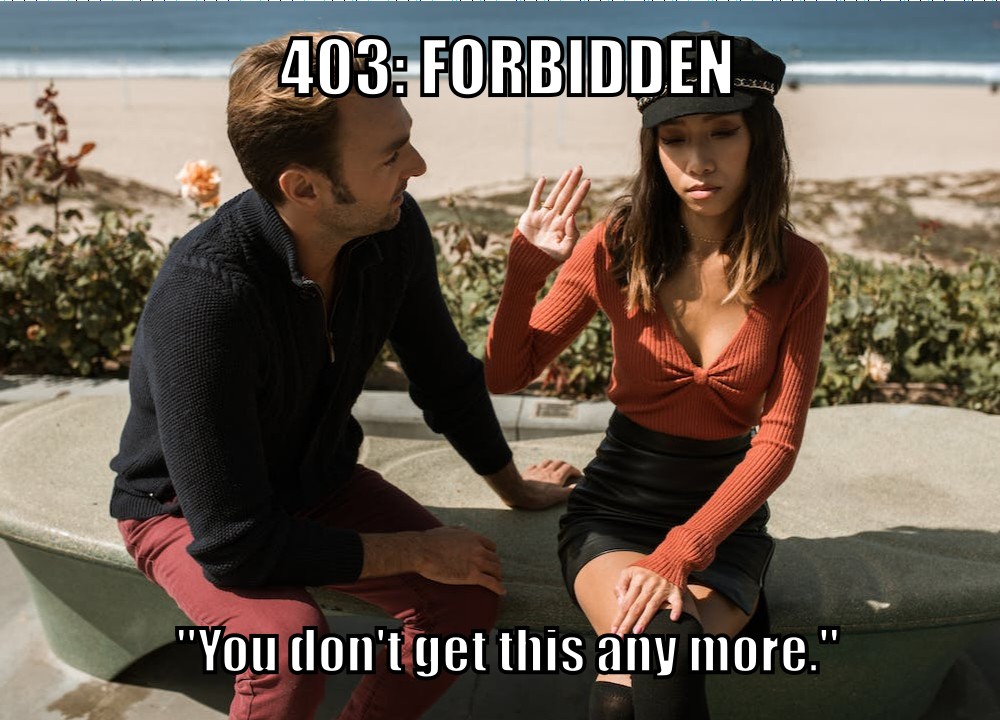
403: Forbidden (“You don’t get this any more.”)
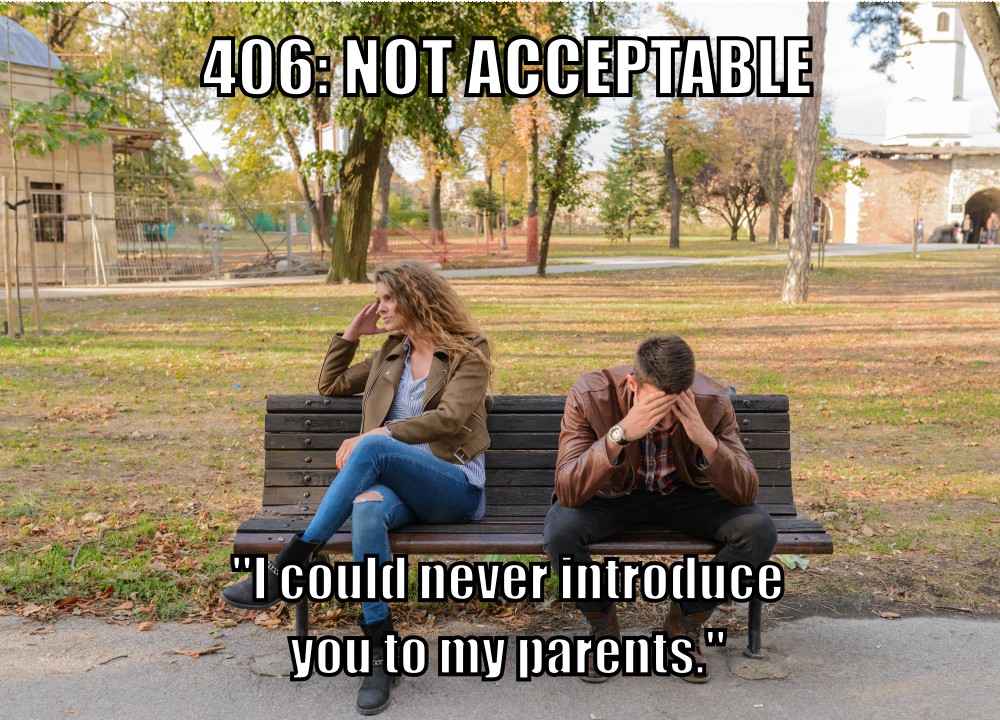
406: Not Acceptable (“I could never introduce you to my parents.”)
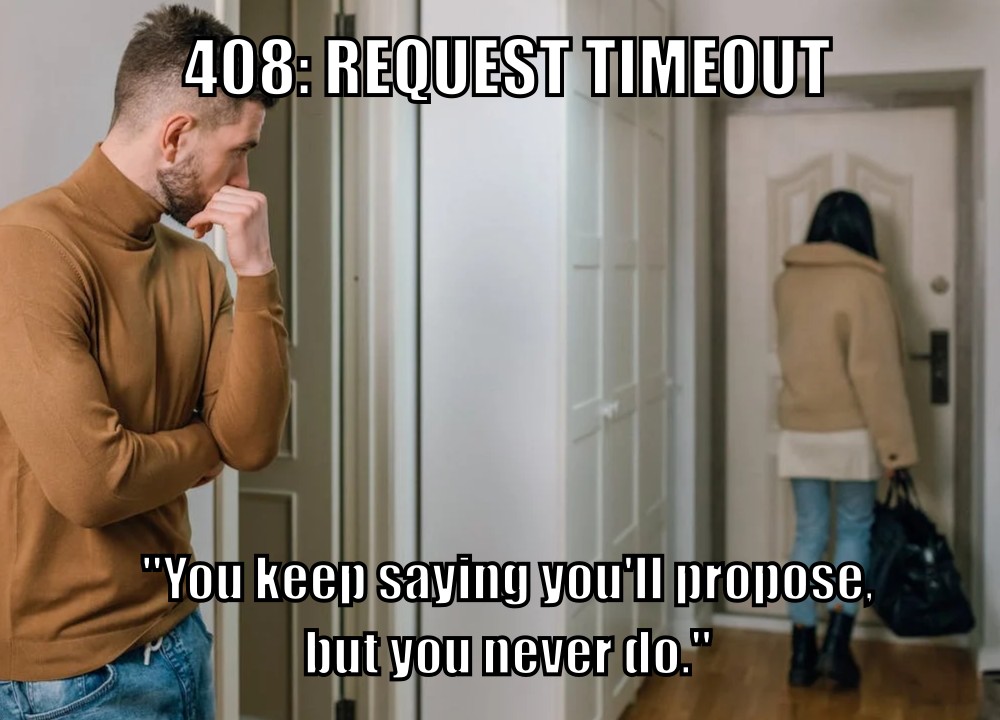
408: Request Timeout (“You keep saying you’ll propose but you never do.”)
409: Conflict (“We hate each other.”)
410: Gone (ghosted)
411: Length Required (“Your penis is too small.”)
413: Payload Too Large (“Your penis is too big.”)
416: Range Not Satisfied (“Our sex life is boring and repretitive.”)
425: Too Early (“Your premature ejaculation is a problem.”)
428: Precondition Failed (“You’re still sleeping with your ex-!?”)
429: Too Many Requests (“You’re so demanding!”)
451: Unavailable for Legal Reasons (“I’m married to somebody else.”)
502: Bad Gateway (“Your pussy is awful.”)
508: Loop Detected (“We just keep fighting.”)
With thanks to Ruth for the conversation that inspired these pictures, and apologies to the rest of the Internet for creating them.
Just in time for Robin Sloan to give up on Spring ’83, earlier this month I finally got aroud to launching STS-6 (named for the first mission of the Space Shuttle Challenger in Spring 1983), my experimental Spring ’83 server. It’s
been a busy year; I had other things to do. But you might have guessed that something like this had been under my belt when I open-sourced a keygenerator for the protocol the other day.
If you’ve not played with Spring ’83, this post isn’t going to make much sense to you. Sorry.
My server is, as far as I can tell, very different from any others in a few key ways:
It does not allow third-party publishing at all. Some might argue that this undermines the aim of the exercise, but I disagree. My IndieWeb inclinations lead me to
favour “self-hosted” content, shared from its owners’ domain. Also: the specification clearly states that a server must implement a denylist… I guess my denylist simply includes all keys that are
not specifically permitted.
It’s geared towards dynamic content.My primary board self-publishes whenever I produce a new blog post, listing the most recent blog posts published. I have
another half-implemented which shows a summary of the most-recent post, and another which would would simply use a WordPress page as its basis – yes, this was content
management, but published over Spring ’83.
It provides helpers to streamline content production. It supports internal references to other boards you control using the format {{board:123}}which are
automatically converted to addresses referencing the public key of the “current” keypair for that board. This separates the concept of a board and its content template from that
board’s keypairs, making it easier to link to a board. To put it another way, STS-6 links are self-healing on the server-side (for local boards).
It helps automate content-fitting. Spring ’83 strictly requires a maximum board size of 2,217 bytes. STS-6 can be configured to fit a flexible amount of dynamic
content within a template area while respecting that limit. For my posts list board, the number of posts shown is moderated by the size of the resulting board: STS-6 adds more and
more links to the board until it’s too big, and then removes one!
It provides “hands-off” key management features. You can pregenerate a list of keys with different validity periods and the server will automatically cycle through
them as necessary, implementing and retroactively-modifying <link rel="next"> connections to keep them current.
I’m sure that there are those who would see this as automating something that was beautiful because it was handcrafted; I don’t know whether or not I agree, but had Spring ’83
taken off in a bigger way, it would always only have been a matter of time before somebody tried my approach.
From a design perspective, I enjoyed optimising an SVG image of my header so it could meaningfully fit into the board. It’s
pretty, and it’s tolerably lightweight.
If you want to see my server in action, patch this into your favourite Spring ’83 client:
https://s83.danq.dev/10c3ff2e8336307b0ac7673b34737b242b80e8aa63ce4ccba182469ea83e0623
A dead end?
Without Robin’s active participation, I feel that Spring ’83 is probably coming to a dead end. It’s been a lot of fun to play with and I’d love to see what ideas the experience of it
goes on to inspire next, but in its current form it’s one of those things that’s an interesting toy, but not something that’ll make serious waves.
In his last lab essay Robin already identified many of the key issues with the system (too complicated, no interpersonal-mentions, the challenge of keys-as-identifiers, etc.) and while
they’re all solvable without breaking the underlying mechanisms (mentions might be handled by Webmention, perhaps, etc.), I
understand the urge to take what was learned from this experiment and use it to help inform the decisions of the next one. Just as John Postel’s Quote of the Day protocol doesn’t see much use any more (although maybe if my
finger server could support QotD?) but went on to inspire the direction of many subsequent “call-and-response” protocols,
including HTTP, it’s okay if Spring ’83 disappears into obscurity, so long as we can learn what it did
well and build upon that.
Meanwhile: if you’re looking for a hot new “like the web but lighter” protocol, you should probably check out Gemini. (Incidentally, you
can find me at gemini://danq.me, but that’s something I’ll write about another day…)
On Wednesday this week, three years and two months after Oxford Geek Nights #51, Oxford Geek Night
#52. Originally scheduled for 15 April 2020 and then… postponed slightly because of the pandemic, its reapparance was an epic moment that I’m glad to have been a part of.
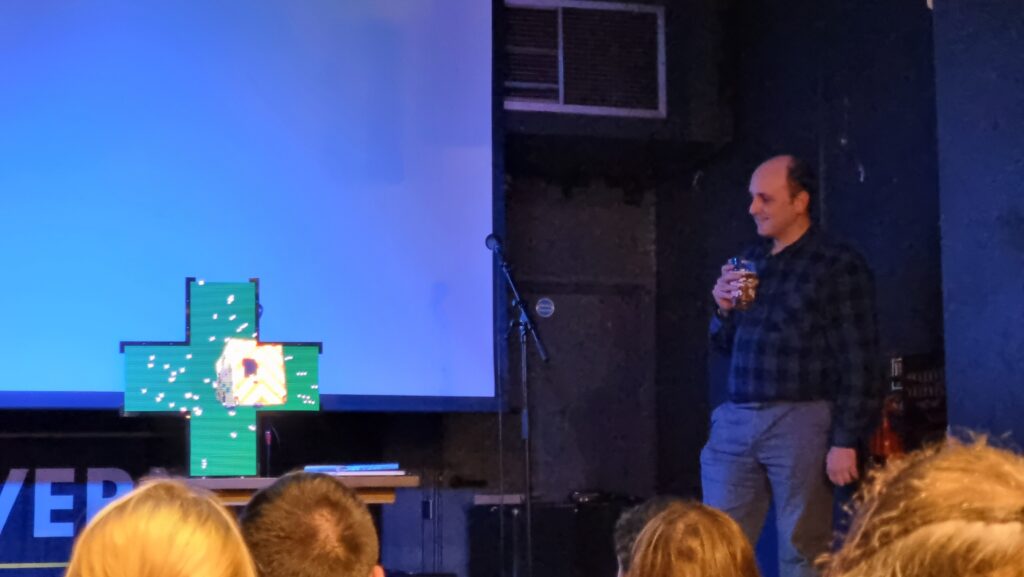
A particular highlight of the night was witnessing “Gasman”Matt Westcott show off his
epic demoscene contribution Pharmageddon, which is presented via a “pharmacy sign”. Here’s a video, if you’re interested.
Ben Foxall also put in a sterling performance; hearing him talk – as usual – made me say “wow, I didn’t know you could do that with a
web browser”. And there was more to learn, too: Jake Howard showed us how robots see, Steve Buckley inspired us to think about how technology can make our homes more energy-smart (this is really cool and sent me
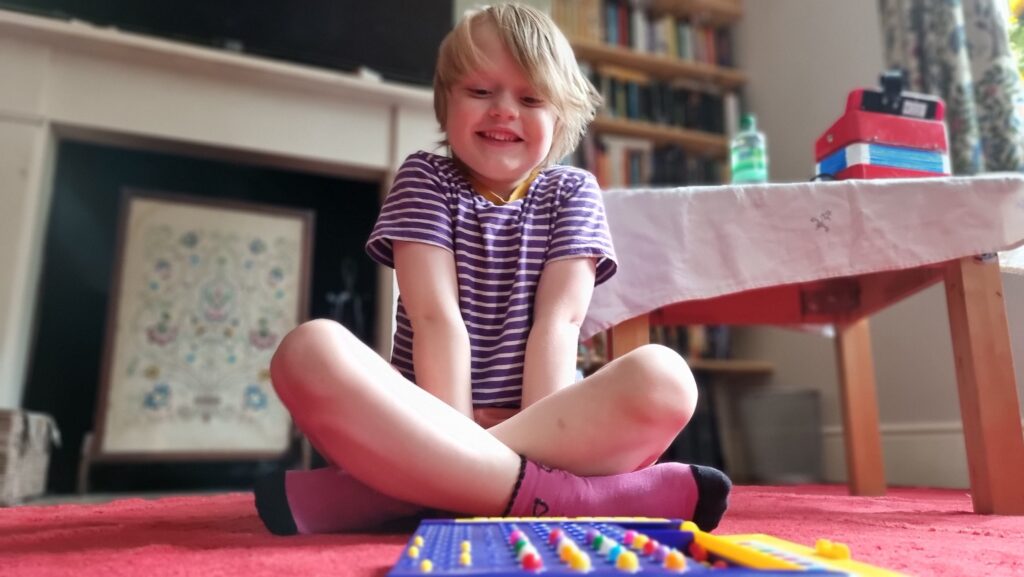
down a rabbithole of reading!), and Joe Wass showed adorable pictures of his kid exploring the user interface of his lockdown electronics
project.
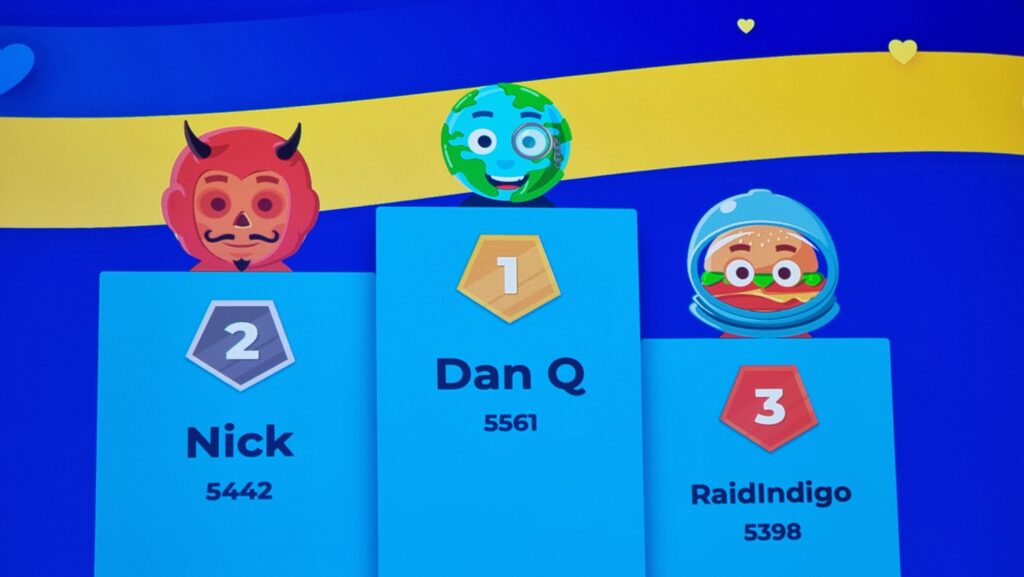
Oh, and there was a quiz competition too, and guess who came out on top after an incredibly tight race.
But mostly I just loved the chance to hang out with geeks again; chat to folks, make connections, and enjoy that special Oxford Geek Nights atmosphere. Also great to meet somebody from
Perspectum, who look like they’d be great to work for and – after hearing about – I had in mind somebody to suggest for a job with them… but it
looks like the company isn’t looking for anybody with their particular skills on this side of the pond. Still, one to watch.
My prize for winning the competition was an extremely-limited-edition cap which I love so much I’ve barely taken it off since.
Huge thanks are due to Torchbox, Perspectum and everybody in attendance for making this magical night possible!
Oh, and for anybody who’s interested, I’ve proposed to be a speaker at the next Oxford Geek Nights, which sounds like it’ll be towards Spring 2023. My title is
“Yesterday’s Internet, Today!” which – spoilers! – might have something to do with the kind of technology I’ve been playing with recently, among other things. Hope to see you there!
Finally got around to implementing a super-lightweight (~20 lines of code, 1 dependency) #spring83 key generator. There are plenty of others; nobody needs this one, but it’s free if you
want it:
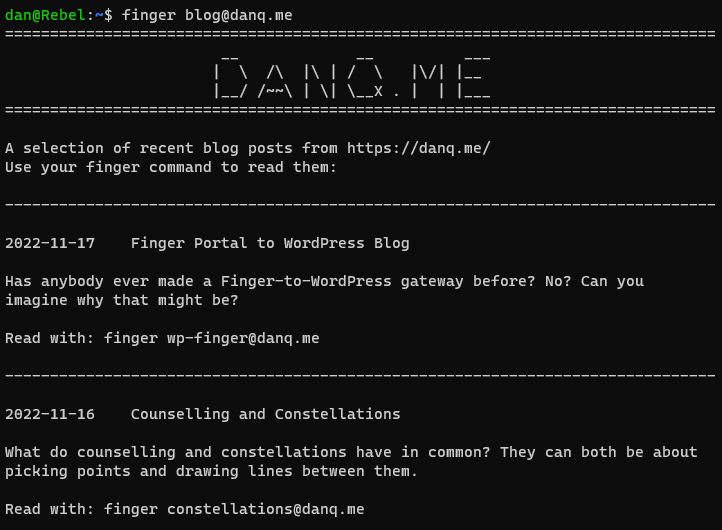
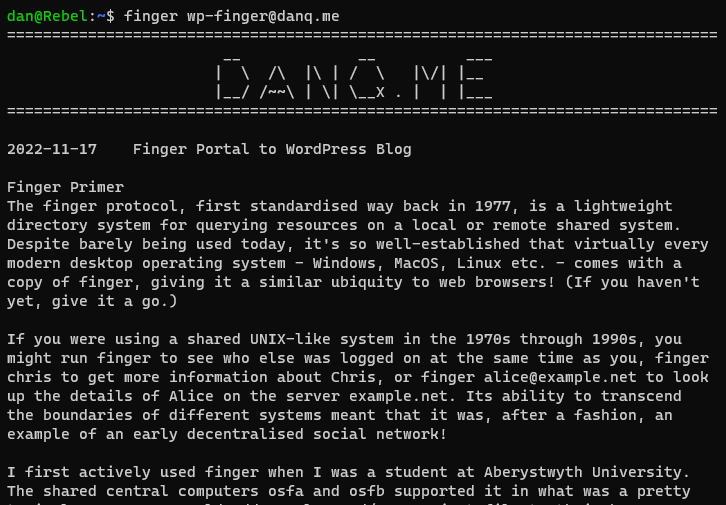
The finger protocol, first standardised way back in 1977, is a lightweight directory system
for querying resources on a local or remote shared system. Despite barely being used today, it’s so well-established that virtually every modern desktop operating system – Windows,
MacOS, Linux etc. – comes with a copy of finger, giving it a similar ubiquity to web browsers! (If you haven’t yet, give it a go.)
If you were using a shared UNIX-like system in the 1970s through 1990s, you might run finger to see who else was logged on at the same time as you, finger
chris to get more information about Chris, or finger alice@example.net to look up the details of Alice on the server example.net. Its ability to transcend the
boundaries of different systems meant that it was, after a fashion, an example of an early decentralised social network!
I first actively used finger when I was a student at Aberystwyth University. The shared central computers osfa and
osfb supported it in what was a pretty typical way: users could add a .plan and/or .project file to their home directory and the contents of these
would be output to anybody using finger to look up that user, along with other information like what department they belonged to. I’m simulating from memory so this won’t be remotely
accurate, but broadly speaking it looked a little like this –
$ finger dlq9@aber.ac.uk
Login: dlq9                           Name: Dan Q
Directory: /users/9/d/dlq9      Department: Computer Science

Project:
Working on my BEng Software Engineering.

Plan:
    _______
---'   ____)____
          ______)  Finger me!
       _____)
      (____)
---.__(___)
It’s not just about a directory of people, though: you could finger printers to see what their queues were like, finger a time server to ask what time it was,
finger a vending machine to see what drinks it
had available… even finger for a weather forecast where you are (this one still works as shown below; try it for your own location!) –
$ finger oxford@graph.no
        -= Meteogram for Oxford, Oxfordshire, England, United Kingdom =-
 'C                                                                   Rain (mm)
 12
 11
 10                                                         ^^^=--=--
  9^^^                                                   ===
  8   ^^^===      ======                              ^^^
  7         ======      ===============^^^         =--
  6                                       =--=-----
  5
  4
  3        |  |  |  |  |  |  |                                        1 mm
    17 18 19 20 21 22 23 18/11 02 03 04 05 06 07_08_09_10_11_12_13_14 Hour

     W  W  W  W  W  W  W  W  W  W  W  W  W  W  W  W  W  W  W  W  W  W Wind dir.
     6  6  7  7  7  7  7  7  6  6  6  5  5  4  4  4  4  5  6  6  5  5 Wind(m/s)

Legend left axis:   - Sunny   ^ Scattered   = Clouded   =V= Thunder   # Fog
Legend right axis:  | Rain    ! Sleet       * Snow
If you’d just like to play with finger, then finger.farm is a great starting point. They provide free finger hosting and they’re easy to use (try
finger dan@finger.farm to find me!). But I had something bigger in mind…
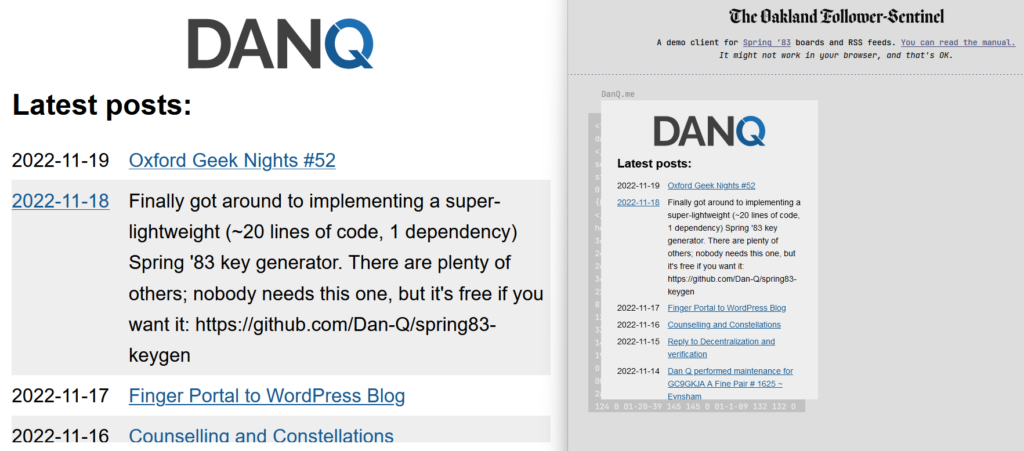
Fingering WordPress
What if you could fingermy blog. I.e. if you ran finger blog@danq.me you’d see a summary of some of my recent posts, along with additional
addresses you could finger to read the full content of each. This could be the world’s first finger-to-WordPress gateway; y’know, for
if you thought the world needed such a thing. Here’s how I did it:
Opened a hole in the firewall on port 79 so the outside world could access it (ufw allow 1965; utf reload).
The default configuration for efingerd acts like a “typical” finger server, but it’s highly programmable to make it “smarter”. I:
Blanked /etc/efingerd/list to prevent any output from “listing” the server (finger @danq.me).
Replaced the contents of /etc/efingerd/list and /etc/efingerd/nouser(which are run when a request matches, or doesn’t match, a user account name) with
a call to my script: /usr/local/bin/finger-to-wordpress "$3". $3 holds the username that was requested, so we can act on it.
Created /usr/local/bin/finger-to-wordpress – a Ruby program that either (a) lists a selection of posts or (b) returns a specific post (stripping the
HTML tags)
In future, I might use some extra tags or metadata to enhance finger-friendly WordPress posts. The infrastructure’s in place already (I already have tags that I use to make
certain kinds of content available only via certain media – shh!). You might rightly as what the point is of this entire enterprise, of course, and you’d be well within your
rights to ask such a question. But I think the best answer available is “because Dan”.
If you want to see my blog in a whole new way, give it a go: run finger blog@danq.me on your computer and follow the instructions.
In the light of the so-called “Twitter migration”, I’ve spent a lot of the last week helping people new to Mastodon/the Fediverse in general to understand it. Or at least, to understand
how it’s different from Twitter.1
If you’re among those jumping ship, by the way, can I recommend that you do two things:
Don’t stop after reading an article about what Mastodon is and how it works (start here!); please also read about the established
etiquette, and
Don’t come in with the expectation that it’s “like Twitter but…”, because the ways it’s not like Twitter are more-important (and nobody wants it to be more like Twitter).
The tools, protocols and culture of the fediverse were built by trans and queer feminists. Those people had already started to feel sidelined from their own project when people like
me started turning up a few year ago. This isn’t the first time fediverse users have had to deal with a significant state change and feeling of loss. Nevertheless, the basic
principles have mostly held up to now: the culture and technical systems were deliberately designed on principles of consent, agency, and community safety.
…
If the people who built the fediverse generally sought to protect users, corporate platforms like Twitter seek to control their users… [Academics and advertisers] can claim that
legally Twitter has the right to do whatever it wants with this data, and ethically users gave permission for this data to be used in any way when they ticked “I
agree” to the Terms of Service.
…
This attitude has moved with the new influx. Loudly proclaiming that content warnings are censorship, that functionality that has been deliberately unimplemented due to community
safety concerns are “missing” or “broken”, and that volunteer-run servers maintaining control over who they allow and under what conditions are “exclusionary”. No consideration is
given to why the norms and affordances of Mastodon and the broader fediverse exist, and whether the actor they are designed to protect against might be you.
I genuinely believe that the fediverse is among our best bets for making a break from the silos of the corporate Web, and to do that it has to scale – it’s only the speed at which it’s
being asked to do so that’s problematic.
Aside from what I’m already doing – trying to tutor (tootor?) new fediversians about how to integrate in an appropriate and respectful manner and doing a little to supporting the
expansion of the software that makes it tick… I wonder what more I could/should be doing.
Would my effort be best-spent be running a server (one not-just-for-me, I mean: abnib.social, anyone?), or should I use that time and money to support existing instances
directly? Should I brush up on my ActivityPub spec so I can be a more-useful developer, or am I better-placed to focus on tending my own digital garden first? Or maybe I’m looking at it
all wrong and I should be trying to dissuade people from piling-on to a system that might well not be right for them (nor they for it!)?
I don’t know the answers to these questions, but I’m hoping to work them out soon.
Addendum
It only occurred to me after the fact that I should mention that you can find me at @dan@danq.me.
Footnotes
1 Important: I’m no expert. I’ve been doing fediverse things for about 3 years but I’m
relatively quiet on Mastodon. Also, I’ve never really understood or gotten along with Twitter, so I’m even less an expert on that. Don’t assume that I’m
an authority on anything at all, and especially not social media.
Unable to sleep, I found myself wondering whether anybody with a retro-hipster vibe had built a smart pocketwatch. All your smartwatch features, but in pocketwatch format.
Then I realised I was describing a mobile phone on a keychain.
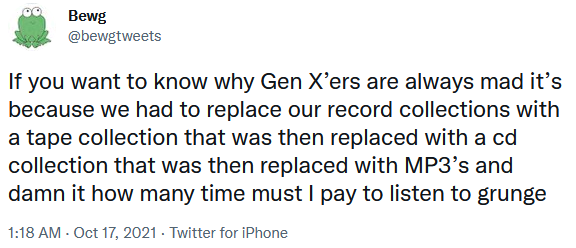
I didn’t/don’t own much vinyl – perhaps mostly because I had a tape deck in my bedroom years before a record player – but I’ve felt this pain. And don’t get me started on the videogames I’ve paid for multiple times.
In the Summer of 1995 I bought the CD single of the (still excellent!) Set You
Free by N-Trance.2
I’d heard about this new-fangled “MP3” audio format, so soon afterwards I decided to rip a copy of the song to my PC.
I was using a 66MHz 486SX CPU, and without an embedded FPU I didn’t
quite have the spare processing power to rip-and-encode in a single pass.3
So instead I first ripped to an uncompressed PCM .wav file and then performed the encoding: the former step
was done almost in real-time (I listened to the track as it ripped!), about 7 minutes. The latter step took about 20 minutes.
So… about half an hour in total, to rip a single song.
Progress bar, you say? I’ll just sit here and wait then, I guess. Actual contemporary-ish photo.
Creating a (what would now be considered an apalling) 32kHz mono-channel file, this meant that I briefly stored both a 27MB wave file and the final ~4MB MP3 file. 31MB
might not sound huge, but I only had a total of 145MB of hard drive space at the time, so 31MB consumed over a fifth of my entire fixed storage! Even after deleting the intermediary wave file I was left with a single song consuming around 3% of my space,
which is mind-boggling to think about in hindsight.
But it felt like magic. I called my friend Gary to tell him about it. “This is going to be massive!” I said. At the time, I meant for techy
people: I could imagine a future in which, with more hard drive space, I’d keep all my music this way… or else bundle entire artists onto writable CDs in this new format, making albums obsolete. I never considered that over the coming decade or so the format would enter the public consciousness, let
alone that it’d take off like it did.
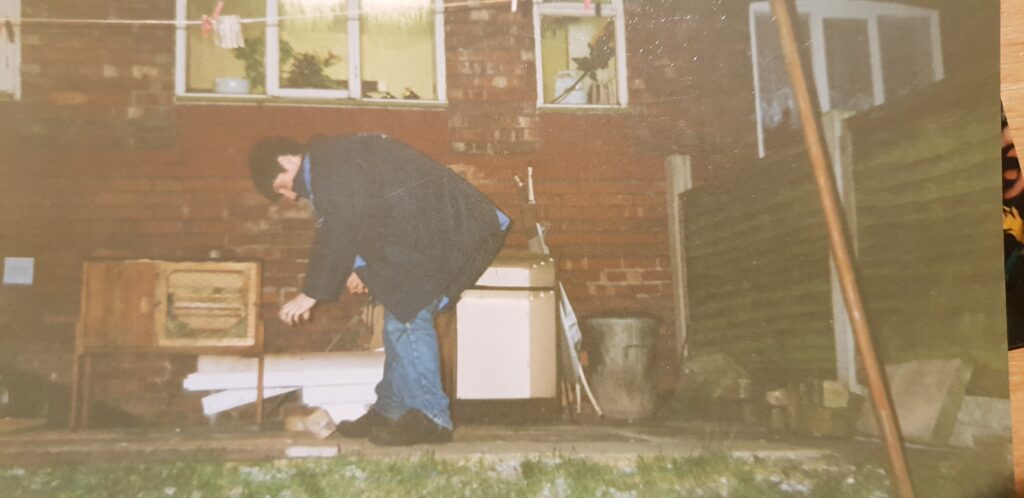
If you’re thinking of Gary and I as the kind of reprobates who helped bring on the golden age of music piracy… I’d like to distract you with a bigger show of yobbish behaviour in the
form of this photo from the day we played at dropping half-bricks onto starter pistol ammunition.
The MP3 file I produced had a fault. Most of the way through the encoding process, I got bored and ran another program, and this
must’ve interfered with the stream because there was an audible “blip” noise about 30 seconds from the end of the track. You’d have to be listening carefully to hear it, or else know
what you were looking for, but it was there. I didn’t want to go through the whole process again, so I left it.
But that artefact uniquely identified that copy of what was, in the end, a popular song to have in your digital music collection. As the years went by and I traded MP3 files in bulk at LAN parties or on CD-Rs or, on at least one ocassion, on an Iomega Zip disk (remember those?), I’d ocassionally see
N-Trance - (Only Love Can) Set You Free.mp34 being passed around and play it, to see if it was “my”
copy.
Sometimes the ID3 tags had been changed because for example the previous owner had decided it deserved to be considered Genre: Dance instead of Genre: Trance5. But I could still identify that file because
of the audio fingerprint, distinct to the first MP3 I ever created.
I still had that file when I went to university (where it occupied a smaller proportion of my hard drive space) and hearing that
distinctive “blip” would remind me about the ordeal that was involved in its creation. I don’t have it any more, but perhaps somebody else still does.
Footnotes
1 I might never have told this story on my blog, but eagle-eyed readers may remember that
I’ve certainly hinted at it before now.
2 Rewatching that music video, I’m struck by a recollection of how crazy popular
crossfades were on 1990s dance music videos. More than just a transition, I’m pretty sure that most of the frames of that video are mid-crossfade: it feels like I’m watching
Kelly Llorenna hanging out of a sunroof but I accidentally left one of my eyeballs in a smoky nightclub and can still see out of it as well.
3 I initially tried to convert directly from red book format to an MP3 file, but the encoding process was
too slow and the CD drive’s buffer filled up and didn’t get drained by the processor, which was still presumably bogged down with
framing or fourier-transforming earlier parts of the track. The CD drive reasonably assumed that it wasn’t actually being used and
spun-down the drive motor, and this caused it to lose its place in the track, killing the whole process and leaving me with about a 40 second recording.
4 Yes, that filename isn’t quite the correct title. I was wrong.
I swear that I used to be good at Mastermind when I was a kid. But now, when it’s my turn to break
the code that one of our kids has chosen, I fail more often than I succeed. That’s no good!
If you didn’t have me pegged as a board gamer… where the hell have you been?
Mastermind and me
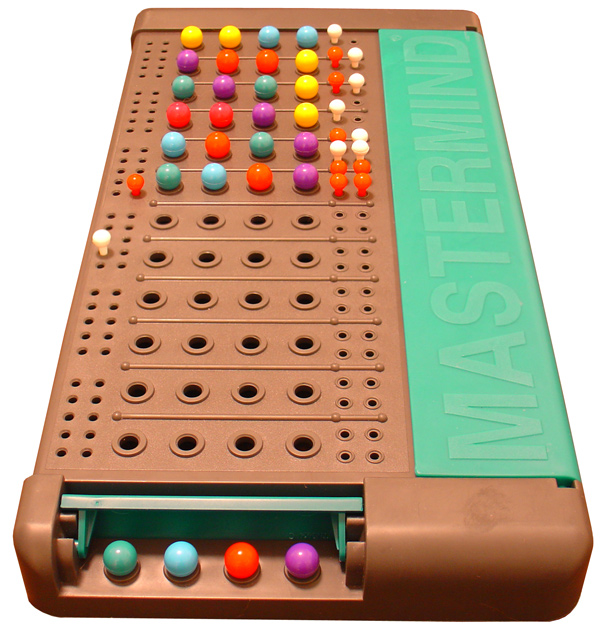
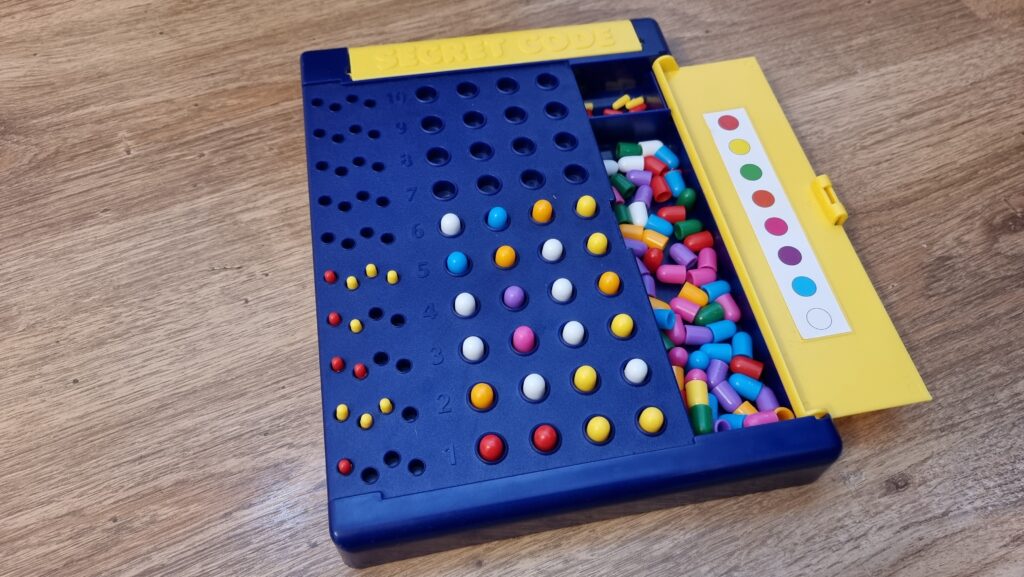
Maybe it’s because I’m distracted; multitasking doesn’t help problem-solving. Or it’s because we’re “Super” Mastermind, which differs from the one I had as a child in that
eight (not six) peg colours are available and secret codes are permitted to have duplicate peg colours. These changes increase the possible permutations from 360 to 4,096, but the
number of guesses allowed only goes up from 8 to 10. That’s hard.
The set I had as a kid was like this, I think. Photo courtesy ZeroOne; CC-BY-SA license.
Hey, that’s an idea. Let’s crack the code… by writing some code!
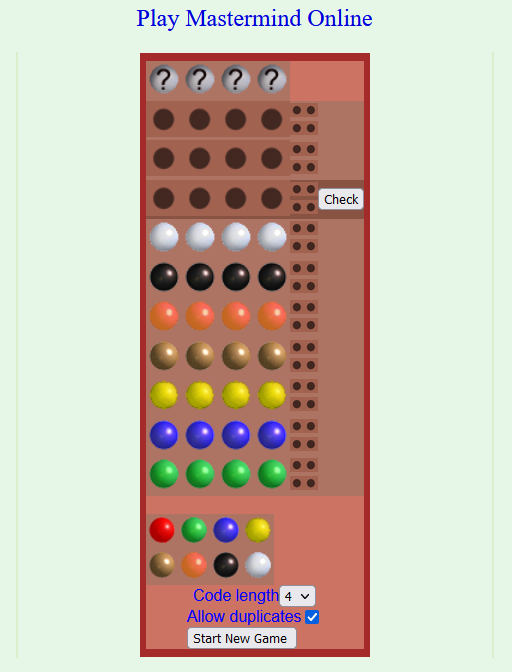
This online edition plays a lot like the version our kids play, although the peg colours are different. Next guess should be an
easy solve!
Representing a search space
The search space for Super Mastermind isn’t enormous, and it lends itself to some highly-efficient computerised storage.
There are 8 different colours of peg. We can express these colours as a number between 0 and 7, in three bits of binary, like this:
Decimal
Binary
Colour
0
000
Red
1
001
Orange
2
010
Yellow
3
011
Green
4
100
Blue
5
101
Pink
6
110
Purple
7
111
White
There are four pegs in a row, so we can express any given combination of coloured pegs as a 12-bit binary number. E.g. 100 110 111 010 would represent the
permutation blue (100), purple (110), white (111), yellow (010). The total search space, therefore, is the range of numbers from
000000000000 through 111111111111… that is: decimal 0 through 4,095:
Decimal
Binary
Colours
0
000000000000
Red, red, red, red
1
000000000001
Red, red, red, orange
2
000000000010
Red, red, red, yellow
…………
4092
111111111100
White, white, white, blue
4093
111111111101
White, white, white, pink
4094
111111111110
White, white, white, purple
4095
111111111111
White, white, white, white
Whenever we make a guess, we get feedback in the form of two variables: each peg that is in the right place is a bull; each that represents a peg in the secret code but
isn’t in the right place is a cow (the names come from Mastermind’s precursor, Bulls & Cows). Four bulls
would be an immediate win (lucky!), any other combination of bulls and cows is still valuable information. Even a zero-score guess is valuable- potentially very valuable! – because it
tells the player that none of the pegs they’ve guessed appear in the secret code.
If one of Wordle‘s parents was Scrabble, then this was the other. Just ask its Auntie Twitter.
Solving with Javascript
The latest versions of Javascript support binary literals and bitwise operations, so we can encode and decode between arrays of four coloured pegs (numbers 0-7) and the number 0-4,095
representing the guess as shown below. Decoding uses an AND bitmask to filter to the requisite digits then divides by the order of magnitude. Encoding is just a reduce
function that bitshift-concatenates the numbers together.
/** * Decode a candidate into four peg values by using binary bitwise operations. */function decodeCandidate(candidate){
return [
(candidate &0b111000000000) /0b001000000000,
(candidate &0b000111000000) /0b000001000000,
(candidate &0b000000111000) /0b000000001000,
(candidate &0b000000000111) /0b000000000001
];
}
/** * Given an array of four integers (0-7) to represent the pegs, in order, returns a single-number * candidate representation. */function encodeCandidate(pegs) {
return pegs.reduce((a, b)=>(a <<3) + b);
}
With this, we can simply:
Produce a list of candidate solutions (an array containing numbers 0 through 4,095).
Choose one candidate, use it as a guess, and ask the code-maker how it scores.
Eliminate from the candidate solutions list all solutions that would not score the same number of bulls and cows for the guess that was made.
Repeat from step #2 until you win.
Step 3’s the most important one there. Given a function getScore( solution, guess ) which returns an array of [ bulls, cows ] a given guess would
score if faced with a specific solution, that code would look like this (I’m convined there must be a more-performant way to eliminate candidates from the list with XOR
bitmasks, but I haven’t worked out what it is yet):
/** * Given a guess (array of four integers from 0-7 to represent the pegs, in order) and the number * of bulls (number of pegs in the guess that are in the right place) and cows (number of pegs in the * guess that are correct but in the wrong place), eliminates from the candidates array all guesses * invalidated by this result. Return true if successful, false otherwise. */function eliminateCandidates(guess, bulls, cows){
const newCandidatesList = data.candidates.filter(candidate=>{
const score = getScore(candidate, guess);
return (score[0] == bulls) && (score[1] == cows);
});
if(newCandidatesList.length ==0) {
alert('That response would reduce the candidate list to zero.');
returnfalse;
}
data.candidates = newCandidatesList;
chooseNextGuess();
returntrue;
}
I continued in this fashion to write a full solution (source code). It uses ReefJS for
component rendering and state management, and you can try it for yourself right in your web browser. If you
play against the online version I mentioned you’ll need to transpose the colours in your head: the physical version I play with the
kids has pink and purple pegs, but the online one replaces these with brown and black.
Testing the solution
Let’s try it out against the online version:
As expected, my code works well-enough to win the game every time I’ve tried, both against computerised and in-person opponents. So – unless you’ve been actively thinking about the
specifics of the algorithm I’ve employed – it might surprise you to discover that… my solution is very-much a suboptimal one!
My code has only failed to win a single game… and that turned out to because my opponent, playing overexcitedly, cheated in the third turn. To be fair, my code didn’t lose
either, though: it identified that a mistake must have been made and we declared the round void when we identified the problem.
My solution is suboptimal
A couple of games in, the suboptimality of my solution became pretty visible. Sure, it still won every game, but it was a blunt instrument, and anybody who’s seriously thought about
games like this can tell you why. You know how when you play e.g. Wordle (but not in “hard mode”) you sometimes want to type in a word that can’t possibly be the
solution because it’s the best way to rule in (or out) certain key letters? This kind of strategic search space bisection reduces the mean number of guesses you need to solve the
puzzle, and the same’s true in Mastermind. But because my solver will only propose guesses from the list of candidate solutions, it can’t make this kind of improvement.
My blog post about Break Into Us used a series of visual metaphors to show search space dissection, including this one. If you missed
it, it might be worth reading.
Search space bisection is also used in my adverserial hangman game, but in this case the aim is to split the search space in such a way that no
matter what guess a player makes, they always find themselves in the larger remaining portion of the search space, to maximise the number of guesses they have to make. Y’know, because
it’s evil.
A great first guess, assuming you’re playing against a random code and your rules permit the code to have repeated colours, is a “1122” pattern.
There are mathematically-derived heuristics to optimise Mastermind strategy. The first
of these came from none other than Donald Knuth (legend of computer science, mathematics, and pipe organs) back in 1977. His solution,
published at probably the height of the game’s popularity in the amazingly-named Journal of Recreational Mathematics, guarantees a solution to the six-colour version of the
game within five guesses. Ville [2013] solved an
optimal solution for a seven-colour variant, but demonstrated how rapidly the tree of possible moves grows and the need for early pruning – even with powerful modern computers – to
conserve memory. It’s a very enjoyable and readable paper.
But for my purposes, it’s unnecessary. My solver routinely wins within six, maybe seven guesses, and by nonchalantly glancing at my phone in-between my guesses I can now reliably guess
our children’s codes quickly and easily. In the end, that’s what this was all about.