QR Codes of the Bodleian

The Treasures of the Bodleian exhibition opened today, showcasing some of the Bodleian Libraries‘ most awe-inspiring artefacts: fragments of original lyrics by Sappho, charred papyrus from Herculaneum prior to the eruption of Mt. Vesuvius in 79 CE, and Conversation with Smaug, a watercolour by J. R. R. Tolkien to illustrate The Hobbit are three of my favourites. Over the last few weeks, I’ve been helping out with the launch of this exhibition and its website.
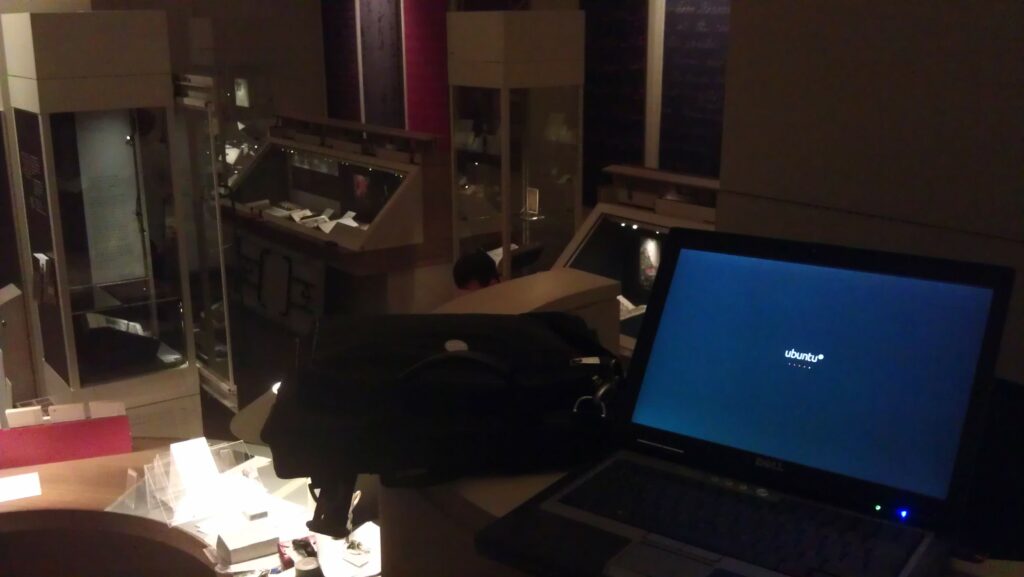
Photograph showing a laptop running Ubuntu, in front of a partially-constructed exhibition hall in which museum artefacts are being laid-out in glass cases.
From an elevated position in the exhibition room, I run a few tests of the technical infrastructure whilst other staff set up, below.

In particular, something I’ve been working on are the QR codes. This experiment – very progressive for a sometimes old-fashioned establishment like the Bodleian – involves small two-dimensional barcodes being placed with the exhibits. The barcodes are embedded with web addresses for each exhibit’s page on the exhibition website. Visitors who scan them – using a tablet computer, smartphone, or whatever – are directed to a web page where they can learn more about the item in front of them and can there discuss it with other visitors or can “vote” on it: another exciting new feature in this exhibition is that we’re trying quite hard to engage academics and the public in debate about the nature of “treasures”: what is a treasure?
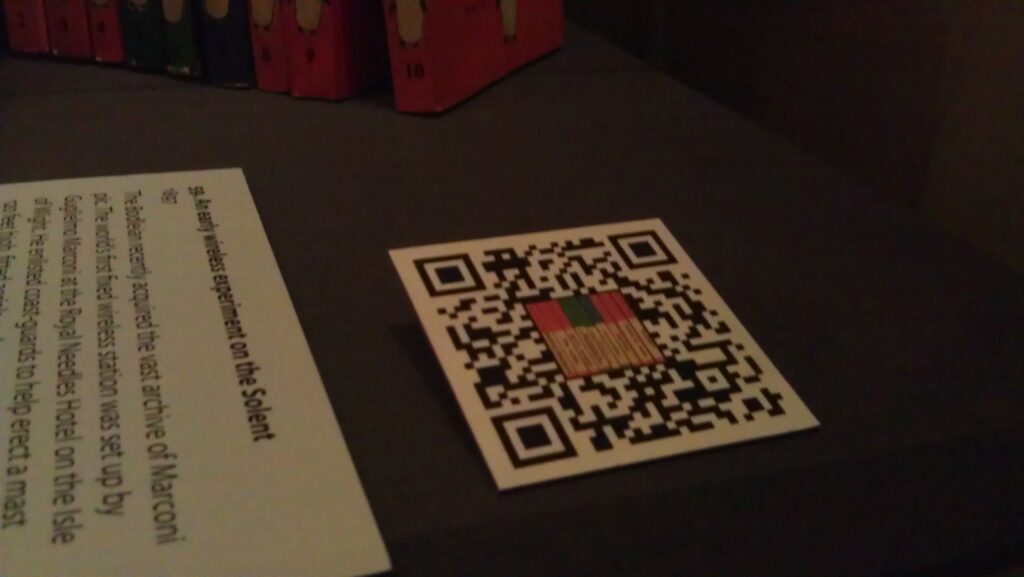
Close-up photograph showing a small plaque with a QR code alongside interprative text, in an exhibition case.
A QR code in place at the Treasures of the Bodleian exhibition.

In order to improve the perceived “connection” between the QR code and the objects, to try to encourage visitors to scan the codes despite perhaps having little or no instruction, we opted to embed images in the QR codes relating to the objects they related to. By cranking up the error-correction level of a QR code, it’s possible to “damage” them quite significantly and still have them scan perfectly well.

One of my “damaged” QR codes. This one corresponds to The Laxton Map, a 17th Century map of common farming land near Newark on Trent.

We hope that the visual association between each artefact and its QR code will help to make it clear that the code is related to the item (and isn’t, for example, some kind of asset tag for the display case or something). We’re going to be monitoring usage of the codes, so hopefully we’ll get some meaningful results that could be valuable for future exhibitions: or for other libraries and museums.

Rolling Your Own

If you’re interested in making your own QR codes with artistic embellishment (and I’m sure a graphic designer could do a far better job than I did!), here’s my approach:

  1. I used Google Infographics (part of Chart Tools) to produce my QR codes. It’s fast, free, simple, and – crucially – allows control over the level of error correction used in the resulting code. Here’s a sample URL to generate the QR code above:

https://chart.googleapis.com/chart?chs=500×500&cht=qr&chld=H|0&chl=HTTP://TREASURES.BODLEIAN.OX.AC.UK/T7

  1. 500×500 is the size of the QR code. I was ultimately producing 5cm codes because our experiments showed that this was about the right size for our exhibition cabinets, the distance from which people would be scanning them, etc. For laziness, then, I produced codes 500 pixels square at a resolution of 100 pixels per centimetre.
  2. H specifies that we want to have an error-correction level of 30%, the maximum possible. In theory, at least, this allows us to do the maximum amount of “damage” to our QR code, by manipulating it, and still have it work; you could try lower levels if you wanted, and possibly get less-complex-looking codes.
  3. 0 is the width of the border around the QR code. I didn’t want a border (as I was going to manipulate the code in Photoshop anyway), so I use a width of 0.
  4. The URL – HTTP://TREASURES.BODLEIAN.OX.AC.UK/T7  – is presented entirely in capitals. This is because capital letters use fewer bits when encoded as QR codes. “http” and domain names are case-insensitive anyway, and we selected our QR code path names to be in capitals. We also shortened the URL as far as possible: owing to some complicated technical and political limitations, we weren’t able to lean on URL-shortening services like bit.ly, so we had to roll our own. In hindsight, it’d have been nice to have set up the subdomain “t.bodleian.ox.ac.uk”, but this wasn’t possible within the time available. Remember: the shorter the web address, the simpler the code, and simpler codes are easier and faster to read.
  5. Our short URLs redirect to the actual web pages of each exhibit, along with an identifying token that gets picked up by Google Analytics to track how widely the QR codes are being used (and which ones are most-popular amongst visitors).
By now, you’ll have a QR code that looks a little like this.
  1. Load that code up in Photoshop, along with the image you’d like to superimpose into it. Many of the images I’ve had to work with are disturbingly “square”, so I’ve simply taken them, given them a white or black border (depending on whether they’re dark or light-coloured). With others, though, I’ve been able to cut around some of the more-attractive parts of the image in order to produce something with a nicer shape to it. In any case, put your image in as a layer on top of your QR code.
  2. Move the image around until you have something that’s aesthetically-appealing. With most of my square images, I’ve just plonked them in the middle and resized them to cover a whole number of “squares” of the QR code. With the unusually-shaped ones, I’ve positioned them such that they fit in with the pattern of the QR code, somewhat, then I’ve inserted another layer in-between the two and used it to “white out” the QR codes squares that intersect with my image, giving a jagged, “cut out” feel.
  3. Test! Scan the QR code from your screen, and again later from paper, to make sure that it’s intact and functional. If it’s not, adjust your overlay so that it covers less of the QR code. Test in a variety of devices. In theory, it should be possible to calculate how much damage you can cause to a QR code before it stops working (and where it’s safe to cause the damage), but in practice it’s faster to use trial-and-error. After a while, you get a knack for it, and you almost feel as though you can see where you need to put the images so that they just-barely don’t break the codes. Good luck!

Another of my “damaged” QR codes. I’m reasonably pleased with this one.

Give it a go! Make some QR codes that represent your content (web addresses, text, vCards, or whatever) and embed your own images into them to make them stand out with a style of their own.

× × × ×

The Queen’s Passport

This was one of my most-popular articles in 2011. If you enjoyed it, you might also enjoy:

Just a quick thought: what does it say on the inside front cover of the Queen‘s passport?

A British passport, with its famous inside text.

Presumably it ought to say:

My Secretary of State requests and requires in my name all those whom it may concern to allow the bearer to pass freely without let or hindrance, and to afford the bearer such assistance and protection as may be necessary.

Nonetheless, I’ll bet that she doesn’t get as much trouble at passport control as I do, despite the fact that she doesn’t have a surname at all (to be completely accurate, Windsor is the name of her royal house, and is not a surname in the conventional sense). It makes the Passport Office look a little silly to complain about my unusually short name.

Interesting fact about passports: in their current form, they’re a comparatively new invention, but have achieved a rather quick ubiquity in international travel. Historically, the term “port” in their name doesn’t refer, as you’d expect, to sea ports, but instead to the “portes” (gates) of walled cities: most early passports granted the bearer the permission of their lord or monarch to travel between cities in their own country – sea ports and international boundaries were considered fair game for anybody to cross.

It was only really with the outbreak of the First World War that it became a widespread mandate that travellers had passports to cross international borders, as the nations of Europe fought to prevent spies. The Schengen Area – only around 25 years old and hailed as welcome liberalisation of European international transit laws – could actually be likened to a step backwards to a simpler time when citizens movements were not so closely monitored.

×

Ouch

Recently, I’ve been diagnosed with cluster headaches. I could tell you more about them, but I’d rather just point you at the Wikipedia article and say “that’s pretty much spot on.”

This picture, from Wikipedia, covers it pretty nicely, actually.

So that’s pretty shit.

It’s been several months now – long enough that, to begin with, I suspected that these new, severe headaches were something to do with the concussion I suffered while moving house. I’m still not convinced that they’re not: it just seems a little too much like a coincidence that that’d happen just weeks before they started.

Since then, they’ve come and gone. Attacks will come on every couple of days – usually at about 3am, but sometimes in the afternoon – for about two weeks, and then will be gone for several weeks. And then they come back again.

The pain is… incredible. I can’t even begin to describe it nor compare it to anything else. Painkillers don’t seem to touch it at all. The only success I’ve had with painkillers has been when I’ve taken so much codeine that I’ve had an “opium high”. The pain doesn’t go away, but at least then I don’t care so much. Then within a couple of (long, long) hours, it’s gone, leaving me drained and exhausted. Sometimes it leaves me with a headache – just a “normal” one, the kind that you can wince and ignore, or treat with asprin – for about a day afterwards, but usually it just disappears as quickly as it came on.

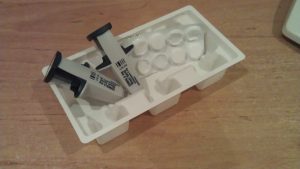
Those things on the left that are shaped like space rockets? They go up my fucking nose, would you believe it. They're supposed to be for migraines, and they seem to work for me - at best - about one time in three.

I’ve been working my way through a variety of medications, with limited success. Basically, the doctors are guessing. In sheer desperation, I’ve even been caught using mild-to-moderately ridiculous alternative treatment, like chiropractic. It didn’t work – it just left me with a new variety of back pain: temporary, I hope – but I think  it goes some way to expressing how crippling it is when I of all people will go to a “spine wizard”. Needless to say, I’m still a long way from desparate enough to try the really stupid alternative medicines: it’s still got to at least sound like it might work before you’ll get me to try it – after all, it’s not like any of these therapies are without risks.

There’s next to no build-up, and no warning, and no relief: they just start and go away their own accord. That’s a terrifying feeling of powerlessness. It’s genuinely scary, going to bed during one of their episodic periods, and not knowing if you’re going to wake up in agony a few hours later.

We’re getting somewhere, though, hopefully. I’ve been assigned to a specialist (to whom I’m sure I’ll be as much a research subject as a patient: I suppose it’s pretty ideal – if you have a rare, barely-understood disease and you’re at the point of being willing to try anything, you probably make a great research subject), and in the meantime there are plenty more medications left to “try”. And I’ve been reading some of the thoughts of other sufferers via an online support group, some of whom have shared some of their relief/coping strategies (some of which I’ve tried already; others of which I’ll try in the future). So there’s still plenty of opportunity for a “fix”.

I didn’t blog about this before now because I was hoping to get to a point where I’d be looking back on it and laughing, first. I quite liked the idea of putting up a blog post – perhaps with some photos of my MRI scans, or something – and saying “Hey; look what happened to me! It’s medication-controlled, now, and the only side-effect is that I can shoot frickin’ laser beams out of my eyes! Muhahahaha!” But I guess that point might still be a way away, and I didn’t want to keep you all in the dark.

Anyway: there’s that, then. If you were hoping for a clean, concise blog post with some closure at the end, you’ll be left hanging. But hey: if I have to suffer, I might as well spread a little bit of suffering to you, too.

×

A Vintage Murder

Another successful murder mystery party! This one was a prefabricated “kit” one, unlike many of our recent ones, in the Inspector McClue range.

As usual, Murder Mystery Night starts a day or two earlier, with Ruth preparing a monumental quantity of food.

I was slightly worried that – with only six people (we four Earthlings and Ruth‘s brothers) in attendance, that the evening might be a little too “quiet”, but Robin and Owen did a pretty good job of ensuring that this wasn’t the case by any stretch of the imagination.

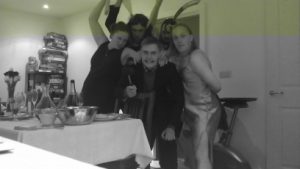
Maurice de Cheval (Robin) and Wallis Simper (Owen)

My character was Marlene Deepditch, a German wine merchant. Not wanting to take things by halves, I put a perhaps-excessive amount of effort into my last-minute costume, even going so far as to shave off my beard… as well as my sideburns… chest… armpits…

My dress wasn't quite as long on me as I'd expected, and I'd neglected to shave my legs, unfortunately.

The night yielded three surprises:

  • Paul wasn’t the murderer.
  • The straight-edge razor I wrote about the other week is remarkably good at removing body hair in bulk.
  • Regrowing chest hair is remarkably itchy.
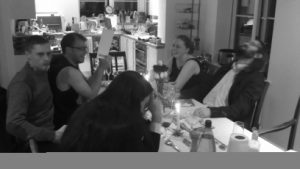
Hilarity ensues as the combination of wine and outrageous accents kicks in.

All in all, a fantastic night, full of exactly the kind of delicious chaos that’s usually reserved for larger murder mystery parties – watch this YouTube video (may contain spoilers) to see what I mean.

× × × ×

PromisQity

Never before have I come across a wine so obviously created for me as this one.

Bottles of white and red 'pro-mis-Q-ous' wine.

I haven’t tasted it, and I’ve never seen it for sale. But just look at the label: it’s called pro-mis-Q-ous, a deliberate mis-spelling of “promiscuous” that substitutes in and emphasises the letter Q (which, of course, is my surname). The label goes on to define promiscuity, and it – and their website, makes significant mention on nonmonogamy, which few will by surprised to hear is pretty close to my heart too.

What a great name. I wish I’d come up with it.

Open-Source Shaving, part 2

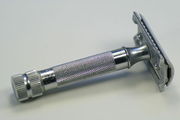
Back in 2009, I wrote about Open-Source Shaving, and the journey I’ve taken over the years to arrive at my current preferred shaving solution: the double-edged traditional safety razor pictured. It’s great: reasonably heavy, just aggressive enough, and far more… manly than anything made of plastic. It’s so manly, in fact, that merely using it results in a surge of testosterone sufficient to make you grow a bad-ass beard, which somewhat undermines the entire exercise.

That blog post attracted a lot of comments, both on and off the web, and since I wrote it I’ve tried a few other different approaches to shaving, too. Like this:

The Rolls Razor

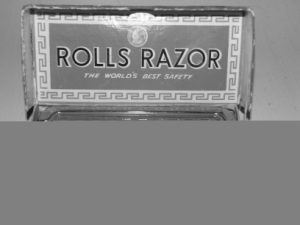
A Rolls Razor with a chrome case, in its original box.

After reading my first Open-Source Shaving post, a friend delivered to me a Rolls Razor that they’d found in a charity shop. I’ll admit that it took me far longer than it ought to have just to open the case, but when I did, I was thoroughly impressed.

The Rolls is a self-contained,  self-sharpening, safety razor, in a sleek portable case. That’s right: it’s a safety razor… that you can reuse like a straight razor! The last one was made in the 1950s, and I’m pretty sure that mine was made in the mid-1940s, but these things were built to last and the one I was given is still in perfect working order despite being older than my parents (who aren’t).

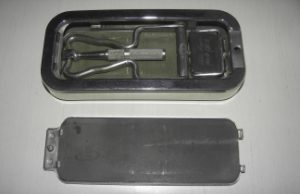
The open case of a Rolls Razor, with the "sharpening" side removed and the "stropping" side ready to use.

The case can be opened from either side, and under each “lid” is a different surface: a sharpening stone under one and a leather stop under the other. A lever arm mechanism folds down and attaches to the blade, such that moving the lever backwards and forwards sharpens or strops the blade, depending on whichever side you didn’t remove. It’s tucked into the most remarkably small space, and yet still manages a wonderful feat of trickery: as is correct, the blade grinds forwards when it’s against the stone, and draws backwards when it’s against the strop – a remarkable feat of engineering.

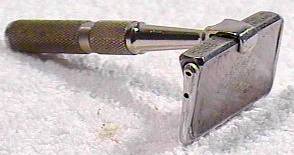
A rolls razor, assembled and ready to use.

When you’re ready to use it, a clip-on handle (which also fits neatly inside the case) is attached to the blade. The fit is snug, and it’s not always easy to push the blade into position, but that’s far better I suppose than a loose and wobbly blade.

The shave is raw and basic. Despite the fact that it looks no more-sophisticated than a straight edge, it’s almost as easy to shave with as a disposable-blade safety razor. The blade feels a little bit narrow, and it takes more strokes than would be ideal, but it’s perfectly usable. On the scale of things, it’s certainly preferable to an electric shaver or a plastic disposable razor, but it’s not quite as good as a cartridge razor or – still my personal favourite – a double-edged safety razor with disposable blades.

Nonetheless, it’s a wonderful piece of engineering and I’m proud to own one. There’s a great guru-page about the Rolls Razor, if you’re interested to learn more.

The Shavette

Here’s where things get scary.

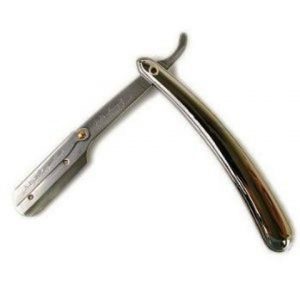
A shavette (or 'injector razor'), armed with half a razorblade and ready to go. Vicious-looking, isn't it?

I’ve always wanted to try a straight edge – you know, a proper razor blade: a strip of metal sharpened on one side. I’ve been told that it’s an incredibly close shave, a wonderfully tactile experience, and a challenge to dexterity to challenge even the handiest of men. But there’s an overhead: you need a strop, and a sharpening stone, and there’s a whole suite of skills that you need to learn about care and maintenance before you even get close to putting a blade near a face.

A shavette – or “injector razor” – is a simpler alternative. It’s functionally a straight razor, but instead of having a blade it has a pair of closely aligned grips and a clip to hold them in place. You take a traditional double-edged razor blade (which I have about a million of anyway), snap it – carefully! – in half, and insert one half into the grips, then clip it into place. Ta-da: you have a piece of metal shaped like a straight razor, but holding a disposable sharp edge.

The challenge is learning how to use it. It turns out that there’s a reason that you have a barber do this for you: it’s actually really quite hard!

Finding a suitable angle of attack isn’t hard so long as you’re used to using a safety razor already: that same 30° or so angle that words for a safety works when you don’t have a guard in place too. You’ve got to remember to maintain the angle, of course, because the tactile feedback is subtler and more gentle, and it’s easy to slip up. It’s also challenging because – unlike a real straight edge – razor blades have corners, and those corners can catch if you’re not taking care in more-rugged terrain such as around the jawline.

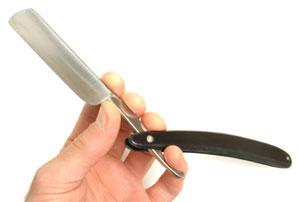
How to hold a straight razor.

The grip used for a straight razor looks unwieldy, but it’s actually quite comfortable and gives a great deal of control over the motion of the blade. It’s possible to perform strokes that just aren’t feasible with any other kind of shaving equipment, like scything, where a rotation is applied such that the tip of the blade moves further than the end closest to your fingers. It’s challenging, but effective.

But the biggest difficulty with shaving yourself with a straight razor or shavette, for me, has to be that you have to be ambidextrous! I’d read this fact online even before I got my razor, but I’d somehow glossed over it: somehow in my mind I thought that I’d have no problem with just using my right hand. But the first time I tried to shave with a shavette, I realised my mistake: if you try to shave the left-hand side of your face with your right hand… your arm is in front of your eyes! The angle is just about achievable, but without being able to see the mirror you’re quickly going to find yourself in pain.

I got the hang of working left-handed, eventually, but it was a struggle. And while the shave isn’t much cleaner than a safety razor, it is possible to get a great deal of control. I still use my shavette from time to time, particularly if I want to get a very sharp, tidy finish around the edges of my beard or to straighten my mustache, but from a standpoint of speed and convenience alone, my safety razor is still the first thing I reach for.

The Glass Hone

A glass hone, which can allegedly keep razor blades sharp for hundreds of shaves.

I was recently given a glass hone: a small piece of slightly curved glass that can be used to hone (align) plain old razor blades. The theory is sound – it’s well known that blades require honing far sooner than they actually require sharpening. It’s not possible to strop a double-edged razor blade, but if this mechanism works then it would provide a means to dramatically extend the lifespan of each blade.

I’ve not used it yet: I’m naturally skeptical of claims of such a magnitude, and I’d like to put together a good double-blind test to see if it actually works as well as it should. I’m thinking I’ll run down a pair of blades, store them, label them, and have somebody else hone one (of their choice) without telling me which. I’ll then try to re-shave with both, try to identify the honed one, and then re-run the whole experiment a few more times before asking my assistant to identify which blades were the honed ones.

Maybe I take these things too seriously.

In any case, I can’t report back to you on how useful such a tool is until I actually get the chance to do so, and as I don’t bother to shave every day, it’d take me a while to get any results. Perhaps others would like to volunteer to participate in my experiment, too? Is there anybody out there who shaves with a double-edged safety razor who’s willing to buy one of these things and provide feedback? We could even have our assistants liaise with one another behind our backs and agree not to hone either blade for one or the other of us, to act as a control group…

Okay: way too seriously.

× × × × × ×

The Back Button

How did I get here?

While lying in bed, unwell and off work, last month, I found myself surfing (on my new phone) to the Wikipedia page on torsion springs. And that’s when I found myself wondering – how did I get here?

Thankfully, there’s always the back button: famously the second most-used bit of your web browser’s user interface. So… how did I come to be reading about torsion springs?

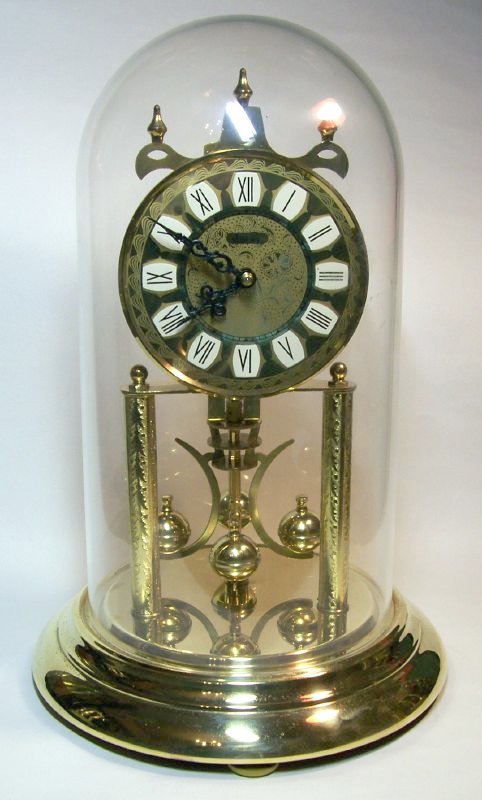
An anniversary clock, using a torsion pendulum, so-named because it only needs winding once a year.
  • I got there from reading about torsion pendulum clocks. My grandmother used to have one of these (an “anniversary clock”, like the one above, and I remember that I used to always enjoy watching the balls spin when I was a child).
  • I’d followed a link from the article about the Atmos clock, a type of torsion pendulum clock that uses minute variations in atmospheric temperature and pressure to power the winder and which, in ideal circumstances, will never need winding.
  • Before that, I’d been reading about the Beverly Clock, a classic timepiece that’s another example of an atmospheric-pressure-clock. It’s been running for almost 150 years despite having never been wound.
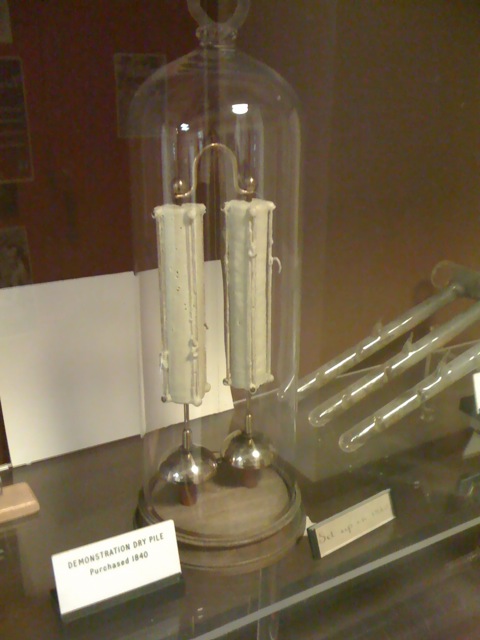
  • This was an example of another long-running experiment given on the page about the Oxford Electric Bell, which is perhaps the world’s longest-running scientific experiment. Built in 1840, it uses a pair of electrostatic batteries to continuously ring a bell.
The Oxford Electric Bell experiment. It’s batteries have lasted for over 160 years, but I have to charge my mobile most nights: what gives, science?
  • I got to the Oxford Electric Bell from another long-running experiment – the one acknowledged as the world’s longest-running by the Guinness Book of Records – the University of Queensland Pitch Drop Experiment. Running since 1927, this experiment demonstrates that pitch is not solid but a high-viscosity fluid. A sample of room-temperature pitch in a funnel forms a droplet about once a decade.
  • Earlier, I was learning about the difference between the different substances we call tar. Traditionally, tar is derived by baking pine wood and roots into charcoal, and collecting the runoff, but we also use the word “tar” to describe coal tar (a byproduct of coke production) and bitumen (viscous, sticky crude oil).
  • I took the initiative to learn about those differences after reading about the name “Jack Tar“, an Empire-era slang term for a sailor in the Merchant Navy or Royal Navy…
  • …which in turn was linked from the similar article about “Tommy Atkins“, a term for a British infantryman (particularly in the First World War), which has an interesting history…
  • …to which I got from the “Doughboy” article. The Doughboys were members of the American Expeditionary Force during the First World War.
R.U.R. – “Private Robot” – loads an artillery piece.
  • Finally, I got to that first Wikipedia article while, when reading an article on The Paleofuture Blog, I wondered about the etymology of the term “doughboy”, and began this whole link-clicking adventure.

It’s fascinating to work out “how you got here” after an extended exploration of a site like Wikipedia (or TV Tropes, or Changing Minds, or Uncyclopedia – and there goes your weekend…). Thank you, Back Button.

I just wish I had a Back Button in my head so that I could “wind back” my wandering thought processes. How did I end up thinking about the salt content of airline food, exactly?

× × ×